Thursday, April 05, 2007

The To Do List, again

A month ago I posted a to-do list. Let's see what we can strike off the list:

Kayak To-Do List
1. Sand inside seam
2. Install mobies
a. Mark location
b. Mask surrounding area
c. Cut patches of glass cloth for reinforcement
d. Epoxy in place with thick epoxy & fillets overlayed with glass cloth
3. Build & install cheek plates
4. Build & install bulkheads

5. Build & install bulkhead footbrace
6. Install paddle park
a. Drill holes for paddle park bungee
b. Fill with thickened epoxy
c. Re-drill holes
d. Attach hook with thickened epoxy

e. Install bungee (after varnish)
7. Install backband
8. Carve seat from minicell foam (underway)
9. Wet sand epoxy
9a. Touch up spots with epoxy
10. Varnish
a. Sand
b. Varnish
c. Sand
d. Varnish

e. Sand
f. Varnish
g. Sand
h. Varnish
i. Rub to a gloss
11. Install soft padeyes
12. Install deck lines
12a. Build sliders for holding stuff on the deck (they are reputed to work much better than bungees).
13. Install bungees into mobies
14. Install weather-stripping into hatch seal channels
15. Carve & install handles/grab loops for bow & stern
16. See if it floats

The item(s) in blue have been added to the list. We also need to get a few things before it's done, or before we take it out on the water. I still need to buy deckline (the reflective stuff would be nice), a paddle float, & a pump. Currently, a custom-made Snapdragon spray skirt has been ordered through a friend that happens to be their local distributor.

Wednesday, April 04, 2007

Epoxy Final Sanding

.... or perhaps that should be Penultimate Sanding?

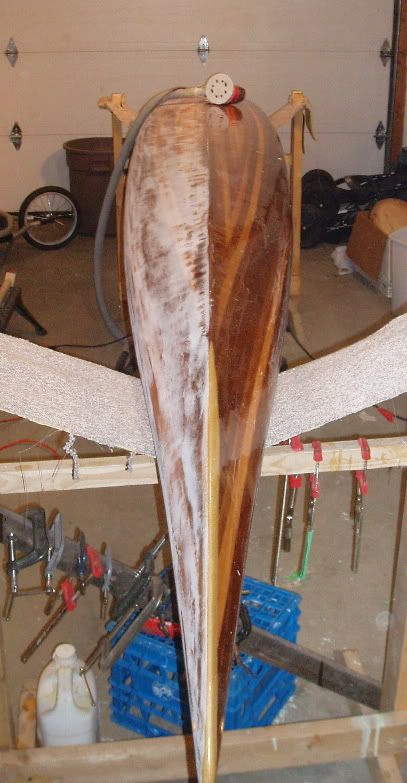
I have sanded the kayak in preparation for varnish. As per Martin's suggestion I "sand(ed) to at least 150" using my random orbital sander working progressively through the grits.

In the photo above I have just started with 80 grit on the hull. The spots that still have the gloss of un-sanded epoxy are low spots. Since my fiberglass job was imperfect, there are areas where I cannot remove all of the high spots without sanding into the glass cloth, something to be avoided. I have the dust collection bag container on the back of my sander removed and vacuum hose connected in it's place. With the sander connected to the shop vac the majority of the dust is collected. The use of a HEPA filter in the shop vac prevents the vacuum from simply acting as a dust pump & exhausting the very fine dust into the air (where it would be inhaled: the finer the dust => the more it goes through a regular filter => the deeper it is carried into the lungs). This reusable filter is highly recommended and will protect your shop vac motor as well as your lungs.

To avoid breathing in the dust that is not sucked up by the vacuum (a fairly small proportion) I wear a dust mask. If working with epoxy which is not fully cured, I use a more substantial mask with carbon cartridge filters.

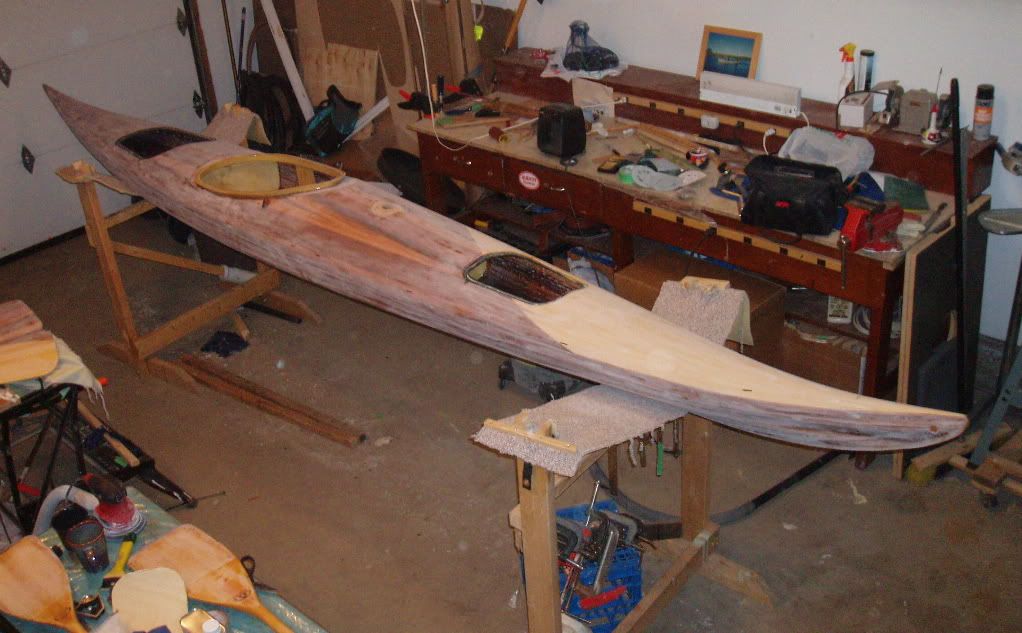
Now with the boat entirely sanded it doesn't look too pretty anymore. In sanding I found a couple of spots where I would like to touch up the epoxy. One of these spots is at the area surrounding the paddle park hook that I installed. Another is at the tip of the stern where the bow and hull were joined - the halves did not meet perfectly there and as a result the tip has a small gap (perhaps 3/16" long) on one side that remains. The third spot is at the location of the bubble that kept reappearing when glassing the outside seam and the subsequent fill coats.


My plan is to touch up those epoxy spots, let them cure then get them faired into the rest of surface. With that done I can then clean up the shop, rid my life of every speck of dust (ha!) then begin the varnishing. In the meantime, here is an article on varnishing courtesy of Martin Step at Green Valley.

A Place To Sit, Part 1

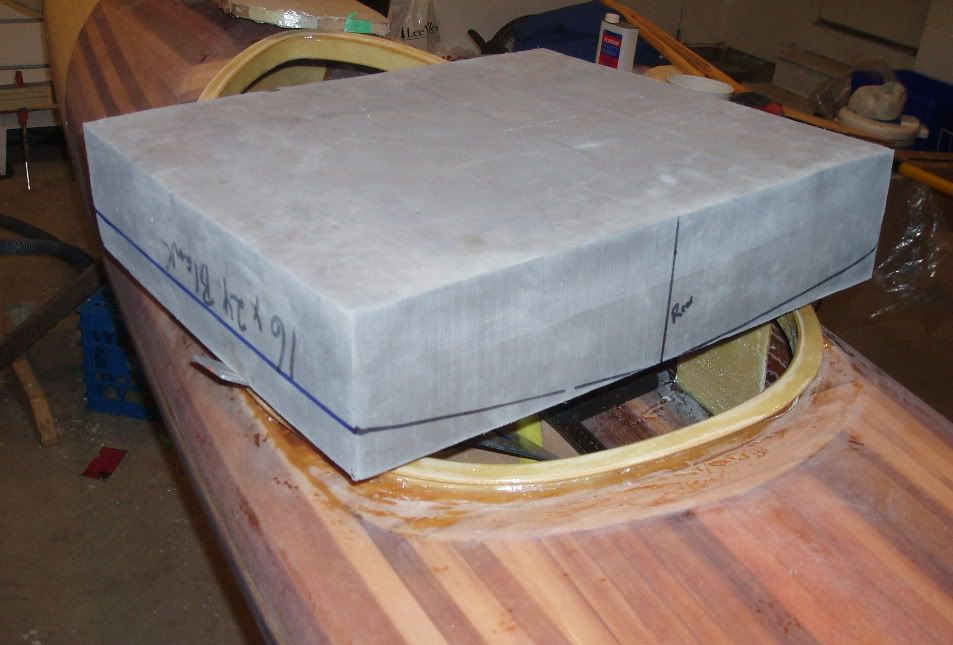
I began shaping a large block of minicell foam to create a seat for the kayak. Custom-made seats of minicell are reputed to be extremely comfortable and to provide a good fit for excellent boat control. Last year I ordered a supply of minicell foam for fitting out the kayak from Joe at Redfish Kayaks in the US, including a 4" x 16" x 24" block for the seat. Comparing the prices locally and from suppliers across Canada & the USA, Joe's price was best after the consideration of shipping charges.

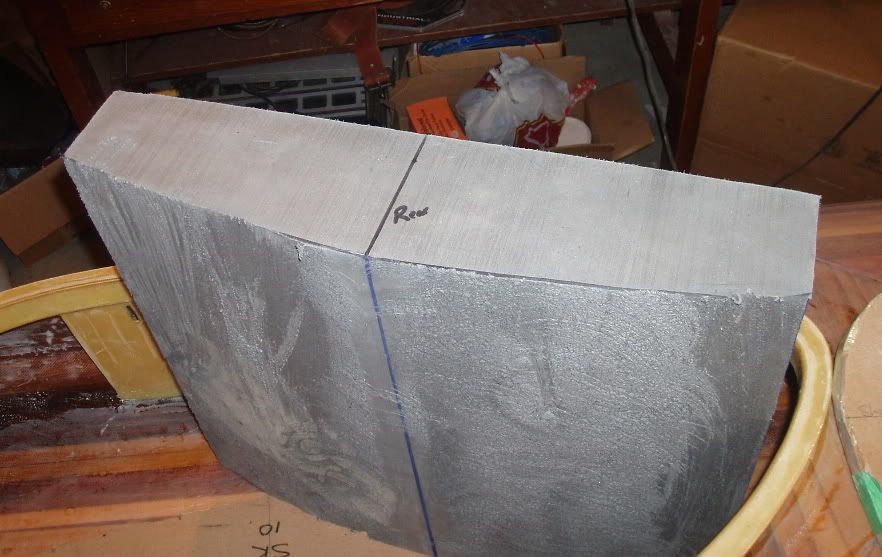
My first step was to cut the block to length in order to fit snugly between the hip braces, trimming it to 18.5" on the band saw. I then traced the shape of the bottom of the hull onto the front and back of the seat block, using form #9 for the front and form #10 for the rear. I then connected the lines on the side edge and added a line down the center of the bottom for reference.
I next used my japanese saw to cut a wedge off of each side of the bottom to get a shape that closely matched the profile of the bottom of the kayak. Note that this is different from the method described by Vaclav at One Ocean Kayaks.

Since I cut a bit outside the lines with the saw, I used a wheel in my drill designed for stripping paint (about 5-6" in diameter, found at the local Canadian Tire). This wheel seems to work well for the task and I think it will do the job of shaping the top to fit a bum. One has to be careful in using it though because it does tend to catch and want to gouge if the angle is held too high (this is why I practiced with it on the bottom!). My next steps will be to follow the seat carving instructions laid out on the Shop Tips section of the One Ocean Kayaks web site.

Tuesday, April 03, 2007

Scraping By

Much is said in the boat building forums in favour of the lowly paint scraper for fiberglass work and I finally figured out why. When well sharpened the paint scraper works very well for removing high spots, bumps, drips, runs, edges and excess glass/epoxy. My success with the scraper was initially limited, but since then it has been very helpful. The trick is getting the tool sharp and keeping it that way. In order to sharpen the scraper I clamp the handle into a bench vise. Then with a flat file (nothing fancy here, just a hand-me-down from the toolbox) held horizontal I move the file across the scraping edge a number of times. Every once in a while I remove the burr from the back-side of the cutting edge by passing the file across the back edge, holding the file flat against the blade back. Thirty seconds of attention will restore the edge allowing effective scraping with little effort. Since this is not high carbon steel, the edge dulls quickly so requires resharpening after a few minutes of work on fully cured epoxy (green epoxy, being softer is less harsh on the blade). My one caution while sharpening with the file is to ensure that all of your digits pass well clear of the blade. I once allowed my thumb to be sliced open during sharpening of the scraper.

The replaceable blades are double edged. I have reshaped one side of the blade currently in the tool so that it is curved. I used the flat file for reshaping but this could probably be more quickly done with a grinding wheel. A curved blade allows the tool to be useful in concave areas, a rather handy feature for the interior of the boat. Another tip is to take the sharp corners off of the straight scraper blade. The sharp corners, if left on, tend to catch and gouge or slice into the epoxy. To remove the corners, simply round them off with the flat file.

Monday, March 26, 2007

Waterwalker Film Festival, Bulkheads & Mobies

The Waterwalker Film Festival this weekend was great. We had three fantastic guest speakers and many great videos. Thankfully, there were only minor glitches in my area of responsibility - the A/V aspects (thanks Rob!), such as a DVD that refused to play the portion we wanted to watch (we receive burned copies of the films from Paddle Canada). Lynda Holland told us about her travels in far northern Saskatchewan, NWT & Nunavut, and stories of the Dene that historically inhabited the region. Laurel Archer presented photos and told us about paddling the rivers of northern B.C. Paul Lapointe gave us a totally unique version of a trip report slide show wherein rather than photos of the trip, he showed us 48 of the paintings he produced while on the Fond du Lac River. The Waterwalker Film Festival this weekend did have a boatbuilding connection - Martin & Heather of Kisseynew Canoe Company rented a display table at the event and had a very nicely done strip canoe on display.

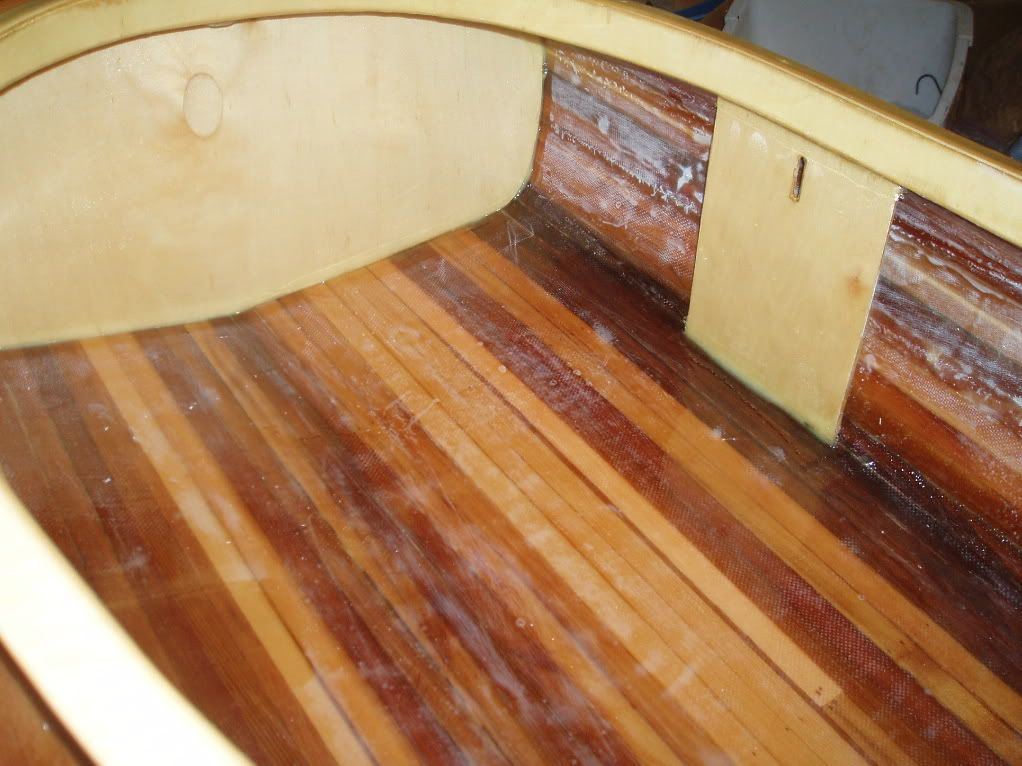
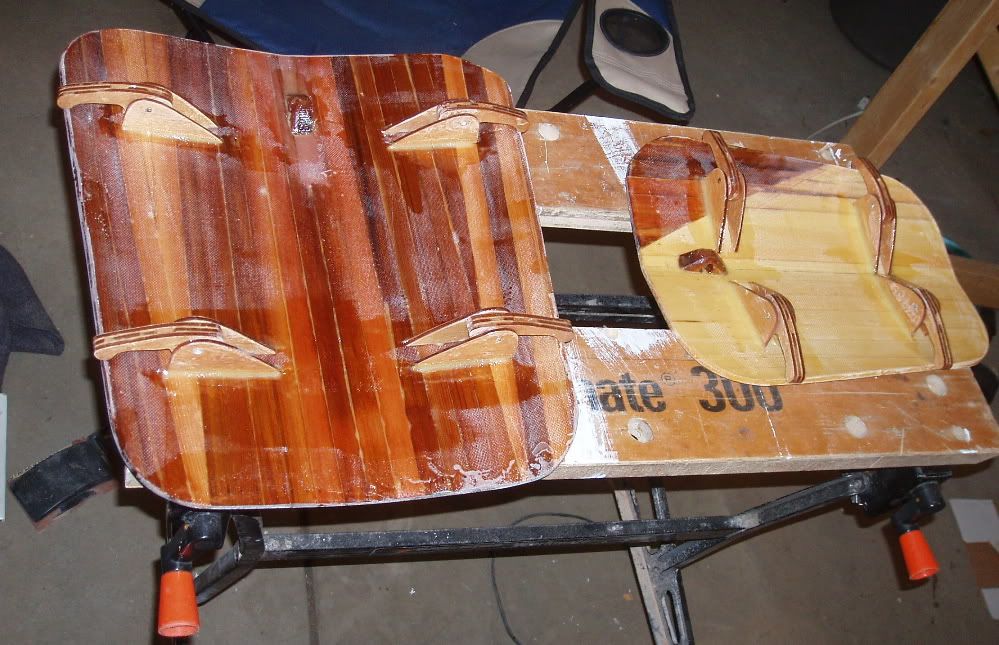
I also managed to make some progress on the kayak over the past few evenings. The cheek plates have been glassed (4 oz) both sides with a fill coat of epoxy on each side. The bulkheads have been similarly treated but the front bulkhead (support for the footbrace) received 2 layers of 4 ounce glass on one side and one layer on the other. The bulkheads were trimmed and installed into place using a fillet of epoxy. For the record, epoxying bulkheads into place on a fully decked boat is a real PITA. The fore bulkhead was some distance (18"?) from the hatch opening so in order to get in there and apply my fillet, I turned the boat upside down on the stands then crawled underneath and poked my head in through the hatch opening. However, there was no room in the small opening for both my head and my arm, so the actual applying of the fillet (and associated clean up of gobs of epoxy) was done mostly blind. I used a 20 ml (?) syringe with the tip bored out to 1/16" to apply the thickened (WS 406 colloidal silica) epoxy then smeared it smooth with a gloved finger. The same thing was done from the other side but, thankfully, the cockpit opening is a bit larger than the fore hatch and the space less cramped (though the bulkhead is farther from the opening). The rear bulkhead was a much easier beast to tackle, though it too involved reaching into cramped quarters through the nearby hatch opening. The much, much easier to tackle cheekplates were installed with a fillet covered with a strip of 4 oz glass cloth for strength.


It was nice to also get the "mobies" installed on the underside of the hatches this weekend. They too were filleted in place using epoxy thickened with WS 406 colloidal silica, overlaid with a strip of 4 oz glass. The bungee cords that provide the tension can be installed after I double check that all wood is sealed with epoxy (I think I can probably use varnish on the spots that may have been sanded through to wood during their manufacture). I will create a separate blog posting (with photos) about manufacturing the Moby Latch System someday soon.
Now I have a couple of small sections along the seam to better fill the weave on (I started on this yesterday but I have to have a close look to see if there are more spots). Once that cures I will need to do final sanding on the whole kayak. Then it's time to get ready to varnish this boat! (Yay!) Once varnished, I will install the deck padeyes & lines and head out for a paddle. (I guess I should also make a seat, make the footbraces, and complete then install the backband.)

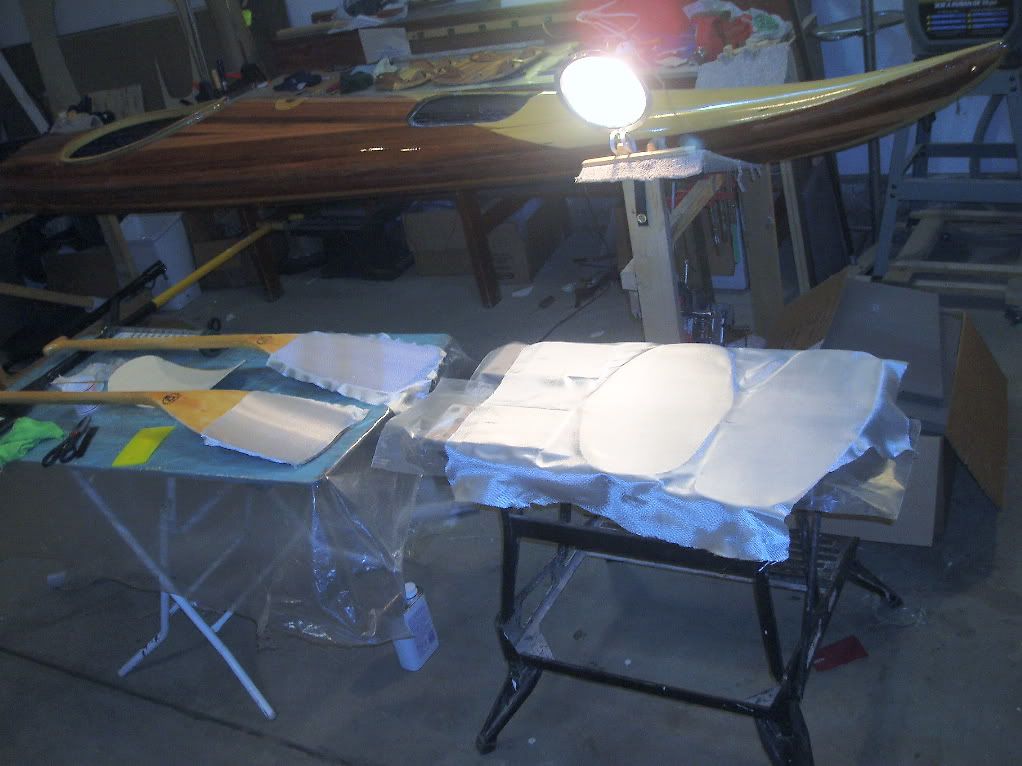
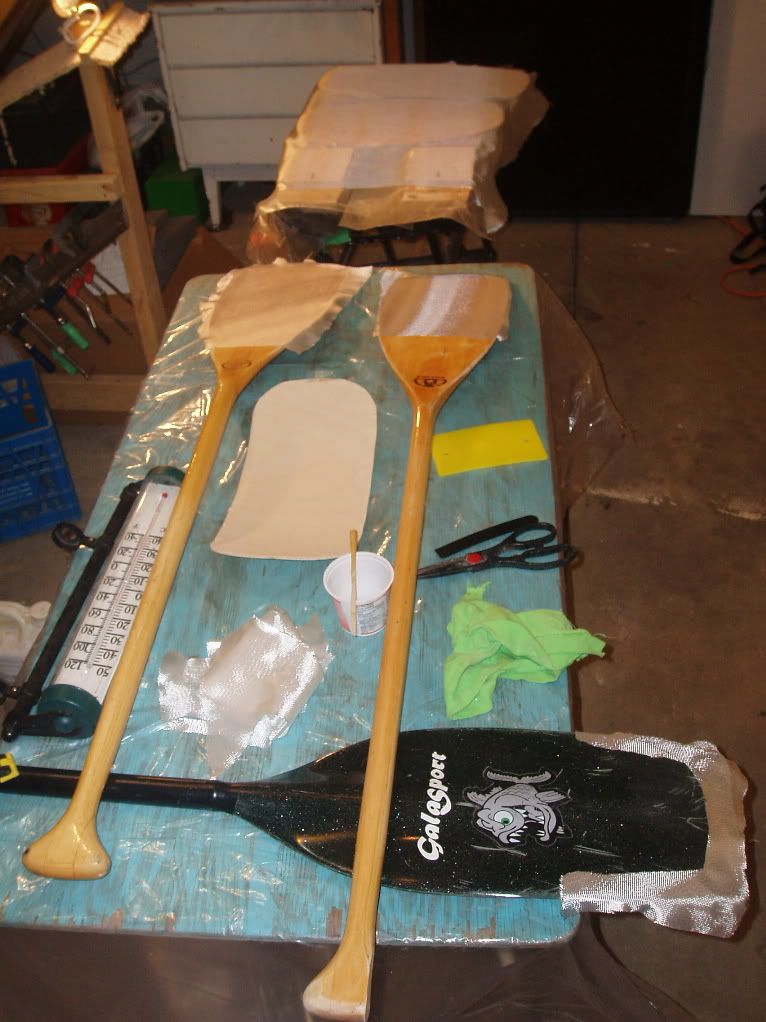
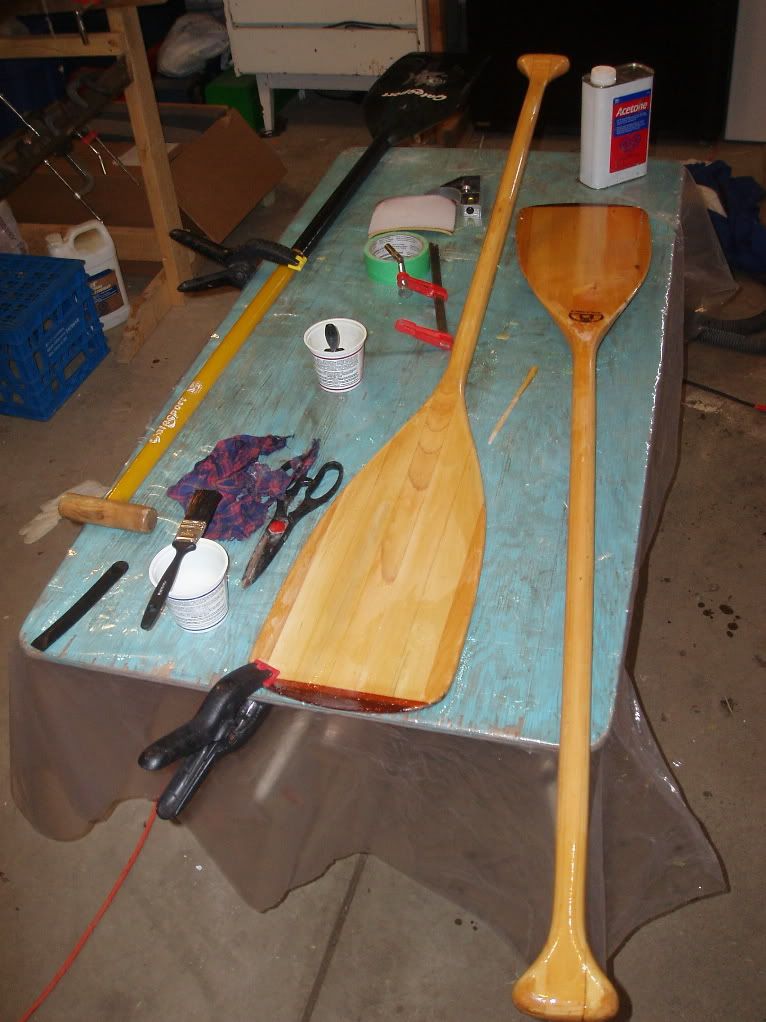
I have also been working on getting some paddles ready for the season and they too are now just about ready for varnish. Last fall on a trip I suffered two broken canoe paddles. For some unknown reason the blade of my wife's bent shaft paddle split (which is a problem since she wasn't even on the trip). Also, my own bent shaft suffered a broken grip when one of our esteemed members of North Star Expeditions used it to put a nice walleye out of it's misery and hit a rock instead. This paddle too had cracks beginning to develop on the blade. Thus, both paddles received 4 oz glass cloth patches at the cracks on one side (non-power face) while the lower 75% of the other side was covered in sheath of 4oz glass and the weave filled by squeegeeing very thin coats of epoxy on. The handle of my wife's paddle was also wearing from abrasion so it received a coating of epoxy (something I had done to my own paddle years ago and as a result of which has not deteriorated at all since). The third paddle I'm repairing is a fiberglass whitewater canoe paddle, recently purchased used from Jimmy MacDonald (he sells new paddles and other paddling stuff so get in touch with him if you need something). As this is a used paddle, it has seen the occasional rock and there was some damage to the edge. I repaired the damage and reinforced the rest of the edges by adding a strip of 4oz cloth to both sides. Both of the wood bent-shaft paddles will receive full varnish, while the whitewater paddle will receive varnish on the repaired areas of the blade to protect it from UV. At the same time I will also add a finish to the greenland paddle I built some time ago. I think I will give that one a tung oil finish.


Monday, March 19, 2007

Waterwalker Film Festival

I could have been working on my bulkheads & more for the last 3 1/2 hours but instead I was updating the web site for the Saskatoon Canoe Club (and now I lost half an hour of sleep to updating this blog). We are hosting the Waterwalker Film Festival this coming weekend so I was adding a detailed schedule and additional sponsors to the web site. I'm also responsible for the audio/visual component of the festival organisation so I have been wrapping up the final details in that respect too.
In other news, it looks like the next couple of evenings will be good in terms of weather for laying up glass on the other side of the bulkheads & cheek plates then epoxying them into place (or should I use structural silicone?).

My garage is insulated but the big double door lets a fair bit of heat out (even though it is insulated) and I don't have a proper heating system installed, relying instead on an electric overhead radiant heater. Actually that heater worked pretty well for glassing the bulkheads the other night since I set them up on a work bench directly underneath the heater with probably a 6 foot distance between heater and object. Although the garage was only about 12C, it was 25C on the bench beside the bulkheads & cheek plates.

Sunday, March 18, 2007

Decisive

Well, after consulting with the online kayak building community I went ahead and got to work. With respect to bulkheads I decided on ......


Cardboard!


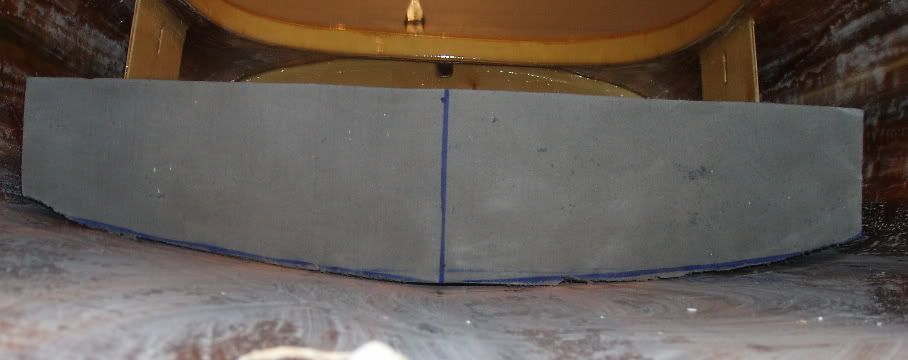
OK, not really. The above is a cardboard template being used to determine the exact size and shape needed for the rear bulkhead. The bulkhead position falls between forms 10 & 11 so just using either of those wouldn't quite be right, especially since the shape of the boat changes markedly between those two forms. In order to get the right shape I traced both forms onto a piece of cardboard, ensuring they were precisely aligned. I then cut out the cardboard template to the widest set of lines. Then, by testing the fit in the boat, I kept trimming until it fit well in the space. I then traced that shape onto a piece of 1/8 birch plywood and cut that out with a jig saw then checked it for fit in the boat. It had to be trimmed somewhat but eventually I ended up with a good fit. The same basic process was done for the front bulkhead except in that case the location is close to a form so that became my starting point for the template.

Again, cardboard templates were used to determine the size & shape of the cheekplates (another decision I made since last post - I decided that putting them in was just as easy as making and installing the padeyes that would be needed to hold the backband up). In this case, two overlapping pieces of cardboard were cut and put into position, then held together with a spring clamp. Thus, not only is the proper length determined but also the precise top and bottom angles required to fit the space. Once cut out of the plywood, a 1/4" x 1" slot was cut (by drilling a series of 1/4" holes and filing out the rest) into the cheekplate for the backband webbing to pass through.

I then laid out the newly cut pieces and glassed them before calling it quits for the night.

In the morning, I filled the weave with a second coat of epoxy and tonight I will trim the pieces from the excess glass. I may glass them on the other side tonight yet, or I may wait a couple of days since the temperature outside is dropping (-9 right now and -19 forecast overnight, with 50 km/hr wind gusts) and it will take more $$ to maintain a warm garage for the epoxy to cure.

Friday, March 16, 2007

Decision, Decisions

Minicell foam for rear bulkhead, or a panel of strips, or a piece of plywood?
Minicell is easy & flexes so avoids creating a rigid spot in the hull. Minicell is expensive and the stuff I have on hand could perhaps be put to better use elsewhere. A panel of strips would look good to match the rest of the kayak, but needs to be glued up from leftover strips & glassed both sides then cut to just the right size & shape to install. Plywood (1/8" birch is what I have on hand) would look OK, matching the coaming and the front portion of the boat, but would have the same issues of getting a good fit (maybe not a big deal) and should probably be glassed on at least one side. Either of the wood options would provide extra support for when sitting on the deck. The front bulkhead will be plywood and will epoxied in place because I intend to use the front bulkhead as the support for a minicell foam footbrace (adjustable with spacers). Right now, I think I'm leaning towards the plywood option. A very low priority bonus of the birch ply is that it would give a nice light background upon which I could add a signature (built by me, 2005-2007, etc.). I also have to decide whether to glass both bulkheads in, or use silicone to install them as Vaclav describes.

Cheek plates (hip braces, butt plates) or not?

Cheek plates are pieces of wood installed vertically beside the seat in the cockpit. They serve to take up the slack which is helpful for getting a good fit in the boat and helps with rolling. They also serve as an attachment point for the backband. In his book, Nick recommends them. However, it's pretty tight in there already and a little minicell foam could probably serve the bracing function well. The backband could in turn be supported by a couple of padeyes located under the deck beside the coaming. Last night I decided that I was going to omit the cheek plates but now I'm thinking of putting them in, mainly for the purpose of backband attachment. Like the bulkheads, these can be made of a panel of glass-reinforced strips or a piece of glass-reinforced birch plywood. Oh what to do, what to do.

Paddle park or not?
I had originally planned on installing a paddle park beside the cockpit but am now considering leaving it off in the name of simplicity. The paddle park is a hook and bungee that provides a place to put the paddle without having it float away (see Pedro's version here). I'm thinking now a loop of bungee running between a couple of the padeyes on the bow would serve a similar function. I have already carved a hook out of mahogany so to install the paddle park I need to epoxy that hook onto the hull and also drill a couple of holes for the bungees (which actually involves drilling an over-sized hole, filling with thickened epoxy, then re-drilling a hole through the cured epoxy for the bungee to pass through with a tight fit).

If you have any insight or comments, please let me know! (Use the post a comment link below.)

I am hoping to do some epoxy work this weekend (I hope the weather warms some more). I need to epoxy the mobies into place under the hatch covers and epoxy a mahogany padeye onto each hatch lid. Depending on the decisions I make regarding the above, I need to glass one or two pieces of birch for the bulkheads, and a couple of pieces for the cheek plates, then epoxy each into place. If I use the paddle park (and after reading some of the comments regarding Glen's & Pedro's paddle parks linked above, I think maybe I should), then I should drill the holes for the bungee cords and fill with thickened epoxy and epoxy the hook in place.

Tuesday, March 06, 2007

The To Do List

I've created another version of the To-Do list. For earlier versions of the list go here, or here, or here.

Kayak To-Do List
1. Sand inside seam
2. Install mobies
a. Mark location
b. Mask surrounding area
c. Cut patches of glass cloth for reinforcement
d. Epoxy in place with thick epoxy & fillets overlayed with glass cloth
3. Build & install cheek plates
4. Build & install bulkheads
5. Build & install bulkhead footbrace
6. Install paddle park
a. Drill holes for paddle park bungee
b. Fill with thickened epoxy
c. Re-drill holes
d. Attach hook with thickened epoxy
e. Install bungee (after varnish)
7. Install backband
8. Carve seat from minicell foam
9. Wet sand epoxy
10. Varnish
a. Wet sand
b. Varnish
c. Wet sand
d. Varnish
e. Rub to a gloss
11. Install soft padeyes
12. Install deck lines
13. Install bungees into mobies
14. Install weather-stripping into hatch seal channels
15. Carve & install handles/grab loops for bow & stern
16. See if it floats

Monday, March 05, 2007

Boatbuilding Workshop Review

The Saskatoon Canoe Club boatbuilding workshop held on Feb 3rd was a great success if I do say so myself. We had a turn-out of approximately 25 people which was a nice number for the space. We could have coped with 35 or so people but beyond that things would start getting crowded. Thank you to Heather for allowing me to post some of her photos here. For more photos, visit the Kisseynew Canoe Company web site, and Warren Long's album. The event was attended by experienced builders, aspiring builders, struggling builders and paddlers of all sorts. We even had 50% of the famous rockabilly band, Five Star Homeless.

The photos below are all taken by and courtesy of Heather Dunning. For the larger versions and more photos, view the full album on the Kisseynew Canoe Company web site..

Above: Yours truly welcoming participants and introducing the first speaker of the day. My kayak can be seen hanging in the upper left.


Above: Carl describes aspects of building his Waters Dancing stitch & glue kayaks.

Above: I am introducing Jesse who told us about some of the more challenging aspects of building a skin-on-frame baidarka.


Above: Martin & Gordon (?) of Kisseynew Canoe Company demo steam bending stems. That's a pair of record-breaking paddlers you are looking at by the way.

Above: Martin demonstrates fiberglass & epoxy techniques. Martin was incredibly well prepared and had built a panel to demonstrate (from right to left) wet-out of the glass cloth, filling the weave, and applying a 3rd coat of epoxy.

Thank you to everyone for coming, to Martin Bernardin & Kisseynew Canoe Company for hosting the event, and to Jesse, Carl & Martin for teaching us all a few things. The presentations were interesting and informative. Thanks especially to Heather for baking cookies!

Monday, January 15, 2007

Saskatoon Canoe Club Boat Building Workshop

Boat Building Workshop
Saturday, February 3rd, 2007

Presented by the


Learn & discuss boat building techniques and tips from a variety of local boat builders including:
  • Cedar Strip Canoes
  • Stitch & Glue Kayaks
  • Skin-on-Frame Kayaks

    Located at:
    Kisseynew Canoe Company
    502 Ave L South, Saskatoon
    Backdoor entrance off of 18th St. W
    .

    1:00 pm - 4:00 pm

    Everyone is welcome!
    If you have a home-built boat or paddle, bring it along to show it off!
    No admission charged.
    For more info call 242-1200 or e-mail pawistik@gmail.com

That's right folks, I'm helping to organise an afternoon workshop on canoe & kayak building. I hereby extend the invitation for you to join us from where ever in the world you are located.

Thursday, January 04, 2007

Rabid Boatbuilder Goes Wild

The result perhaps of inhaling too much green epoxy dust? See what happens when a boat builder lets loose. I'm pretty sure that's cedar dust on Martin's shirt. Fun with Five Star Homeless.

Sunday, December 17, 2006

EPOXYWORKS - Fiberglassing a woodstrip hull

I just came across this article by Ted Moores on the West System's website from issue 16 of EPOXYWORKS magazine. It's a good review of the Moores method for applying epoxy and filling the weave as described in his books. Note that this method is quite different from that described by Nick Schade in his book - Schade advocates using a squeegee to apply very thin coats to fill the weave. Moores is more about applying thick coats of epoxy to build up a thick layer over the glass cloth.

Saturday, December 16, 2006

Bubbles!

No, not that one. Having saturated the glass with epoxy on the final seam between the hull and deck and monitored it for a period to ensure that no dry spots or bubbles developed, I left the seam to cure on it's own. As soon as I turned my back a bubble developed, lifting the glass cloth and forming a pocket about 1 3/4" long. Once the epoxy had partially cured I excised the cloth over the bubble, trimming away any loose glass. In the photo below you can see the piece of glass/epoxy which has been cut out

I then scraped the edges in order to allow a smooth transition.

Later, while adding a final fill-coat of epoxy to the hull, I epoxied a patch of glass in place. This time I baby sat it for a few hours in order to prevent the repeat of the bubble. The bubble did come back (the air seems to have been coming from the slight gap that is the seam between hull and deck) but at least I was able to minimize it by pushing out the air as it accumulated. In the end I had to be satisfied with a small bubble in the glass which was largely filled with a subsequent application of epoxy.

With the seam taken care of, I rolled on a final coat of epoxy onto the entire boat to completely fill the weave of the cloth and add a layer of protection for the underlying cloth. With the shop temperature stable at about 20C, I used a West Systems foam roller cover* which I cut in half and used on a small paint roller handle. After mixing the epoxy in small batches I poured it into a paint tray with a small disposable insert which has the added benefit of allowing heat from the exothermic curing epoxy to dissipate better than when it is pool into a mixing container. I started in the morning by rolling a coat of epoxy onto the hull. The foam roller applied the epoxy in a nice thin layer, but left a million tiny bubbles behind (it made little difference how much pressure I applied nor how much epoxy was loaded on the roller, and the epoxy was warm). Thus, I tipped off the epoxy coat as described on the West System web site. The strategy I used was to roll out a section of epoxy on the hull running the roller perpendicular to the boat, doing about 3 feet on one side, then going to the other side and doing another 3 foot section, reloading the roller as necessary. I would then go back over both with a dry foam brush and brush the epoxy parallel to the boat then start the process again on the next section. Once the coat was complete, this was allowed to cure for about 10 hours until late in the evening I repeated the process on the deck. Both coats overlapped at the seam so that the seams received two fill coats of epoxy. The boat now looks pretty good again with that nice wet look of fresh epoxy. At some point I will have to ruin it all by wet-sanding the whole thing to smooth out all the little bumps (the epoxy does not give a very smooth finish in my hands) and prepare it for the varnishing.

Here is what that bubble looked like after the repair and a fill coat of epoxy:

I may have to add another fill coat to this area, but otherwise it should be barely visible by the time everything gets smoothed out and eventually varnished.

I also set my daughter into the kayak so that she could try it out and to pose for a couple of photos.


*I picked up a couple of WS roller covers at a local woodworking store which was having a closing out sale in June. I took the opportunity to purchase on sale some of the "800" polyurethane foam roller covers, a couple of the "804" mixing sticks, and a couple of the "808" plastic spreaders (squeegees). A couple of weeks later the rest of the inventory was auctioned. I had hoped to be able to pick up a number of items for a low price, including a dust collector, bench sander, etc. but everything went for way more than I could afford. I was getting rather annoyed at the fellow who kept bidding on everything I wanted and obviously had more money than me to spend (which isn't saying much, I was really only willing to spend a small amount of cash). I found out later that this fellow was starting a woodworking shop for inner city youth which produces custom furniture for sale. It seems the tools were being purchased for a very good cause. Everything I chose to bid on I was quickly outbid by others in the room. In fact, I usually didn't even get into the bidding before the price went beyond my limit (I believe some of the items went for more than retail price!). The one area where there was very limited interest was in the inventory of fiberglass related items. They had a couple of gallons of WS epoxy and hardener but this too went for more than I was willing to pay (I didn't really need more epoxy after all), but there was a roll of 6 ounce glass cloth on a large stand that I think only one other person bid on and they were not very enthusiastic about it. Thus, I was able to purchase about 10 yards of West Systems brand 6 oz cloth for $30. Now of course I'll have to build another boat in order to have a reason for using it.

Green Tape & An Unemployed Bum

I've started to work on the kayak once again with a bit more regularity. With recent warm temperatures I decided it was a good time to do some epoxy work over the past week before we get another cold snap (we have had unusual quantities of cold and snow so far this winter). You may recall that back in June I joined the two halves of the kayak, fiberglassing only the inside of the seam, then packed everything up because we moved to a new house. Well that move threw me off and I lost all momentum with my energy being directed first toward moving, then towards finishing up the renos I initiated during the move. Add in the parenting of two energetic girls and being busy at work and there was little time or energy to work on the kayak. However, at the end of November I was laid off from my job as a "Research Associate" and now I have a bit more time on my hands (not a lot mind you, I still have to take care of the kids - the youngest started walking this week - while my wife picks up extra shifts at her job). Thus, I moved the car out onto the driveway, warmed up the garage, and fiberglassed the outside seam. I used the technique of masking off the edges as described on the One Ocean Kayaks web site.

I laid down strips of masking tape to either side of the seam leaving about 3/4" to 1" on each side of the joint. I folded the edge of the tape to prevent drips from running away.

I then rolled on the 3" wide strips of glass cloth that I had cut for this purpose.

In the picture above you can see that in addition to the green masking tape that I ran out of, I also used brown masking paper. This paper has a light adhesive on one edge (like a sticky note) and I turned to it because it was what I had available at the moment. However, I would advise against others using the same stuff - although waxed, the epoxy soaks through the paper and gets stuck to the kayak. Thankfully it scraped away fairly easily and at least the brown colour matches the boat so if I missed anything it should be inconspicuous (at least it's sufficiently inconspicuous that I couldn't find any more of it).


The fiberglassing of the seam went pretty much as the rest of the glass/epoxy work but on a smaller scale. Once sufficiently cured, I then trimmed away the masked tape. In the above close-up photo you can see that I went over top of the hole drilled for the grab loop; I trimmed the glass cloth from the holes while trimming the masked edges.

However, I sort of forgot one minor detail from Vaclav's instructions - I should have lifted the masking tape, pulling it away from the kayak and bending the glass right at the edge of the tape. As it was, on the first side I scored/cut the glass with the tape flat which didn't work all that well. On the other side I lifted the tape/glass as I was supposed to and it made trimming the excess much easier and in the end I was left a fairly nice edge which was easily scraped to a smooth transition. I now have about 70 feet of fiberglass reinforced masking tape - that's gotta be good for something right? I can see why people seem to always want to build another boat - next time the whole seam glassing process would go much more smoothly.

I have more on the subject of glassing the seam and addtional progress to report, but I'll address those in the next posting or two.

p.s. If you are in the Saskatoon area and would like to hire a molecular biology technician for generous sums of money, please let me know! ;-)