Sunday, December 17, 2006
EPOXYWORKS - Fiberglassing a woodstrip hull
I just came across this article by Ted Moores on the West System's website from issue 16 of EPOXYWORKS magazine. It's a good review of the Moores method for applying epoxy and filling the weave as described in his books. Note that this method is quite different from that described by Nick Schade in his book - Schade advocates using a squeegee to apply very thin coats to fill the weave. Moores is more about applying thick coats of epoxy to build up a thick layer over the glass cloth.
Saturday, December 16, 2006
Bubbles!
 No, not that one. Having saturated the glass with epoxy on the final seam between the hull and deck and monitored it for a period to ensure that no dry spots or bubbles developed, I left the seam to cure on it's own. As soon as I turned my back a bubble developed, lifting the glass cloth and forming a pocket about 1 3/4" long. Once the epoxy had partially cured I excised the cloth over the bubble, trimming away any loose glass. In the photo below you can see the piece of glass/epoxy which has been cut out
 I then scraped the edges in order to allow a smooth transition.
 Later, while adding a final fill-coat of epoxy to the hull, I epoxied a patch of glass in place. This time I baby sat it for a few hours in order to prevent the repeat of the bubble. The bubble did come back (the air seems to have been coming from the slight gap that is the seam between hull and deck) but at least I was able to minimize it by pushing out the air as it accumulated. In the end I had to be satisfied with a small bubble in the glass which was largely filled with a subsequent application of epoxy.
With the seam taken care of, I rolled on a final coat of epoxy onto the entire boat to completely fill the weave of the cloth and add a layer of protection for the underlying cloth. With the shop temperature stable at about 20C, I used a West Systems foam roller cover* which I cut in half and used on a small paint roller handle. After mixing the epoxy in small batches I poured it into a paint tray with a small disposable insert which has the added benefit of allowing heat from the exothermic curing epoxy to dissipate better than when it is pool into a mixing container. I started in the morning by rolling a coat of epoxy onto the hull. The foam roller applied the epoxy in a nice thin layer, but left a million tiny bubbles behind (it made little difference how much pressure I applied nor how much epoxy was loaded on the roller, and the epoxy was warm). Thus, I tipped off the epoxy coat as described on the West System web site. The strategy I used was to roll out a section of epoxy on the hull running the roller perpendicular to the boat, doing about 3 feet on one side, then going to the other side and doing another 3 foot section, reloading the roller as necessary. I would then go back over both with a dry foam brush and brush the epoxy parallel to the boat then start the process again on the next section. Once the coat was complete, this was allowed to cure for about 10 hours until late in the evening I repeated the process on the deck. Both coats overlapped at the seam so that the seams received two fill coats of epoxy. The boat now looks pretty good again with that nice wet look of fresh epoxy. At some point I will have to ruin it all by wet-sanding the whole thing to smooth out all the little bumps (the epoxy does not give a very smooth finish in my hands) and prepare it for the varnishing.
Here is what that bubble looked like after the repair and a fill coat of epoxy:

I may have to add another fill coat to this area, but otherwise it should be barely visible by the time everything gets smoothed out and eventually varnished.
I also set my daughter into the kayak so that she could try it out and to pose for a couple of photos. 

*I picked up a couple of WS roller covers at a local woodworking store which was having a closing out sale in June. I took the opportunity to purchase on sale some of the "800" polyurethane foam roller covers, a couple of the "804" mixing sticks, and a couple of the "808" plastic spreaders (squeegees). A couple of weeks later the rest of the inventory was auctioned. I had hoped to be able to pick up a number of items for a low price, including a dust collector, bench sander, etc. but everything went for way more than I could afford. I was getting rather annoyed at the fellow who kept bidding on everything I wanted and obviously had more money than me to spend (which isn't saying much, I was really only willing to spend a small amount of cash). I found out later that this fellow was starting a woodworking shop for inner city youth which produces custom furniture for sale. It seems the tools were being purchased for a very good cause. Everything I chose to bid on I was quickly outbid by others in the room. In fact, I usually didn't even get into the bidding before the price went beyond my limit (I believe some of the items went for more than retail price!). The one area where there was very limited interest was in the inventory of fiberglass related items. They had a couple of gallons of WS epoxy and hardener but this too went for more than I was willing to pay (I didn't really need more epoxy after all), but there was a roll of 6 ounce glass cloth on a large stand that I think only one other person bid on and they were not very enthusiastic about it. Thus, I was able to purchase about 10 yards of West Systems brand 6 oz cloth for $30. Now of course I'll have to build another boat in order to have a reason for using it.
Green Tape & An Unemployed Bum
I've started to work on the kayak once again with a bit more regularity. With recent warm temperatures I decided it was a good time to do some epoxy work over the past week before we get another cold snap (we have had unusual quantities of cold and snow so far this winter). You may recall that back in June I joined the two halves of the kayak, fiberglassing only the inside of the seam, then packed everything up because we moved to a new house. Well that move threw me off and I lost all momentum with my energy being directed first toward moving, then towards finishing up the renos I initiated during the move. Add in the parenting of two energetic girls and being busy at work and there was little time or energy to work on the kayak. However, at the end of November I was laid off from my job as a "Research Associate" and now I have a bit more time on my hands (not a lot mind you, I still have to take care of the kids - the youngest started walking this week - while my wife picks up extra shifts at her job). Thus, I moved the car out onto the driveway, warmed up the garage, and fiberglassed the outside seam. I used the technique of masking off the edges as described on the One Ocean Kayaks web site.

 In the picture above you can see that in addition to the green masking tape that I ran out of, I also used brown masking paper. This paper has a light adhesive on one edge (like a sticky note) and I turned to it because it was what I had available at the moment. However, I would advise against others using the same stuff - although waxed, the epoxy soaks through the paper and gets stuck to the kayak. Thankfully it scraped away fairly easily and at least the brown colour matches the boat so if I missed anything it should be inconspicuous (at least it's sufficiently inconspicuous that I couldn't find any more of it).


I laid down strips of masking tape to either side of the seam leaving about 3/4" to 1" on each side of the joint. I folded the edge of the tape to prevent drips from running away.
I then rolled on the 3" wide strips of glass cloth that I had cut for this purpose.
In the picture above you can see that in addition to the green masking tape that I ran out of, I also used brown masking paper. This paper has a light adhesive on one edge (like a sticky note) and I turned to it because it was what I had available at the moment. However, I would advise against others using the same stuff - although waxed, the epoxy soaks through the paper and gets stuck to the kayak. Thankfully it scraped away fairly easily and at least the brown colour matches the boat so if I missed anything it should be inconspicuous (at least it's sufficiently inconspicuous that I couldn't find any more of it). 

The fiberglassing of the seam went pretty much as the rest of the glass/epoxy work but on a smaller scale. Once sufficiently cured, I then trimmed away the masked tape. In the above close-up photo you can see that I went over top of the hole drilled for the grab loop; I trimmed the glass cloth from the holes while trimming the masked edges.

However, I sort of forgot one minor detail from Vaclav's instructions - I should have lifted the masking tape, pulling it away from the kayak and bending the glass right at the edge of the tape. As it was, on the first side I scored/cut the glass with the tape flat which didn't work all that well. On the other side I lifted the tape/glass as I was supposed to and it made trimming the excess much easier and in the end I was left a fairly nice edge which was easily scraped to a smooth transition. I now have about 70 feet of fiberglass reinforced masking tape - that's gotta be good for something right? I can see why people seem to always want to build another boat - next time the whole seam glassing process would go much more smoothly.
I have more on the subject of glassing the seam and addtional progress to report, but I'll address those in the next posting or two.
p.s. If you are in the Saskatoon area and would like to hire a molecular biology technician for generous sums of money, please let me know! ;-)
Friday, September 29, 2006
Bikes & Commuters
If I may change the subject for a moment....
A recent thread in the "Off Topic" section of a paddling forum I often read has gotten me thinking this week about cycle commuting. That thread was full of an awful lot of vitriol, especially from the anti-cyclists (not what I anticipated on a paddling forum). I think one of the cyclist advocates was writing at least a bit tongue-in-cheek, but it certainly wasn't taken that way by some of the other posters. Anyways, a couple of very interesting links to other blogs were posted and I thought I would share them here (since this website actually sees traffic and is much easier to add it to than my main site).
First was a blog posting by Crazy Biker Chick who wrote an article entitled "Things a non-cyclist might not understand Part I: An open letter to motorists who dislike cyclists." I liked this article thoroughly, it is well written, respectful, and in no way does it chide or goad the motorists she hopes to get the point across to. What she says reflects my feelings on the subject quite closely, though there was one point she made that I'm not sure I can agree with (not sure I entirely disagree with it either). She addressed the issue in her most recent post. For more on my feelings on the matter, you can see the rants section of my other web page.
Another blog posting that was linked to was regarding the pro-cycle commuting movement, Critical Mass, and was written by the Accordian Guy in his article Critical Massholes (or: Why I No Longer Ride with Critical Mass). While I appreciate the message they attempt to convey, I've never quite understood how obstructing other vehicles on the road was the best way to get the message across. Let see, piss off a whole bunch of motorists in an effort to get them to afford us more respect? Apparently I wasn't the only person that this has occurred to as evidenced by the aforementioned article.
Now back to kayaks - I gotta go work on the boat (I think I'll glass the outside seams tonight). Ciao.
Thursday, September 21, 2006
Back Adder
As of this week I'm back at it, continuing my slow progress on the boat. The other night I sanded the outside seam smooth, taking the edge off a fair bit in a few places where the deck did not quite conform to the hull. This left some bare wood in places and may in the end be visible but I'm not too worried about it. This area will be soon covered in a strip of fiberglass.
Inspired by a photo in Dan Millsip's journal detailing the building of his kayak, I decided to build a device to help me scrape/sand smooth the inside seam in those hard to reach and curved portions of the kayak. Dan credits Daren Neufeld with the pole sanding device.
Here is the problem I'm trying to fix:
 In the photo above, the boat is upside down. The tip of the bow curves down and away from the camera (and the guy trying to work in the confined space). The seams are to the sides of the photo. Below are a couple of the closeups of the bumps and glass fibers which stick up (cropped from the right side of the above photo). The whole thing is a big mess of epoxy and fiberglass.
 I stopped by the local Co-Op hardware store on my way home to look for the highly & repeatedly recommended sureform rasp. Not finding one, I picked up some other rasp thing, designed for drywall but the package says it can be used for autobody work. It was cheap so I figured what the hell. I also picked up a couple of small hinges. Here is the first version of my inside seam tool, Inside Seam Tool, MKI:

 I fitted the rasp blade to a block of wood which was then attached via a small hinge to a 3 foot length of scrap spruce. This first version did not work very well for 2 reasons - the sole was too flat, and the rasp did not cut the fully cured epoxy very well. I fully expected both of these to be a problem so there were no suprises there. I attempted to curve the rasp but was not very successful and quickly tossed the rasp aside. It was a good thing I sharpened my plane blade last night because I put it to good use by planing down the sole of my block of wood to form a nicely curved surface. While I was at it, I planed down the square corners of the handle to give a handle that I can comfortably grip without fear of gaining a mitt full of splinters (working with a plane and a piece of wood is so much nicer than scraping cured epoxy & fiberglass). I then stapled a piece of 80 grit automotive sandpaper (from a Princess Auto variety pack) to the bottom and voila, Inside Seam Tool, MKII:
 Thankfully, the rounded sanding version works much better. It's still gonna be a lot of work and rather slow, reaching with one arm in through the hatch with your head crammed in there too so you can see what you're doing, but my wife has indicated that she'd like to help with the kayak so maybe I can get her to do it.
Inspired by a photo in Dan Millsip's journal detailing the building of his kayak, I decided to build a device to help me scrape/sand smooth the inside seam in those hard to reach and curved portions of the kayak. Dan credits Daren Neufeld with the pole sanding device.
Here is the problem I'm trying to fix:
 In the photo above, the boat is upside down. The tip of the bow curves down and away from the camera (and the guy trying to work in the confined space). The seams are to the sides of the photo. Below are a couple of the closeups of the bumps and glass fibers which stick up (cropped from the right side of the above photo). The whole thing is a big mess of epoxy and fiberglass.
 I stopped by the local Co-Op hardware store on my way home to look for the highly & repeatedly recommended sureform rasp. Not finding one, I picked up some other rasp thing, designed for drywall but the package says it can be used for autobody work. It was cheap so I figured what the hell. I also picked up a couple of small hinges. Here is the first version of my inside seam tool, Inside Seam Tool, MKI:
 I fitted the rasp blade to a block of wood which was then attached via a small hinge to a 3 foot length of scrap spruce. This first version did not work very well for 2 reasons - the sole was too flat, and the rasp did not cut the fully cured epoxy very well. I fully expected both of these to be a problem so there were no suprises there. I attempted to curve the rasp but was not very successful and quickly tossed the rasp aside. It was a good thing I sharpened my plane blade last night because I put it to good use by planing down the sole of my block of wood to form a nicely curved surface. While I was at it, I planed down the square corners of the handle to give a handle that I can comfortably grip without fear of gaining a mitt full of splinters (working with a plane and a piece of wood is so much nicer than scraping cured epoxy & fiberglass). I then stapled a piece of 80 grit automotive sandpaper (from a Princess Auto variety pack) to the bottom and voila, Inside Seam Tool, MKII:
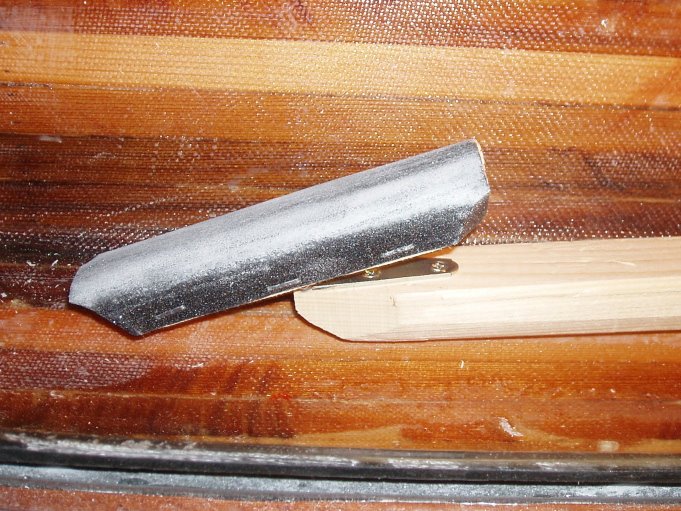 Thankfully, the rounded sanding version works much better. It's still gonna be a lot of work and rather slow, reaching with one arm in through the hatch with your head crammed in there too so you can see what you're doing, but my wife has indicated that she'd like to help with the kayak so maybe I can get her to do it.
Wednesday, September 20, 2006
Some Good Ideas from Dan Millsip
Dan Millsip has recently completed building a Pygmy Coho and has posted a gallery and journal of the build at West Coast Paddler at the above link. Dan has some pretty good ideas which I would like to keep in mind in order to finish off this kayak, or maybe for the next one.
* The hinged pole sander for the inside seam (maybe I'll work on that tonight and finally get those jagged edges cleaned up).
* The laminate trimmer slot cutting template - The way I did it by drilling and filing has been less than perfect and now some of those slots are partially filled with epoxy and I have to figure out how to clean them up (maybe I'll grind a file down to the correct thickness).
* Making finger pulls from dowel.
* Making bulkhead templates.
p.s. After about 2 1/2 months away from the kayak I'm getting back at it!
Wednesday, July 12, 2006
Grizzly Industrial - Workshop Planner
This is pretty cool: Grizzly Industrial - Workshop Planner
Since I am in the process of moving out of our old house/boatbuilding shop and getting a new boatbuilding shop, errr - garage, set-up, this little tool might come in handy to plan the layout of where things go. The common woodworking and shop tools (Grizzly brand of course) are all pre-loaded and available for placement in the layout. Every object can be re-sized so it's easy to change the size to match your own tools. I'll have to play around with this when I have some more time.

Since I am in the process of moving out of our old house/boatbuilding shop and getting a new boatbuilding shop, errr - garage, set-up, this little tool might come in handy to plan the layout of where things go. The common woodworking and shop tools (Grizzly brand of course) are all pre-loaded and available for placement in the layout. Every object can be re-sized so it's easy to change the size to match your own tools. I'll have to play around with this when I have some more time.
Friday, June 30, 2006
Kisseynew & the Yukon River Quest
I just checked the results of the Yukon River Quest which is currently underway. The race has already been won by a tandem kayak from the US, but in second place after the last checkpoint is team #84: Kisseynew - Denesuline Dalutweh! Martin Bernardin, the fellow behind Kisseynew Canoe Company, and his team are paddling his strip-built voyageur canoe and look like they are headed for a finish time of about 45 hours. They are probably actually done already, but the race results haven't yet been posted. In the meantime...
Go Kisseynew Go!!!
p.s. I just found the gallery of photos from the race here.


Go Kisseynew Go!!!
p.s. I just found the gallery of photos from the race here.
Update (July 4th, 2006): The official results have been posted and the awards made. Team 84 Kisseynew - Denesuline Dalutweh finished first in the Voyageur class with a record-breaking time of 42 hours, 56 minutes and 13 seconds, and won the prize of $1500 (which almost covers the $200 per person entry fee).
Congratulations Guys!
N.B. - I originally had the name of the team mixed up, interchanging the words Denesuline Dalutweh (which refers to the name of the first nation to which 3 of the paddlers belong). I had simply copied it from the YRQ website which had it mixed up as well. As it appears above is the corrected name, sorry for any confusion. Thanks to Heather for pointing out the mistake.
While I'm editing this post, I might as well add that one of the members of Team Kisseynew has written an article about his experience in the 2006 YRQ. You can find Ryan Martin's article here, and some photos here .
Thursday, June 29, 2006
Reunification
The kayak is now "one".
The inside seams have been fiberglassed using the method described on the Outer Island Kayak web site. The basic process is to cut strips of fiberglass cloth (I made my strips 2 - 2.5" wide, 6 ounce cloth) and use small dabs of hot glue to tack the cloth in place along the shear line of the hull so that the cloth will end up evenly spanning the seam. The deck was then carefully laid over the hull and the ends taped into position. The hull had pulled inwards so the hull and deck did not mate perfectly and I needed to even things up. I found that trying to use tape and straps to bring the hull and deck flush was not that effective, partly because this method can only push the deck inward and does not allow the hull to spread to meet halfway. Also, since the hull overlapped the deck, the pressure from tape and straps pushed the edges past each other rather than causing them to meet. Instead, I used a method I had seen described on the KBBB where u-shaped pieces of wood are tacked to the hull with hot glue near the top edge, then a wedge is driven in past the deck which causes equal pressure pulling the hull outwards and pushing the deck inwards. I found this worked very well and it was easy to convert a bunch of plywood scraps (former strip-holding jigs from when I thought I would build this boat "staple-less") into u's and wedges. I placed a bunch of these jigs along the seam on each side, wherever things needed to be pushed into alignment and used fiber-reinforced strapping tape to tape the halves together. I then attempted to use clear packing tape (too thin, too cheap) to seal the seam but could only manage to do this between the jigs.
With everything aligned and taped up, I turned the boat on it's side and hoisted one end up with a strap from the ceiling such that epoxy poured onto the seam through the hatch opening would run downhill and into the end. I attached a sawed-off brush at a 45 degree angle to the end of a stick and used this to reach in through the hatch openings and push the pool of epoxy where it needed to go to wet out the cloth, ensuring it reached the extremities. With one end epoxied in this way, I raised the other end and did the rest of the seam, then returned the boat to level (still on side). I added a second layer of glass (3" wide, 4 ounce cloth) in the cockpit area for extra strength.
Once this mess had cured for about 24 hours, I knocked the alignment jigs off with a mallet then scraped/cut/sanded away the excess hot glue and all the epoxy that came through. Because my packing tape was crappy, I had trouble getting it off. Because the jigs were in place before I put on the tape, it did little to prevent epoxy from coming through the joint and caused it to pool in many places. As a result, most of my jigs were epoxied in place, though since the epoxy was still only partly cured, they came off without too much trouble.
With the starboard side taped, I then turned the boat over and repeated the process for the other side.
Some comments I have at this juncture:
See you in August!
The inside seams have been fiberglassed using the method described on the Outer Island Kayak web site. The basic process is to cut strips of fiberglass cloth (I made my strips 2 - 2.5" wide, 6 ounce cloth) and use small dabs of hot glue to tack the cloth in place along the shear line of the hull so that the cloth will end up evenly spanning the seam. The deck was then carefully laid over the hull and the ends taped into position. The hull had pulled inwards so the hull and deck did not mate perfectly and I needed to even things up. I found that trying to use tape and straps to bring the hull and deck flush was not that effective, partly because this method can only push the deck inward and does not allow the hull to spread to meet halfway. Also, since the hull overlapped the deck, the pressure from tape and straps pushed the edges past each other rather than causing them to meet. Instead, I used a method I had seen described on the KBBB where u-shaped pieces of wood are tacked to the hull with hot glue near the top edge, then a wedge is driven in past the deck which causes equal pressure pulling the hull outwards and pushing the deck inwards. I found this worked very well and it was easy to convert a bunch of plywood scraps (former strip-holding jigs from when I thought I would build this boat "staple-less") into u's and wedges. I placed a bunch of these jigs along the seam on each side, wherever things needed to be pushed into alignment and used fiber-reinforced strapping tape to tape the halves together. I then attempted to use clear packing tape (too thin, too cheap) to seal the seam but could only manage to do this between the jigs.
With everything aligned and taped up, I turned the boat on it's side and hoisted one end up with a strap from the ceiling such that epoxy poured onto the seam through the hatch opening would run downhill and into the end. I attached a sawed-off brush at a 45 degree angle to the end of a stick and used this to reach in through the hatch openings and push the pool of epoxy where it needed to go to wet out the cloth, ensuring it reached the extremities. With one end epoxied in this way, I raised the other end and did the rest of the seam, then returned the boat to level (still on side). I added a second layer of glass (3" wide, 4 ounce cloth) in the cockpit area for extra strength.
Once this mess had cured for about 24 hours, I knocked the alignment jigs off with a mallet then scraped/cut/sanded away the excess hot glue and all the epoxy that came through. Because my packing tape was crappy, I had trouble getting it off. Because the jigs were in place before I put on the tape, it did little to prevent epoxy from coming through the joint and caused it to pool in many places. As a result, most of my jigs were epoxied in place, though since the epoxy was still only partly cured, they came off without too much trouble.
With the starboard side taped, I then turned the boat over and repeated the process for the other side.
Some comments I have at this juncture:
- Sheer clamps as used on some kayak designs look like a pretty good idea right now. Sheer clamps are strips of wood which extend the length of the boat along the sheer line, providing a surface to which the deck can be attached. Sheer clamps are common on boats which have a fairly flat deck where the deck and hull meet at a sharp angle (not the case in a guillemot).
- Purchased 2" wide fiberglass tape with selvaged edges may produce a neater job than my version of cutting my own strips from regular width cloth on the bias since this would avoid all the loose strands and frayed edges.
- I'm not sure how I'll clean up the rough/sharp surface of the inside seam. I guess I'll have to shape a sanding block of some sort and attach it to a pole. It'll have to be narrow enough to fit most of the way into the tips. I'm not worried about aesthetics here, but the sharp bits of glass fiber that protrude along the seam will shred whatever I put in the hatches.
- The current weight is 35 lbs (no seat, bulkheads, etc) according to the bathroom scale.
See you in August!
Thursday, June 22, 2006
I won, I won!!
Recently, Bear Mountain Boats had a bit of a contest on their boat building forum where they requested forum participants to share their perspective on building small boats, asking the following questions:
- Why have you built your own boat?
- What method did you use and why?
- How do you respond when people say to you 'that's nice but I would never put it in the water'.
- What was your biggest concern before starting to build it? How did you overcome this?
I answered the questions (or at least those applicable at this point) and was thus entered into a drawing for the prize of a boat building class hosted by Bear Mountain in Peterborough, Ontario. I recently received a message from Joan notifying me that the first person offered the prize declined and I was next on the list. Woo Hoo! Now the only problem is to figure out how to get myself to Peterborough for a week (cash in some air miles?). Luckily the prize is a bit open ended so I can wait awhile before claiming my prize, perhaps next winter once I've built up some more time off from my job. 
Thank you to Joan & Ted for writing the book that got me interested in boatbuilding in the first place and thanks' for providing the forum where I can learn of techniques from a community of builders.
Tuesday, June 20, 2006
Preparing to Attach Hull & Deck
Here is some good reading, courtesy of Outer-Island Kayak in anticipation of my next major step. Now I have to decide if this method tacking the glass tape in place with hot glue is better for me than the epoxy-saturated roll of fiberglass tape method described in Nick's book and also well-described in the One Ocean Kayak's shop tips.
Regarding my previously posted "To Do List", I can take a couple more items off the list.
7. Build hatch lips . The hatch lips have been trimmed and permanently installed
9. Make & install soft padeyes . I made the padeyes and cut the slots in the hull for them to be inserted into after the final varnishing steps.
10. Make & install regular padeyes (to be used for internal tie down points). Done. I used some scrap 5/8" mahogany pieces to make padeyes to secure the backband and hatches to, and also a hook which will become the better part of a paddle park alongside the cockpit.
19. Drill holes at bow & stern for grab loops. I grabbed a drill bit from the rack that looked about right and proceeded to drill a 7/8" hole in the boat. As soon as I saw it I knew that it was way too big, but at that point the only thing I could do was proceed to drill one at the other end too. As it happened, I had some 7/8" dowel on hand for some long forgotten other project (too bad it wasn't walnut or something fancy) so I cut a couple of short pieces, drilled a smaller hole through the center (maybe 3/8") of each dowel piece ( a drill press would have been handy), then epoxied them into place. With the dowels trimmed flush to hull, my oversized holes now look like a contrasting feature rather than a f$%& up.
Regarding my previously posted "To Do List", I can take a couple more items off the list.
Saturday, June 17, 2006
Wednesday, June 14, 2006
Pedro's Woven Rope Carrying Handles
Pedro Almeida over at the Kayak Building Bulletin Board has come up with a new and interesting version of a rope carrying handle. He uses a series of knots to bring together four separate cords to form a carrying handle for what looks like a comfortable grip. For photos of Pedro's kayak and deck rigging including the carrying handles, visit his Flickr site here.
Pedro has very graciously written a set of illustrated instructions and has provided that to the boat-building community. You can find his instructions here.
Pedro has very graciously written a set of illustrated instructions and has provided that to the boat-building community. You can find his instructions here.
Friday, June 02, 2006
To Do List, Revisited
An update on my previously posted To Do List. There are a few things I can check off the list after the last 2 weeks.
a1. Build cockpit coaming lip
a2. Fiberglass the coaming (I still have to tidy up underneath the coaming a bit, see my comments in my earlier post)
a3. Sand epoxy smooth on hull and deck (external)
4. apply 3rd fill coat to hull & deck?
5. sand the epoxy some more
a6. Cut hatches
a7. Build hatch lips (I still have to finish the lips, but the hard part is done)
8. build & install moby latch system
9. make & install soft padeyes
10. make & install regular padeyes (to be used for internal tie down points)
11. make & install cheek plates
a12. carve pieces to fit into the extremities to fill the cavities that will be impossible to glass at the seam
13. mate the deck and hull once again and glass the interior seam
14. glass the exterior seam
15. make the seam glass transition "seamless"
16. make & install bulkheads
17. carve seat out of minicell foam
18. build and install backband (I have glassed a curved piece of 1/8" plywood to form the backrest).
19. drill holes at bow & stern for grab loops
20. varnish
21. sand
22. varnish
23. sand
24. varnish
25. install deck lines & bungees
26. install grab loops and toggles
a
a
a
4. apply 3rd fill coat to hull & deck?
5. sand the epoxy some more
a
a
8. build & install moby latch system
9. make & install soft padeyes
10. make & install regular padeyes (to be used for internal tie down points)
11. make & install cheek plates
a
13. mate the deck and hull once again and glass the interior seam
14. glass the exterior seam
15. make the seam glass transition "seamless"
16. make & install bulkheads
17. carve seat out of minicell foam
18. build and install backband (I have glassed a curved piece of 1/8" plywood to form the backrest).
19. drill holes at bow & stern for grab loops
20. varnish
21. sand
22. varnish
23. sand
24. varnish
25. install deck lines & bungees
26. install grab loops and toggles
Coaming lip, sanding, hatches cut and hatch lips built
-----I have photos to add but they'll have to wait until a later date--------
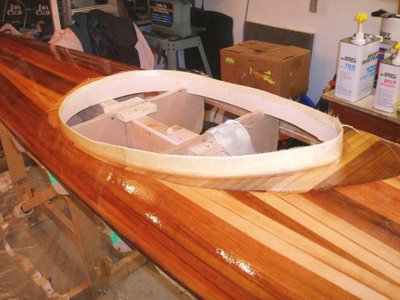
I have gotten a few things done in the last couple of weeks. The first on my "to do" list was to build the cockpit coaming lip, the rim around the top of the cockpit to which the skirt attaches. There are a number of ways to do this. Probably the most common way it is done on strip-built kayaks is as described in Nick Schade's book using 1/4" wide by ~1/8" thick strips of hardwood (ash or walnut are common), wrapped around the top of the coaming with about 6 laminations glued in place. While this is reported to be easy enough, dealing with many thin pieces of wood buttered in epoxy (they get darned slippery) and trying to keep everything aligned didn't have all that much appeal for me. Since the finished product is 1/4" thick by 1/2"-3/4" wide hardwood & glue, it seems to me that this might be heavier than other options. A second common method is that described by Vaclav on the One Ocean website, where a coaming is laid up in carbon fiber (and/or fiberglass, but carbon seems to be common) over top of a form built on the boat out of styrofoam. This method seems simple enough, but I don't have carbon fiber so quite a few layers of glass would likely be necessary to get the required strength and stiffness. Something I began to think about was using thin (1/8") birch plywood reinforced with a couple of layers of fiberglass to form the lip. The birch plywood is thin enough to flex into place and conform to the curvature of the top of the coaming (it is curved from the side profile), but when encased on both sides in layers of glass, should be both stiff and strong. Recently, I saw a post on the KBBB where a builder (Gaetan) used plywood (stained to match the colour of the boat) for his coaming lip. The result looked great and that sealed it - that's how it was going to be done.
The process was fairly simple - I rough cut a piece of 1/8" birch plywood to the size of the cockpit rim, leaving it over-sized to be trimmed later. I oriented the grain perpendicular to the boat so that it flexed into place easily. I then tacked the lip into place on top of the trimmed coaming riser using CA glue (I should have been using accelerator too but the spray pump on the little bottle is buggered and I've given up fighting with it). I then trimmed the inside of the cockpit lip to be flush with the riser and rounded off the corner a bit. I then glassed the lip with 2 layers of bias-cut 4 ounce fiberglass which wrapped from the top of the lip, down the riser, and onto the underside of the deck (barely). The 4 ounce cloth had no trouble making the bends and wets out very easily. It is very nice stuff to work with. Once this had cured, the rough edges at the bottom were smoothed out (a scraper works very well as long as the epoxy is not too hard) and the outer edge of the lip was trimmed down to it's final size of 3/4". I then applied a fillet of epoxy underneath the lip at the junction with the riser to smooth out this corner to a radius the glass can manage, then applied 2 layers of fiberglass which again wrapped from the deck, up the riser and under the the lip. I used a trick I read about on the KBBB to hold this glass in place and make things in this hard to work area "smooth as glass" (described by John Monroe and credited to Rob Macks). I used 3/4" flexible vinyl tubing (purchased at Cdn Tire) squashed in underneath the coaming lip and held in place with spring clamps. Once the glass had partially cured, the tubing was pulled out to reveal ---- a mess! It seems I didn't get the tubing in far enough in many places and there were a lot of voids and air pockets above the glass and underneath the glass. I scraped some of the rough edges I could reach, but there is still a lot of smoothing to go underneath the lip. I may try to put another layer of glass in under the lip since I'm sanding a lot of the strength away in order to clean up the mess. For now, it's not easily seen so it's something I'm working on here and there while focusing on other things. In the end, the plywood coaming lip worked really well and was very easy to do, but I need to work on my technique for glassing underneath. One thing I considered was to put a layer of glass on the underside of the whole lip BEFORE tacking it in place on top of the riser while the glass was still green and flexible. This would have been very easy, but I went for what I thought would be the stronger method by having the glass continuous from deck to riser to lip. Next time, I'd probably do it as I originally considered with putting a layer of glass on the underside of the plywood lip prior to tacking it in place, with a fillet underneath and an extra layer of glass on the outside, avoiding all the trouble of trying to work with glass underneath the installed coaming lip.
While the weather was nice last weekend (overcast but comfortable working temperature) I took the opportunity to drag the boat outside to do some sanding in the fresh air. I also took a few pictures, and sat in the boat to determine the approximate location of the front bulkhead (to ensure I cut my hatch in front of it!).
This week, I cut out the hatches. This went fairly well despite my nervousness about cutting giant holes in the deck of boat. The first step was to determine the shape of the hatches. Using the offset's in Nick's book as a guide, I experimented with a number of shapes. I printed these out on the computer to the right scale which meant taping together a bunch of sheets of paper to create my templates. After considering the diamond shape provided in the book and different egg shapes, I settled on a trapezoid shape with round corners and sides roughly parallel to the sheer line. I then masked off the areas to be cut and with my templates transferred to pieces of cardboard, I traced the shapes onto the boat. Looking at things on the boat, I decided that I had the rear hatch too large, so I scaled it down a bit (about 1/2" all around seemed about right) and moved it aft about 6". This all took me the better part of an evening to get something I was satisfied with.
I started the cut as others have described, using a cutting disc on my dremel. I then used a blade from the jig saw and by hand cut through to make the slot wide enough to fit the jigsaw blade. Then with a new Bosch fine-cut blade and the jig saw on a medium speed, I cut out each hatch. The actual cutting went fairly well. I am glad that I decided not to rush out and purchase a new $200 Bosch jigsaw, and I am glad that I did decide to spend the big bucks and get the Bosh blades (about $12 for a pack of 4). In the end the actual cutting was a bit anticlimactic (which is OK, that means it went well).
With the hatches cut, it was then time to build the hatch lips. I used the method described by Vaclav on the One Ocean web site. Ken (aka Spidey) has some good pictures and a good description of the process on his web site. Before heading to the hardware store I should have double checked what size of weatherstripping to use to form the gasket channel, but I didn't so I just got what looked about right. The 1/8" stuff looked too small, so I went with 1/4" x 3/8" closed cell foam gasket tape. I taped the hatches into position from the outside, adding a couple of strips of cedar to ensure the hatches would sit flush despite any pressure that would be applied in laying up the glass for the lip (not to mention the 20 lbs of wet sand I piled on top). With the deck turned underside-up, I used thin clear packing tape over the whole area to ensure that my gaskets would not yet be a permanent part of the boat. I then applied the self-adhesive weather-stripping to the perimeter of the hatch lid staying about an 1/8" in from the edge. With this in place, I applied a fillet of thickened epoxy (406 filler) pigmented black with graphite powder (mostly because everybody else seems to tint their hatch lips and I didn't want to be left out) on both sides of the weatherstripping. I then began to lay up strips of glass over top of this to make the hatch lip. For the first 1-2 layers, I used 4 ounce glass because it conforms better to curves and does not trap air as easily (I think I still trapped a fair number of bubbles), then followed with strips of 6 ounce glass cloth for a total of 5-6 layers. The glass was wet-out 1 layer at a time using epoxy with graphite powder added to make it black-ish. Once all of the glass cloth was layed up and wet-out, I put a sheet of poly over top and piled damp sand on top of that in an effort to push everything smooth. I was somewhat surprised how long this process took. I started at 10 pm, and did not complete the process until 1:30 am. In the morning, with the epoxy partially cured but still flexible, I removed the sand and the sheet of poly, then peeled the gaskets off of the deck and removed the tape. It all went pretty well, though there are wrinkles from the plastic layed over top. Next, I will trim down the rough edges of the hatch lip, scrape out the weather stripping from the gasket channel, then permanently bond the hatch lip to the underside of the deck.
Friday, May 19, 2006
Gone Paddling
The kayak will have to wait a few days - my wife & I are going paddling this weekend. We are canoeing a section of the Torch River, north of the town of Love, Saskatchewan. It's supposed to be a pretty good section of whitewater and we will run it on Saturday, then probably re-run a shorter section again on Sunday, heading home either Sunday evening or Monday morning. We are doing this trip with other members of the Saskatoon Canoe Club and it is a trip that can only be done when there is sufficient water in the river (ie during spring runoff).


For a good photo of what the river looks like when it is not flush with spring runoff, visit Neil Rawlyk's web site.
Here is a slideshow of photos from the trip:
Sunday, May 14, 2006
Fiberglass, Stage III
My wife helped on Saturday and we glassed the underside of the deck. I used 4 ounce (4 oz./sq. yd.) cloth (West Systems 740) for this step in order to save a bit of weight and use a bit less epoxy (the rest of the boat has been sheathed in 6 ounce cloth). I had actually intended to use the 4oz cloth on the topside of the deck as well but 'accidentally' used the 6oz cloth (I grabbed the wrong roll but convinced myself it was the correct roll). I put an extra strip of cloth just in front of the cockpit and two extra layers behind the cockpit to strengthen these areas for getting in and out of the boat. I really liked working with the 4 oz cloth - it wet out easily and conformed easily to curves, particularly the radius of the bottom side of the coaming riser.
My father-in-law was on hand to take lots of photos (in fact, I think the flashes may have prematurely degraded the epoxy) so I'll post some photos later.
While I had the epoxy out, I also made a curved panel that will become the backband. I made a form to the desired backband shape (a more rounded version of the cockpit back shape) out of 1" thick particle board and tacked a piece of 1/8" birch plywood to it, allowing the ply to assume a fair curve. I then used a scrap of 6 oz cloth to glass over top of this and allowed it to cure (where it remains). Once fully cured, I'll remove the glassed plywood from the form, then may glass the inside of the curve (maybe - I'm not sure if the second layer is necessary and may make the backband too stiff). I'll then use this curved piece to cut out the final backband shape, adding slots for the webbing which will hold it in place behind the seat.
With the whole boat now sheathed in fiberglass, I'm practically done right? Here is my current "To Do" list:
- Build cockpit coaming lip
- fiberglass the coaming
- sand epoxy smooth on hull and deck (external)
- apply 3rd fill coat to hull & deck?
- sand the epoxy some more
- cut hatches
- build hatch lips
- build & install moby latch system
- make & install soft padeyes
- make & install regular padeyes (internal tie down points)
- make & install cheek plates
- carve pieces to fit into the extremities to fill the cavities that will be impossible to glass at the seam
- mate the deck and hull once again and glass the interior seam
- glass the exterior seam
- make the seam glass transition "seamless"
- make & install bulkheads
- carve seat out of minicell foam
- build and install backband
- drill holes at bow & stern for grab loops
- varnish
- sand
- varnish
- sand
- varnish
- install deck lines & bungees
- install grab loops and toggles
Once the above list is completed here are a couple more items I could turn my attention towards:
- carve paddles
- make spray skirt
- make paddle float
- build cradles for car-topping
- build cart
- make pump
- make tuuliq
Monday, May 08, 2006
Fiberglass, Stage II
With the help of my brother on Sunday, I was able to fiberglass the deck then the inside of the hull. The deck fiberglassing went quite well and in the end I was happy with the way it turned out, smooth with a minimum of excess epoxy. One obstacle that caused us a certain amount of grief was the coaming area. While I was doing most of the mixing and applying the epoxy to one side, my brother Ken applied the epoxy to the other side and as he went along, a wrinkle developed in the cloth. This came to a head at the cockpit. We had troubles resolving this wrinkle and also with trying to get the glass to lie flat and make the turn up the coaming riser. The glass repeatedly wanted to pull away from the fillet at the base of the riser. In order to rid ourselves of that nasty wrinkle, we cut the cloth, allowing the glass to overlap itself beside the cockpit an inch or two and eliminating the wrinkle. The overlap created a bit of a step which I later scraped away quite easily. In retrospect, this cut was definitely the right thing to do. The glass wanting to pull away from the riser fillet was a bit more tricky and required a lot of babysitting to get it to stay put until cured. There are still a few bubbles there but I won't tell if you don't. In retrospect, it probably would have been better not to have put in the riser until after the deck was glassed, then to add glass to the riser afterwards, extending that glass down onto the deck. My reason for doing it the way I did was so that I would gain the strength of having continuous glass from the deck and up the riser, and it seemed like it be a bit simpler rather than spreading it out over two glassing operations. The other, and perhaps main reason I installed the riser prior to glassing the deck was that I had time to do so since I couldn't do the deck fiberglass last weekend with my youngest daughter being sick.
 Above: The 1/8 birch ply coaming that caused some grief while glassing, and the region of where the wrinkle was cut out. Below: A close-up of the cut and overlapped region.
 One spot I was a bit concerned about was on the fore deck ahead of the cockpit. I inserted into the deck a hand-carved feature (which I'll discuss further in some other posting) which had a fair bit of relief to it. My concern was that the hollows of the carving would trap air and not fill properly with epoxy (although the carving had been previously coated and the hollows were partially filled). We took care of this area by lifting the cloth and filling the hollows of the carving with unthickened epoxy, then laying the cloth back down, and continuing to brush on the epoxy on the deck as we had been doing. It seemed to tun out fairly well with only a couple of smallish bubbles trapped under the glass (I may try to get these out with a syringe & needle). I must be getting better at squeegeeing because this went much better this time than on the hull. All in all I'm extremely happy with how the deck has turned out so far.
 Above: The glassed deck in the foreground, the hull in the background.
Now the inside of the hull on the other hand .... Well let's just say it's a good thing it'll be under the deck and if someone examining the boat has the audacity to stick their head into the hatch to have a look, I'll just hit them over the back of the head with a greenland paddle. I didn't fill the gaps inside the hull and I didn't sand to the same level of perfection as on the outside. I chose to get aggressive with those epoxy drips and that meant attaching a 36 grit sanding disc to the drill and going after them. For the record, 36 grit will chew through cedar and anything else in it's way VERY quickly. Although I never went all the way through, there is the occasional divot (read gouge). I sanded the hull to 80 grit with the ROS to take most of the gouges from the 36 grit disc out, particularly in the cockpit area. Working in the concave and confined regions of the bow and stern was a bit tricky and I didn't spend a lot of time there to fair things out. I used a fillet in these regions so that the v of the bottom and the stems were rounded out to allow the glass to lay into the hollow a bit better. Getting the glass to stay tight in at the bottom of the stems was still a bit difficult, with the glass wanting to pull up and away. One thing I thought of but didn't try was to use bags of sand in these areas to weigh down the glass, pushing it tight into the cavities. This method would have the added benefit of squeezing out the excess epoxy. I also found squeegeeing inside the hull to be difficult. It seemed that no matter how careful I was, the squeegee would pull the cloth away from the relatively sharp corners at the chines (imagine the troubles I might have with a hard-chined boat!). As a result of this combined with the difficulty of squeegeeing in the confined space at the bow and stern, I am sure I have more epoxy in the hull than I should. Incidentally, I added a second layer of 6 oz. glass in the bottom of the cockpit area (layed out underneath the larger glass cloth sheet covering the rest of the hull).

In addition to the troubles already mentioned, in the hull I also had bubbles forming from air coming out of the wood itself. I had heated the shop to 20C overnight and things were a nice steady temperature by the morning and the heat was turned off (everybody knows you want the temperature to be steady or dropping while doing the fiberglassing). We started our epoxy work in the morning on the deck and after lunch moved to the hull. As we worked on the hull, we noticed it starting to get rather warmish in the shop. The weather outside had risen to a beautiful 20C in bright sunshine, so that may have been helping to warm the shop, but I didn't think that it would make that much difference in a well-insulated shop with a concrete floor that is still holding the cool of a Canadian winter in it's mass. I am therefore led to wonder if the rising temperature was due, in part at least, to the exothermic reaction of curing epoxy. Through the afternoon the temperature inside the shop rose to 24-25C. The temperature rise produced the promised result - bubbles formed under the glass as expanding gasses escaped the wood but then with the wood sealed on the outside, were trapped in thickening epoxy on the inside. Many of these bubbles did actually find their way to the surface, but at least a few did not despite my encouragement. I'm not overly concerned about their presence, but I'm glad it happened on the inside of the hull and not on the topside of the deck.
In the end, I'm not too concnerned about the imperfections inside the hull. My wife suggested the extra bubbles should be considered flotation and I think that's a good approach at this point. The glassing of the underside of the deck should go a bit more smoothly - the curvature is much less than the hull and there are no tight confines to work within and no chines to deal with. Also, the gaps between strips are much less than occured on the hull (again due at least in part to less curvature) so the surface is smoother. My peak this morning under the deck also indicated that there are far fewer epoxy drips coming through to deal with. I think I'll put the 36 grit sanding disc away and stick to hand sanding or a random orbital sander with at least 80 grit paper. For glassing underneath the deck I'll be using 4 ounce West Systems cloth, doubled (tripled?)around the cockpit to provide some extra strength for sitting on the deck while getting in and out.
Below: One final photo for the night - taken on Saturday when my daughter was helping me sand/scrape/grind the inside of the hull in preparation for fiberglass.
 Above: The 1/8 birch ply coaming that caused some grief while glassing, and the region of where the wrinkle was cut out. Below: A close-up of the cut and overlapped region.
  One spot I was a bit concerned about was on the fore deck ahead of the cockpit. I inserted into the deck a hand-carved feature (which I'll discuss further in some other posting) which had a fair bit of relief to it. My concern was that the hollows of the carving would trap air and not fill properly with epoxy (although the carving had been previously coated and the hollows were partially filled). We took care of this area by lifting the cloth and filling the hollows of the carving with unthickened epoxy, then laying the cloth back down, and continuing to brush on the epoxy on the deck as we had been doing. It seemed to tun out fairly well with only a couple of smallish bubbles trapped under the glass (I may try to get these out with a syringe & needle). I must be getting better at squeegeeing because this went much better this time than on the hull. All in all I'm extremely happy with how the deck has turned out so far.
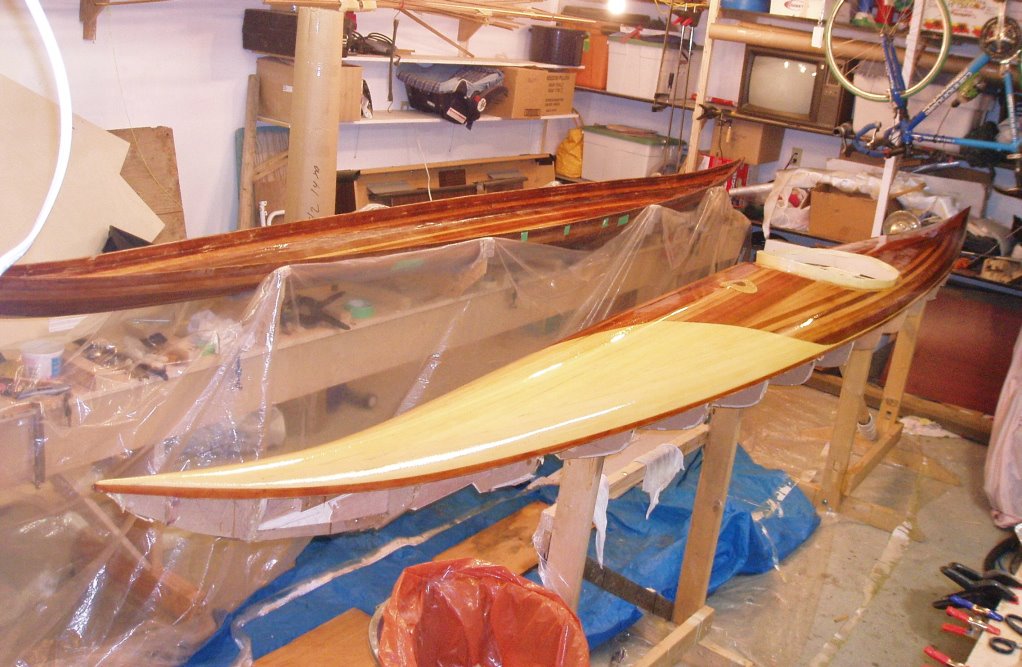 Above: The glassed deck in the foreground, the hull in the background.
Now the inside of the hull on the other hand .... Well let's just say it's a good thing it'll be under the deck and if someone examining the boat has the audacity to stick their head into the hatch to have a look, I'll just hit them over the back of the head with a greenland paddle. I didn't fill the gaps inside the hull and I didn't sand to the same level of perfection as on the outside. I chose to get aggressive with those epoxy drips and that meant attaching a 36 grit sanding disc to the drill and going after them. For the record, 36 grit will chew through cedar and anything else in it's way VERY quickly. Although I never went all the way through, there is the occasional divot (read gouge). I sanded the hull to 80 grit with the ROS to take most of the gouges from the 36 grit disc out, particularly in the cockpit area. Working in the concave and confined regions of the bow and stern was a bit tricky and I didn't spend a lot of time there to fair things out. I used a fillet in these regions so that the v of the bottom and the stems were rounded out to allow the glass to lay into the hollow a bit better. Getting the glass to stay tight in at the bottom of the stems was still a bit difficult, with the glass wanting to pull up and away. One thing I thought of but didn't try was to use bags of sand in these areas to weigh down the glass, pushing it tight into the cavities. This method would have the added benefit of squeezing out the excess epoxy. I also found squeegeeing inside the hull to be difficult. It seemed that no matter how careful I was, the squeegee would pull the cloth away from the relatively sharp corners at the chines (imagine the troubles I might have with a hard-chined boat!). As a result of this combined with the difficulty of squeegeeing in the confined space at the bow and stern, I am sure I have more epoxy in the hull than I should. Incidentally, I added a second layer of 6 oz. glass in the bottom of the cockpit area (layed out underneath the larger glass cloth sheet covering the rest of the hull).
Below: A pretty pattern of swirl marks left behind by the 36 grit disc on the drill. Most of these were sanded out in the cockpit area but these shall remain for eternity.

In addition to the troubles already mentioned, in the hull I also had bubbles forming from air coming out of the wood itself. I had heated the shop to 20C overnight and things were a nice steady temperature by the morning and the heat was turned off (everybody knows you want the temperature to be steady or dropping while doing the fiberglassing). We started our epoxy work in the morning on the deck and after lunch moved to the hull. As we worked on the hull, we noticed it starting to get rather warmish in the shop. The weather outside had risen to a beautiful 20C in bright sunshine, so that may have been helping to warm the shop, but I didn't think that it would make that much difference in a well-insulated shop with a concrete floor that is still holding the cool of a Canadian winter in it's mass. I am therefore led to wonder if the rising temperature was due, in part at least, to the exothermic reaction of curing epoxy. Through the afternoon the temperature inside the shop rose to 24-25C. The temperature rise produced the promised result - bubbles formed under the glass as expanding gasses escaped the wood but then with the wood sealed on the outside, were trapped in thickening epoxy on the inside. Many of these bubbles did actually find their way to the surface, but at least a few did not despite my encouragement. I'm not overly concerned about their presence, but I'm glad it happened on the inside of the hull and not on the topside of the deck.
In the end, I'm not too concnerned about the imperfections inside the hull. My wife suggested the extra bubbles should be considered flotation and I think that's a good approach at this point. The glassing of the underside of the deck should go a bit more smoothly - the curvature is much less than the hull and there are no tight confines to work within and no chines to deal with. Also, the gaps between strips are much less than occured on the hull (again due at least in part to less curvature) so the surface is smoother. My peak this morning under the deck also indicated that there are far fewer epoxy drips coming through to deal with. I think I'll put the 36 grit sanding disc away and stick to hand sanding or a random orbital sander with at least 80 grit paper. For glassing underneath the deck I'll be using 4 ounce West Systems cloth, doubled (tripled?)around the cockpit to provide some extra strength for sitting on the deck while getting in and out.
Below: One final photo for the night - taken on Saturday when my daughter was helping me sand/scrape/grind the inside of the hull in preparation for fiberglass.
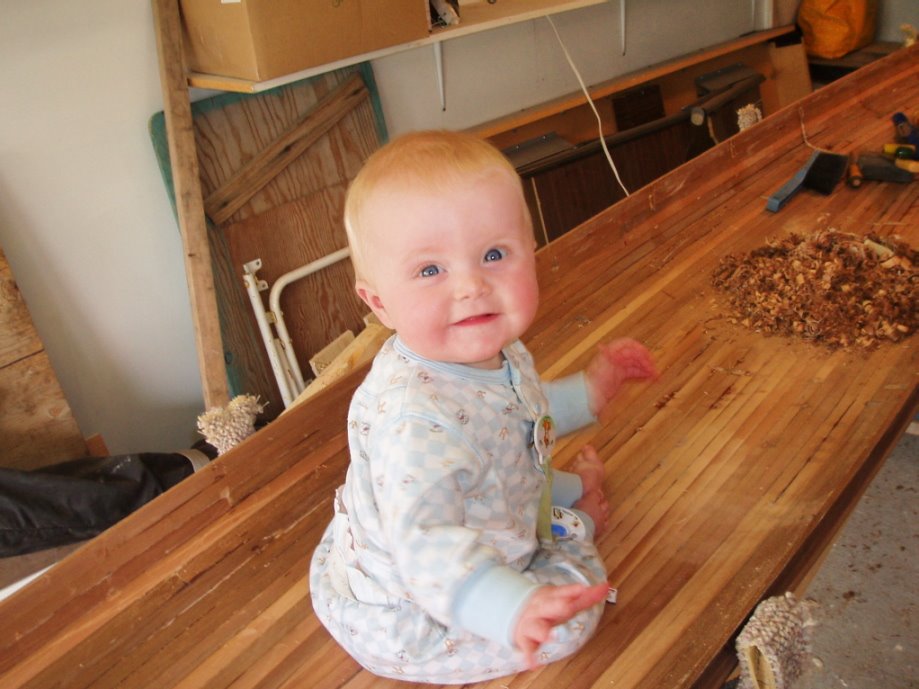
Tuesday, April 25, 2006
Hull Off of the Forms
Having given the hull fibreglass a few days to cure, I pulled the hull off of the forms last night. It was a bit tough to break it free of the forms. The contoured shape lends itself to hugging tightly to the forms, especially at the ends. Also, every staple hole bled epoxy through and into the form where ever a staple used to be. These tiny epoxy bonds aren't much individually but they add up over the whole boat. A third factor was the masking tape I used to prevent glue from sticking to the forms - glue & epoxy stick to masking tape quite nicely. Clear packing tape would have done a much better job and allowed easier separation. A fourth factor was the internal stems that were hot-glued in place to the end forms (masked with duct tape) and I had also added epoxy thickened with sawdust in that region in order to strengthen the bond between stem & strips, but some of this bonded to the duct tape on the endforms too (not a strong bond, but something extra holding on to the forms).
In order to separate the hull from the forms, I had to go along the boat, breaking the bonds at each individual form - first breaking the sides at each form on each side, then going back and breaking the bottom of the boat away at each form. With only the endforms holding things in place, I used a screwdriver to pry the boat up off of the endform prying against the internal stem (mahogany) piece. With a minimum of disturbing cracking sounds and groans the hull lifted up off of the forms.
With the half-glassed hull off of the forms, I took the opportunity to lay it on the lawn and take a couple of photos along with the unglassed and somewhat fragile deck. I allowed the kids to try it out, but refrained from sitting in it myself.
Above: A look inside the hull. You can see the masking tape that pulled away at each form, staying with the hull as well as the duct-tape I used to mask off the internal stem before hot gluing it to the end form. You may also notice the tons of epoxy drips where epoxy leaked through all my loose joints between strips. Anybody know the best way to remove those rock-hard drips?
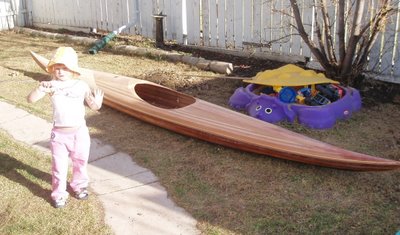
Above: My daughter shows off the partially completed kayak. Below: Both daughters try out the boat for size. I made sure that they put no pressure on the deck at all, especially the cockpit recess. I decided they could forgo the life jackets this time around.

With a look at everything in the sunlight and having satisfied my curiosity regarding what it might look like when complete, I turned the forms around on the stands and put the deck back on the forms. I have a bit more sanding to do to remove excess dookie schmutz/epoxy filler on the deck (seen as a brown splotch near the stern in the second photo above) but I should be able to glass that on the weekend (Sunday?). The hull is now sitting on the same cradles used to support it while I stripped the deck so that I can work on smoothing the inside and preparing it for glass. Perhaps I'll be able to do that at the same time as the deck's topside.
Monday, April 24, 2006
Fiberglass, Stage I
I had a very satisfying moment late Saturday night. In the final preparations prior to fibreglassing the hull, I wet down the hull with a damp rag. This brought out the colours of the cedar from the dull tan colours I've grown familiar with, to vibrant rich browns ranging from deep chocolate to bright amber and that beautiful cedar colour that people love. It was amazing.
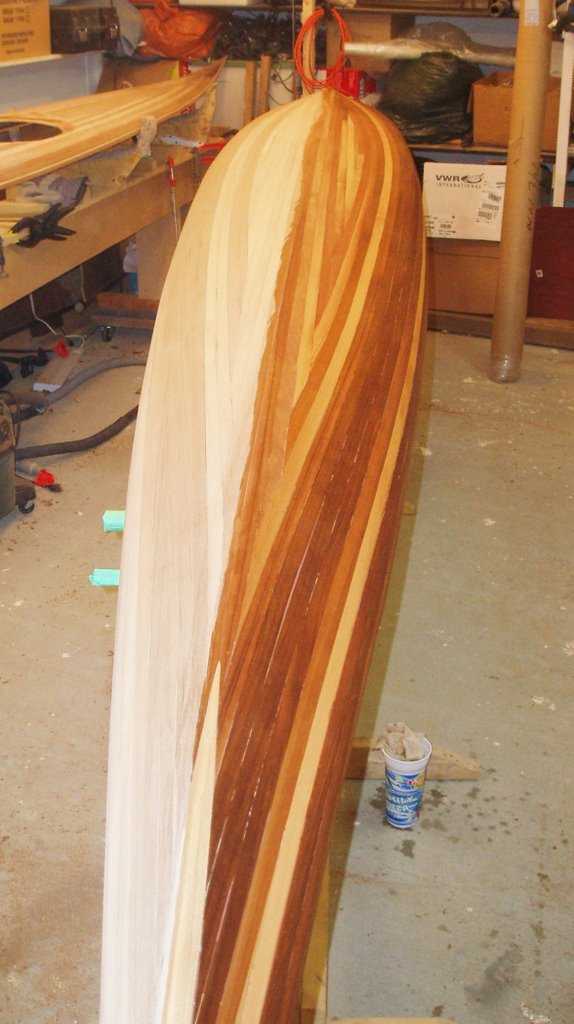
It was about


The above photo shows the hull supported on the forms & internal strongback, which in turn is supported on the stands. The deck has been removed from the forms for the moment and is sitting in the background. I'll put the deck back onto the forms prior to fibreglassing.
Early the next morning I gave the hull a final sanding with 120 grit paper and wiped it down with acetone to remove the dust and any contaminats. With the aid of Rob & Martin (the latter of Kisseynew Canoe Co.), we began the task of fibreglassing the hull. Initially, I was going to lay on 3 layers of fibreglass: a full layer of 6 oz cloth, an additional layer of either 4 or 6 oz over the central bottom area (the football), and another layer of either 4 or 6 oz along the keel line towards the stems. Martin cautioned me against this approach, feeling that it would add a lot of weight, but not much strength or abrasion resistance (my main reason for the additional layers). Instead, we used the full layer of 6 oz cloth with a strip of the same approximately 4” wide along the entire length of the boat. After some deliberation, we opted not to put the smaller piece on top as suggested in Nick’s book, but rather to hide it underneath the larger sheet. In the end, I believe we were correct to do it this way, as I had a very smooth transition at the edge of the lower layer rather than a step which can be sanded into as described in the book.
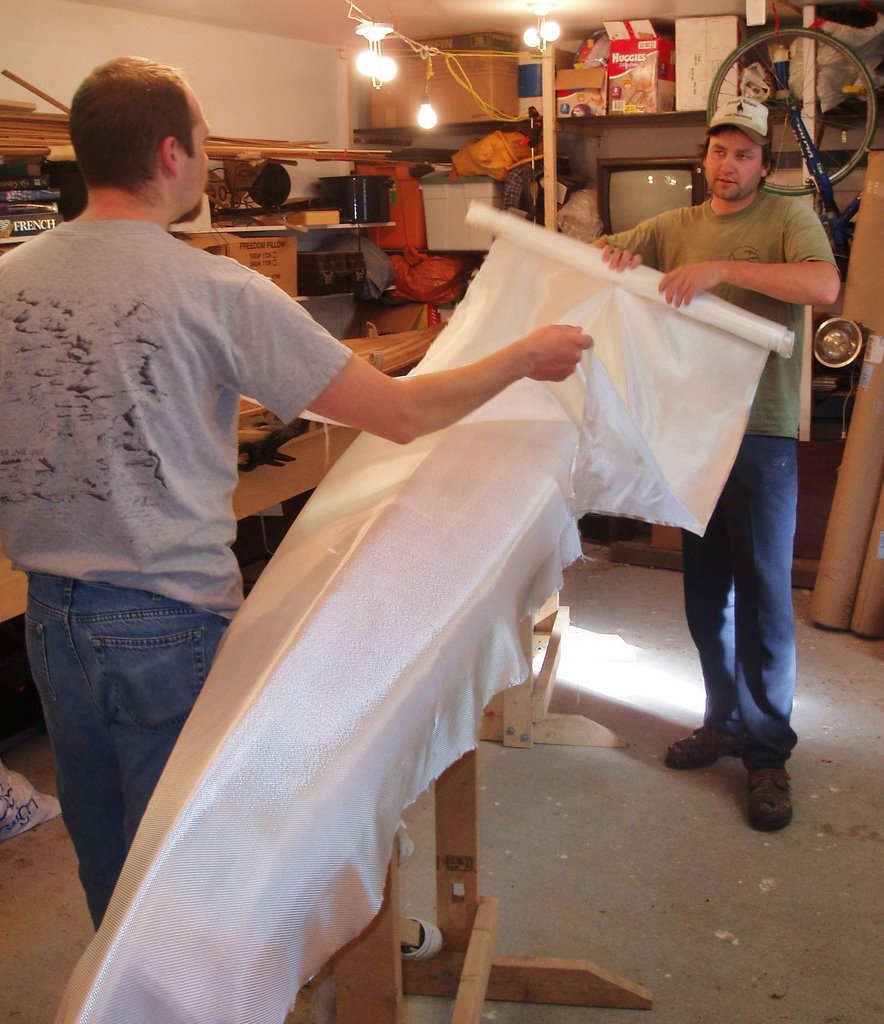
The above photo shows Martin & I rolling out what is to become a second layer of cloth. In the photo below, we're probably discussing the merits of various quantities of cloth.

The fibreglassing went well I think. Martin pumped & mixed small batches of epoxy while Rob & I brushed it on with paint brushes to wet out the cloth, working from bow to stern. As we did this, Martin kept watch to ensure we were doing things correctly and keeping a watch for areas where the wood had soaked up much of the epoxy. We then squeegeed off the excess resin, again working bow to stern, just as the epoxy began to thicken. It would seem that I was not as efficient at this as was Martin. While sanding later I could tell the difference between which areas he had squeegeed and which I had. The areas he had done were largely flat and even. The areas I had done were less so. I think I did not remove sufficient resin in some areas as there were hills and valleys (albeit slight ones) present. At first I thought the hills were excess epoxy on top of the glass, but when I started to scrape & sand, I realised that the areas with visible weave were not the valleys as I first thought, but rather the hills. The areas where the glass was completely buried in epoxy were actually lower. It seems to me that the glass must have floated up on excess resin, creating the hills. Damn! That gives me something to work on for the deck I guess.

In the above photo Rob & I pour on the epoxy while Martin waits to mix up a new batch of epoxy.
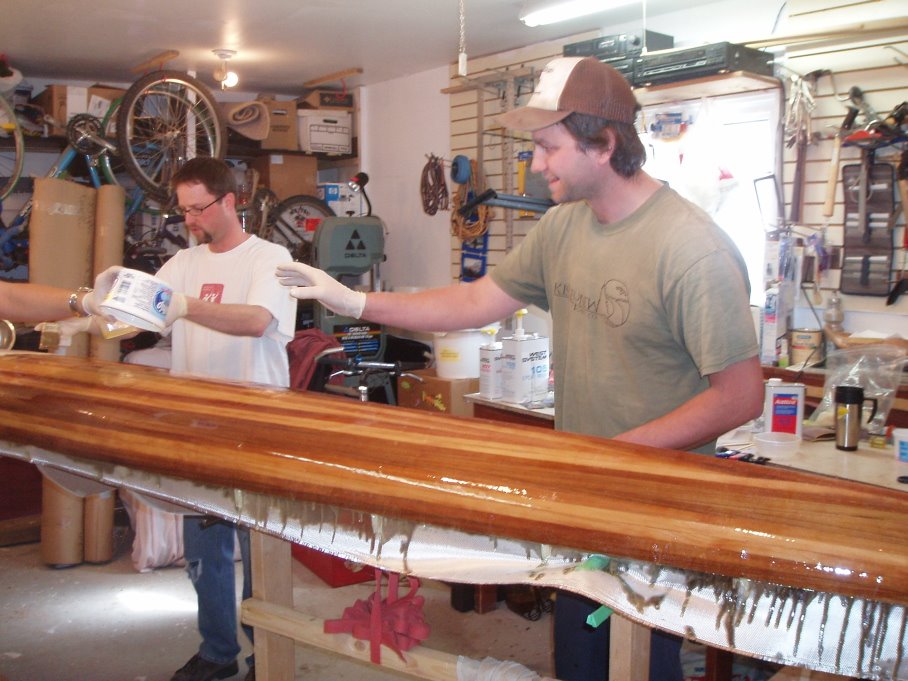
Below, Martin mixes.

Once the fibreglass had cured to a “green” stage (no longer soft, but not yet hard) approximately 4 ½ hours later, I applied a second coat of epoxy, brushing it on then removing the excess by squeegee. I then allowed this to cure overnight before spending an hour the next morning sanding the whole hull with 120 grit to take off all of the high points. I’ll have to add a 3rd coat to completely fill the weave, but I think I’ll wait until the hull and deck have been reunited and the deck seams glassed before I do that.
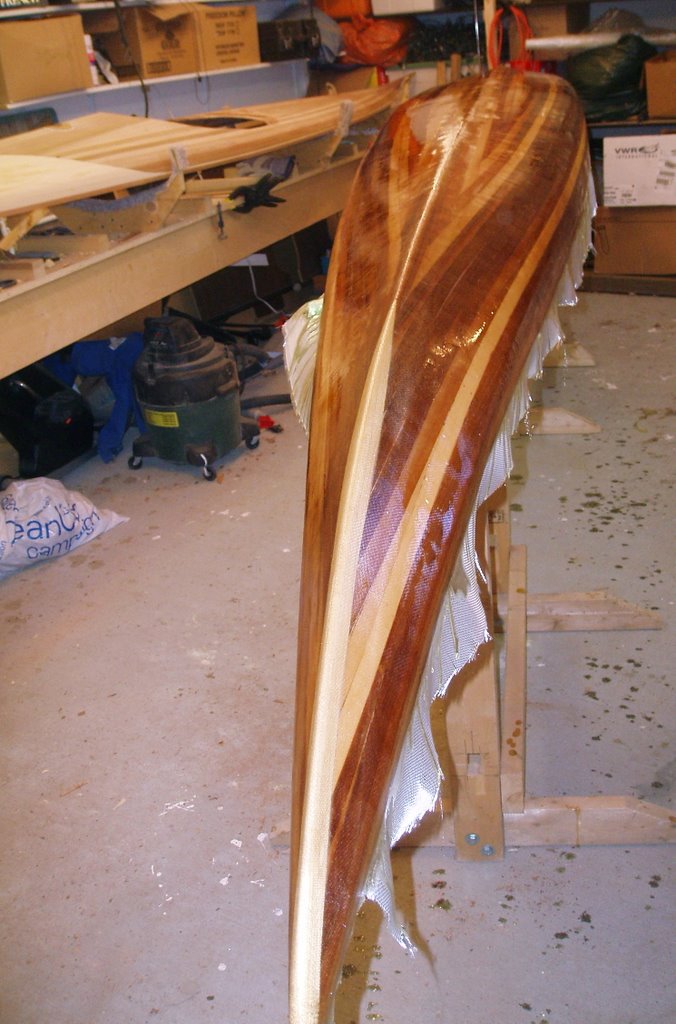
Above: The cloth overhangs the hull and helps to catch drips. Below: Once partially cured, I trimmed the excess cloth with a utility knife.
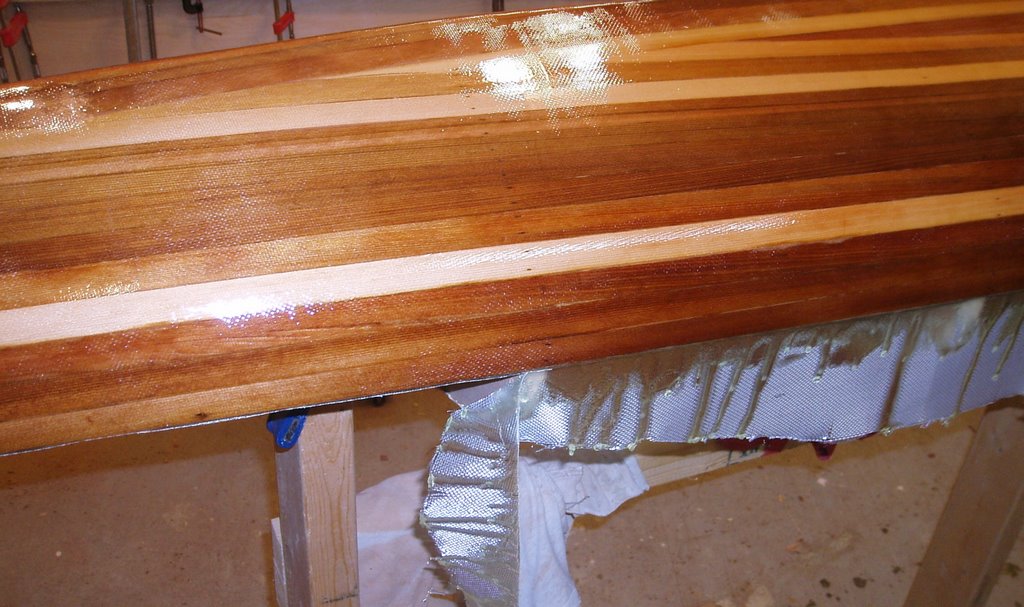 Below: One final photo for the night, this one of the ash stem on the bow.
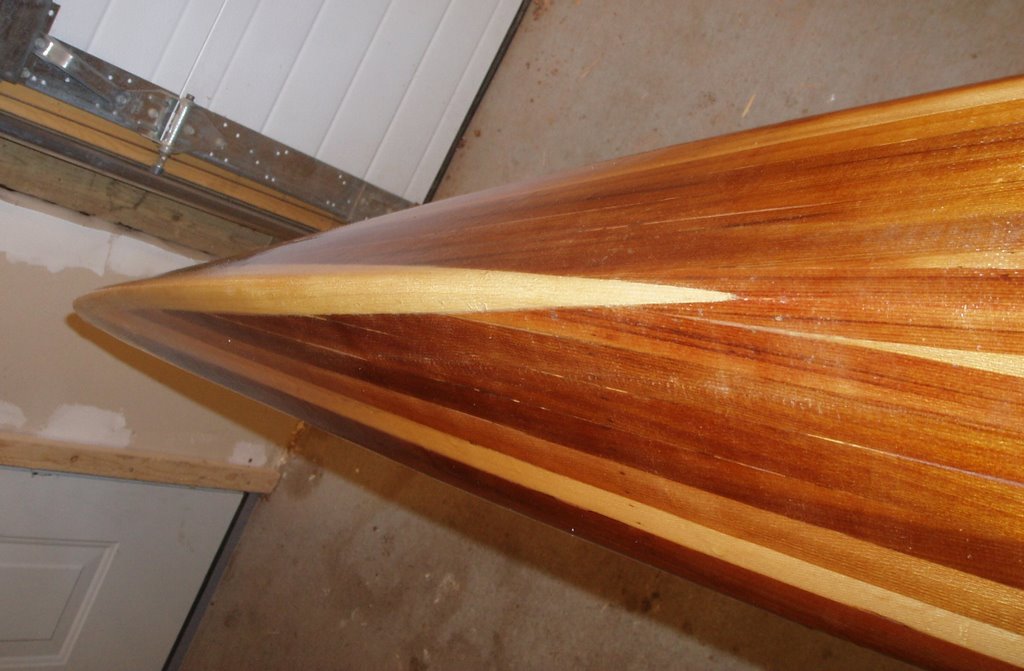
Monday, April 10, 2006
Like Wrestling a Greased Pig
I made some more progress over the past week, having made a big push in order to try to get ready for fiberglassing by yesterday (Sunday) morning. I didn't get that far, but at least I'm closer.
I had filled all the gaps on the deck with thickened/coloured epoxy, and I did the same for the gaps in the hull. I then set about scraping all the excess epoxy & thickener off. Well, that has turned out to be quite a chore. I have sanded, scraped (with a sharp paint scraper and with cabinet scrapers), planed in an effort to remove this rock-hard crap. {For future reference: it's probably way easier to do this when the epoxy is in the "green" stage of curing rather than the "granite" stage.} I eventually got all of the extra dookie schmutz (that's the technical term) off of the hull, only to have revealed more gaps in the process. Frankly, I think I'd best leave those alone before things start getting worse. I am only half done cleaning up the excess dookie schmutz from the deck.
I also attempted to get those stems laminated into place. I had wanted to make use of some walnut I had laying around (cutoffs bought from the local Habitat Re-Store) so I cut it into approximately 1/8" x 1" x 3-4' strips on the band saw. These strips were pretty uneven in their thickness and were far from smooth, but I figured they oughta be good enough to do the job of protecting the stems from wayward rocks. As mentioned in my last post, I steam bent them, and taped them in place to dry. I later decided that the job of bending was pretty unsatisfactory at the tips where the bend is greatest. It was hard to get them to bend just the right way and have them align well and remain clamped in place on a rounded tapered surface. I decided instead to try ash, since it is renowned for being easy to bend, and is well suited to the job of protecting the softer cedar while being easy to carve to match the shape of the boat. I went to my local Windsor Plywood and picked up a 4/4 6" x 4' piece of ash and another of walnut. While there, I paid a few extra dollars and had them cut the ash into 1/8" strips and they did a MUCH nicer job than I did on the bandsaw. Before using the ash strips, I decided it was worth a try to cut a solid piece of walnut to fit, rather than attempting to bend wood. I made a template out of cardboard and transferred the shape to the walnut and cut it out on the bandsaw. The fit needed tweaking, but I found working on the concave curve to be difficult, so I turned my attention instead to using the ash strips. In order to make handling the strips manageable, I taped one end of 6 strips together, then taped this bundle to the keel on the bottom of the hull. I then bent the strips to the keel and taped the strips in place as I went. Once the curve became greater near the tip, I used the heat gun to soften the wood fibers and allow the wood to bend more. What I found with my (mis)application of this technique was that I could create a very sharp bend in the wood (a sharp 90 degree bend was easy), but it was hard to get the wood to bend gradually over a short distance. This probably was a factor of my inexperience. Regardless, I got the wood bent acceptably to match the curve of the stem and taped & bungeed in place until it could cool. With the wood pre-bent in this manner I then mixed up some dookie schmutz using epoxy and the 406 Colloidal Silica to create a mayonnaise consistency glue and painted this on to each side of the wood strips, stacked this up then attempted to wrestle this slimy greased up mess onto the bow stem, taping it in place with fiber-reinforced tape. This proved to be a bit tricky, as two gloved hands were required to keep the pile of strips in place, another hand was needed to wrap the tape around, and another hand was needed to cut the tape with a knife. The whole operation is complicated by the fact that the substrate being attached to is round and tapered. Add to this the fact that my rubber gloves kept disintegrating (if Home Hardware made condoms, I think they'd have an awful lot of paternity suits on their hands; if the gloves I used at work were this crappy, I'd probably have died of strep pneumonia or a staphylococcal infection by now), and I was not a happy camper. However, I managed it by myself and soon left the taped, bungeed, strapped conglomeration alone to cure. Thankfully, Rob was able to come by in the evening and this made the repeat process on the stern a lot easier.
I shoulda had a look at this guy's blog - maybe those inner tube straps would have worked better than the tape.
Here's a picture or two of the stern stem laminations taped in place. I used the green masking tape to mask off the area so that there would be less epoxy to clean off of the hull. This is the one Rob helped me with; the one I did alone wasn't quite so neat.

 Once I removed the strapping tape a problem at the stern tip became evident:
 Looks pretty bad, doesn't it? It seems I didn't have things aligned well enough at the tip and/or it wasn't taped in place tight enough. I began shaping the stem with the block plane anyway.
 Note that I masked off the hull too close to the stems, trapping green masking tape under the stem edges. This was all planed away in the process of shaping the stem so it's not so bad as it looks. The next couple of images show how I intend to fix the problem of the crappy lamination & bends. I'll cut away all of the poorly laminated section, leaving a gently curving squared off area on which I'll glue some new pieces.
 Once those pieces are glued in place, I'll shave them down to match the flowing lines of the stern.
  The only thing I'm not too sure about is how in the heck I'm going to clamp those suckers in place until the glue sets. One thing I thought of was to maybe use thick cyanoacrylate glue with accelerator so that they wouldn't need to be held for long. Anybody know if this will work? Is it strong enough to withstand the abuse that planing would put on the glue?

I had filled all the gaps on the deck with thickened/coloured epoxy, and I did the same for the gaps in the hull. I then set about scraping all the excess epoxy & thickener off. Well, that has turned out to be quite a chore. I have sanded, scraped (with a sharp paint scraper and with cabinet scrapers), planed in an effort to remove this rock-hard crap. {For future reference: it's probably way easier to do this when the epoxy is in the "green" stage of curing rather than the "granite" stage.} I eventually got all of the extra dookie schmutz (that's the technical term) off of the hull, only to have revealed more gaps in the process. Frankly, I think I'd best leave those alone before things start getting worse. I am only half done cleaning up the excess dookie schmutz from the deck.
I also attempted to get those stems laminated into place. I had wanted to make use of some walnut I had laying around (cutoffs bought from the local Habitat Re-Store) so I cut it into approximately 1/8" x 1" x 3-4' strips on the band saw. These strips were pretty uneven in their thickness and were far from smooth, but I figured they oughta be good enough to do the job of protecting the stems from wayward rocks. As mentioned in my last post, I steam bent them, and taped them in place to dry. I later decided that the job of bending was pretty unsatisfactory at the tips where the bend is greatest. It was hard to get them to bend just the right way and have them align well and remain clamped in place on a rounded tapered surface. I decided instead to try ash, since it is renowned for being easy to bend, and is well suited to the job of protecting the softer cedar while being easy to carve to match the shape of the boat. I went to my local Windsor Plywood and picked up a 4/4 6" x 4' piece of ash and another of walnut. While there, I paid a few extra dollars and had them cut the ash into 1/8" strips and they did a MUCH nicer job than I did on the bandsaw. Before using the ash strips, I decided it was worth a try to cut a solid piece of walnut to fit, rather than attempting to bend wood. I made a template out of cardboard and transferred the shape to the walnut and cut it out on the bandsaw. The fit needed tweaking, but I found working on the concave curve to be difficult, so I turned my attention instead to using the ash strips. In order to make handling the strips manageable, I taped one end of 6 strips together, then taped this bundle to the keel on the bottom of the hull. I then bent the strips to the keel and taped the strips in place as I went. Once the curve became greater near the tip, I used the heat gun to soften the wood fibers and allow the wood to bend more. What I found with my (mis)application of this technique was that I could create a very sharp bend in the wood (a sharp 90 degree bend was easy), but it was hard to get the wood to bend gradually over a short distance. This probably was a factor of my inexperience. Regardless, I got the wood bent acceptably to match the curve of the stem and taped & bungeed in place until it could cool. With the wood pre-bent in this manner I then mixed up some dookie schmutz using epoxy and the 406 Colloidal Silica to create a mayonnaise consistency glue and painted this on to each side of the wood strips, stacked this up then attempted to wrestle this slimy greased up mess onto the bow stem, taping it in place with fiber-reinforced tape. This proved to be a bit tricky, as two gloved hands were required to keep the pile of strips in place, another hand was needed to wrap the tape around, and another hand was needed to cut the tape with a knife. The whole operation is complicated by the fact that the substrate being attached to is round and tapered. Add to this the fact that my rubber gloves kept disintegrating (if Home Hardware made condoms, I think they'd have an awful lot of paternity suits on their hands; if the gloves I used at work were this crappy, I'd probably have died of strep pneumonia or a staphylococcal infection by now), and I was not a happy camper. However, I managed it by myself and soon left the taped, bungeed, strapped conglomeration alone to cure. Thankfully, Rob was able to come by in the evening and this made the repeat process on the stern a lot easier.
I shoulda had a look at this guy's blog - maybe those inner tube straps would have worked better than the tape.
Here's a picture or two of the stern stem laminations taped in place. I used the green masking tape to mask off the area so that there would be less epoxy to clean off of the hull. This is the one Rob helped me with; the one I did alone wasn't quite so neat.

 Once I removed the strapping tape a problem at the stern tip became evident:
 Looks pretty bad, doesn't it? It seems I didn't have things aligned well enough at the tip and/or it wasn't taped in place tight enough. I began shaping the stem with the block plane anyway.
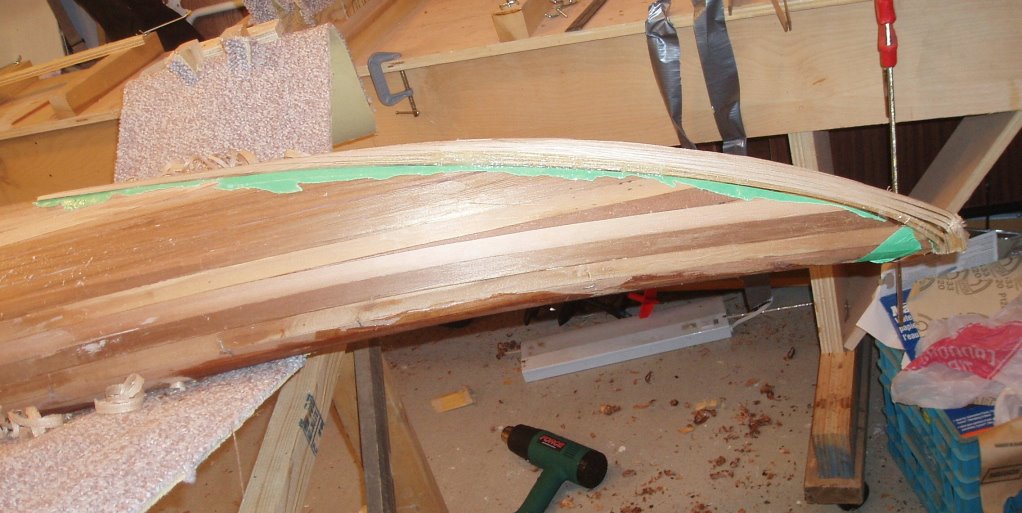 Note that I masked off the hull too close to the stems, trapping green masking tape under the stem edges. This was all planed away in the process of shaping the stem so it's not so bad as it looks. The next couple of images show how I intend to fix the problem of the crappy lamination & bends. I'll cut away all of the poorly laminated section, leaving a gently curving squared off area on which I'll glue some new pieces.
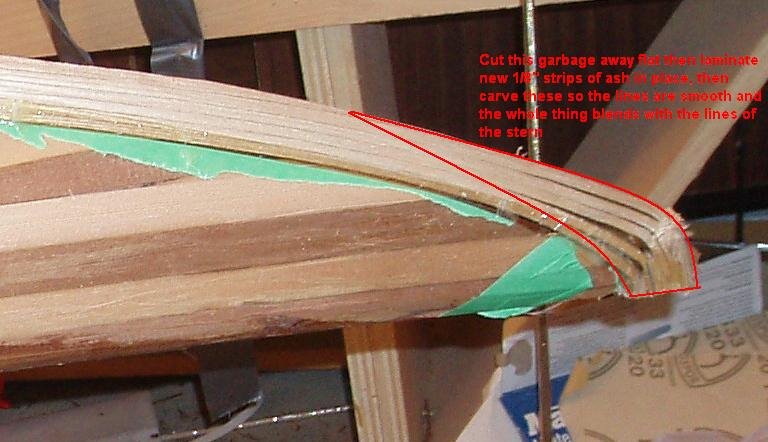 Once those pieces are glued in place, I'll shave them down to match the flowing lines of the stern.
 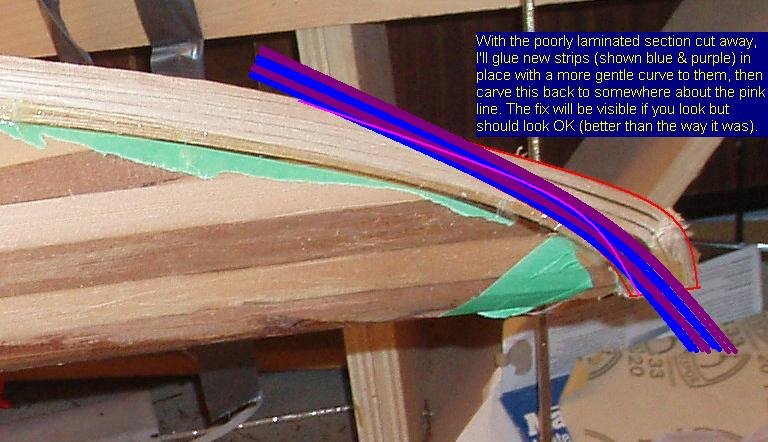 The only thing I'm not too sure about is how in the heck I'm going to clamp those suckers in place until the glue sets. One thing I thought of was to maybe use thick cyanoacrylate glue with accelerator so that they wouldn't need to be held for long. Anybody know if this will work? Is it strong enough to withstand the abuse that planing would put on the glue?
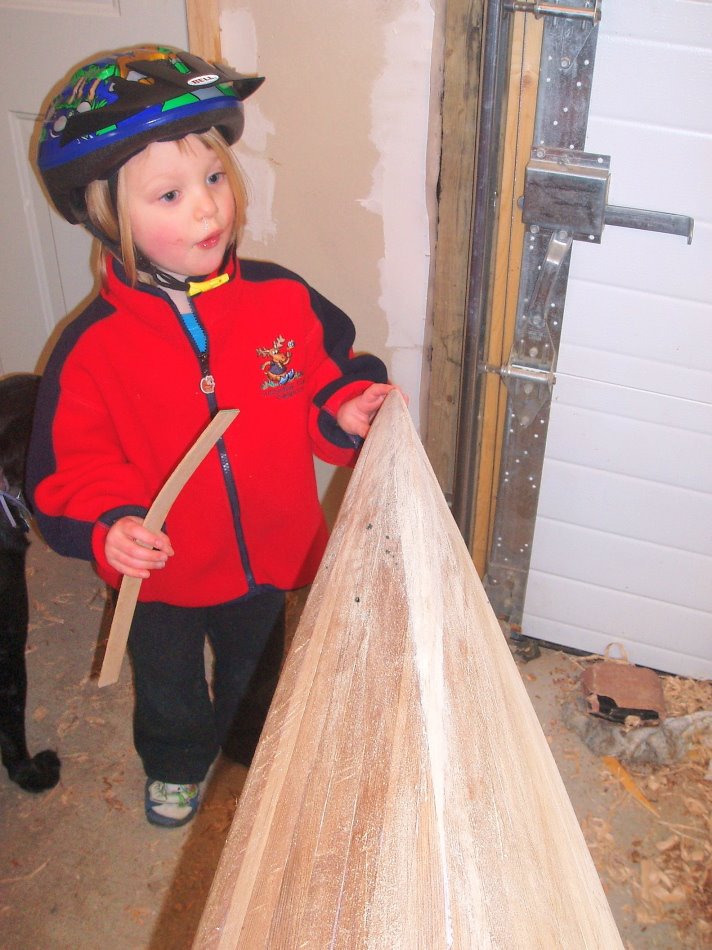
Subscribe to:
Posts (Atom)