
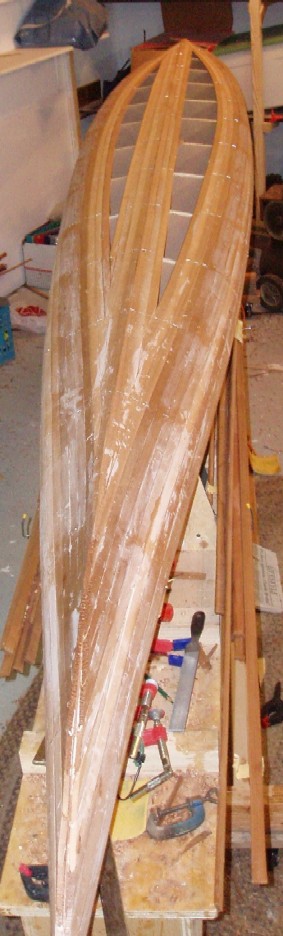
Last Monday night I finally got a bit more work done on the kayak. I am currently filling in the bottom of the boat as you can see from these photos. In the photos bright splotches appear over much of the boat. This is glue residue which remains after the excess has been wiped off. Something about the camera & flash are extremely adept at detecting this residue because it is barely visible by eye. Please believe me that it looks much better in person.
I have written previously about the joining of the tapered strips so I took a couple of photos to illustrate this, pasted in below. Click on the photos for a larger view.
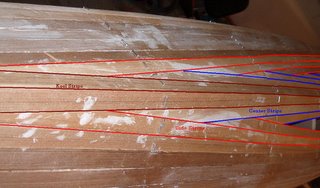
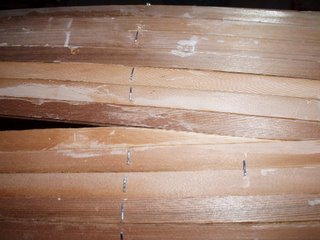
In the above photo I have added lines in order to highlight the junction between strips. A herringbone pattern emerges on each side of the kayak as stripping proceeds. Below is a close-up of the joints illustrated above.
Previously, I have posted about the cheater strips which I used in order to reduce the bend of the strips at the bow and stern. While I was taking pictures and drawing pretty lines, I decided to add a couple of photos to illustrate this part of the construction. Again, click on the photos for a larger version.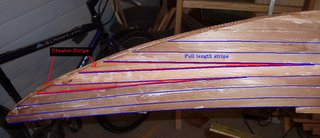
In the photo above I highlighted the normal-length strips with blue. When the blue-outlined strips were put in place I left gaps 1 strip wide at the tip, to be filled in later. The gaps were then filled in with the cheater strips, outlined in red in the above photo.
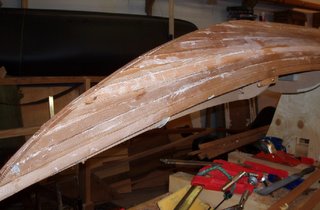
Here's a photo without any extra lines drawn on to show off that sexy bow. The ends of the strips where they overhang the bow were sawed off and things cleaned up a bit with a small block plane. Between the strips is a chunk of mahogany that forms the internal stem (see it nearly naked here), a 3/4"x ~1" curved piece of wood to which the ends of the strips are glued. Just a sliver of that piece of wood is starting to show here. Later, I'll plane things down farther until more of the stem is exposed then I'll glue on an external stem made out of some hardwood laminations (mahogany? ash? cherry? walnut? a combination?). To see what the external stem should look like see this one that Charles Leach did using a contrasting wood. There are also a couple of nice illustrative photos here. But anyway, that's all a long way off yet. Back to the hull .....
No comments:
Post a Comment