With the help of my brother on Sunday, I was able to fiberglass the deck then the inside of the hull. The deck fiberglassing went quite well and in the end I was happy with the way it turned out, smooth with a minimum of excess epoxy. One obstacle that caused us a certain amount of grief was the coaming area. While I was doing most of the mixing and applying the epoxy to one side, my brother Ken applied the epoxy to the other side and as he went along, a wrinkle developed in the cloth. This came to a head at the cockpit. We had troubles resolving this wrinkle and also with trying to get the glass to lie flat and make the turn up the coaming riser. The glass repeatedly wanted to pull away from the fillet at the base of the riser. In order to rid ourselves of that nasty wrinkle, we cut the cloth, allowing the glass to overlap itself beside the cockpit an inch or two and eliminating the wrinkle. The overlap created a bit of a step which I later scraped away quite easily. In retrospect, this cut was definitely the right thing to do. The glass wanting to pull away from the riser fillet was a bit more tricky and required a lot of babysitting to get it to stay put until cured. There are still a few bubbles there but I won't tell if you don't. In retrospect, it probably would have been better not to have put in the riser until after the deck was glassed, then to add glass to the riser afterwards, extending that glass down onto the deck. My reason for doing it the way I did was so that I would gain the strength of having continuous glass from the deck and up the riser, and it seemed like it be a bit simpler rather than spreading it out over two glassing operations. The other, and perhaps main reason I installed the riser prior to glassing the deck was that I had time to do so since I couldn't do the deck fiberglass last weekend with my youngest daughter being sick.
 Above: The 1/8 birch ply coaming that caused some grief while glassing, and the region of where the wrinkle was cut out. Below: A close-up of the cut and overlapped region.

One spot I was a bit concerned about was on the fore deck ahead of the cockpit. I inserted into the deck a hand-carved feature (which I'll discuss further in some other posting) which had a fair bit of relief to it. My concern was that the hollows of the carving would trap air and not fill properly with epoxy (although the carving had been previously coated and the hollows were partially filled). We took care of this area by lifting the cloth and filling the hollows of the carving with unthickened epoxy, then laying the cloth back down, and continuing to brush on the epoxy on the deck as we had been doing. It seemed to tun out fairly well with only a couple of smallish bubbles trapped under the glass (I may try to get these out with a syringe & needle). I must be getting better at squeegeeing because this went much better this time than on the hull. All in all I'm extremely happy with how the deck has turned out so far.
 Above: The glassed deck in the foreground, the hull in the background.
Now the inside of the hull on the other hand .... Well let's just say it's a good thing it'll be under the deck and if someone examining the boat has the audacity to stick their head into the hatch to have a look, I'll just hit them over the back of the head with a greenland paddle. I didn't fill the gaps inside the hull and I didn't sand to the same level of perfection as on the outside. I chose to get aggressive with those epoxy drips and that meant attaching a 36 grit sanding disc to the drill and going after them. For the record, 36 grit will chew through cedar and anything else in it's way VERY quickly. Although I never went all the way through, there is the occasional divot (read gouge). I sanded the hull to 80 grit with the ROS to take most of the gouges from the 36 grit disc out, particularly in the cockpit area. Working in the concave and confined regions of the bow and stern was a bit tricky and I didn't spend a lot of time there to fair things out. I used a fillet in these regions so that the v of the bottom and the stems were rounded out to allow the glass to lay into the hollow a bit better. Getting the glass to stay tight in at the bottom of the stems was still a bit difficult, with the glass wanting to pull up and away. One thing I thought of but didn't try was to use bags of sand in these areas to weigh down the glass, pushing it tight into the cavities. This method would have the added benefit of squeezing out the excess epoxy. I also found squeegeeing inside the hull to be difficult. It seemed that no matter how careful I was, the squeegee would pull the cloth away from the relatively sharp corners at the chines (imagine the troubles I might have with a hard-chined boat!). As a result of this combined with the difficulty of squeegeeing in the confined space at the bow and stern, I am sure I have more epoxy in the hull than I should. Incidentally, I added a second layer of 6 oz. glass in the bottom of the cockpit area (layed out underneath the larger glass cloth sheet covering the rest of the hull).
Below: A pretty pattern of swirl marks left behind by the 36 grit disc on the drill. Most of these were sanded out in the cockpit area but these shall remain for eternity.

In addition to the troubles already mentioned, in the hull I also had bubbles forming from air coming out of the wood itself. I had heated the shop to 20C overnight and things were a nice steady temperature by the morning and the heat was turned off (everybody knows you want the temperature to be steady or dropping while doing the fiberglassing). We started our epoxy work in the morning on the deck and after lunch moved to the hull. As we worked on the hull, we noticed it starting to get rather warmish in the shop. The weather outside had risen to a beautiful 20C in bright sunshine, so that may have been helping to warm the shop, but I didn't think that it would make that much difference in a well-insulated shop with a concrete floor that is still holding the cool of a Canadian winter in it's mass. I am therefore led to wonder if the rising temperature was due, in part at least, to the exothermic reaction of curing epoxy. Through the afternoon the temperature inside the shop rose to 24-25C. The temperature rise produced the promised result - bubbles formed under the glass as expanding gasses escaped the wood but then with the wood sealed on the outside, were trapped in thickening epoxy on the inside. Many of these bubbles did actually find their way to the surface, but at least a few did not despite my encouragement. I'm not overly concerned about their presence, but I'm glad it happened on the inside of the hull and not on the topside of the deck.
In the end, I'm not too concnerned about the imperfections inside the hull. My wife suggested the extra bubbles should be considered flotation and I think that's a good approach at this point. The glassing of the underside of the deck should go a bit more smoothly - the curvature is much less than the hull and there are no tight confines to work within and no chines to deal with. Also, the gaps between strips are much less than occured on the hull (again due at least in part to less curvature) so the surface is smoother. My peak this morning under the deck also indicated that there are far fewer epoxy drips coming through to deal with. I think I'll put the 36 grit sanding disc away and stick to hand sanding or a random orbital sander with at least 80 grit paper. For glassing underneath the deck I'll be using 4 ounce West Systems cloth, doubled (tripled?)around the cockpit to provide some extra strength for sitting on the deck while getting in and out.
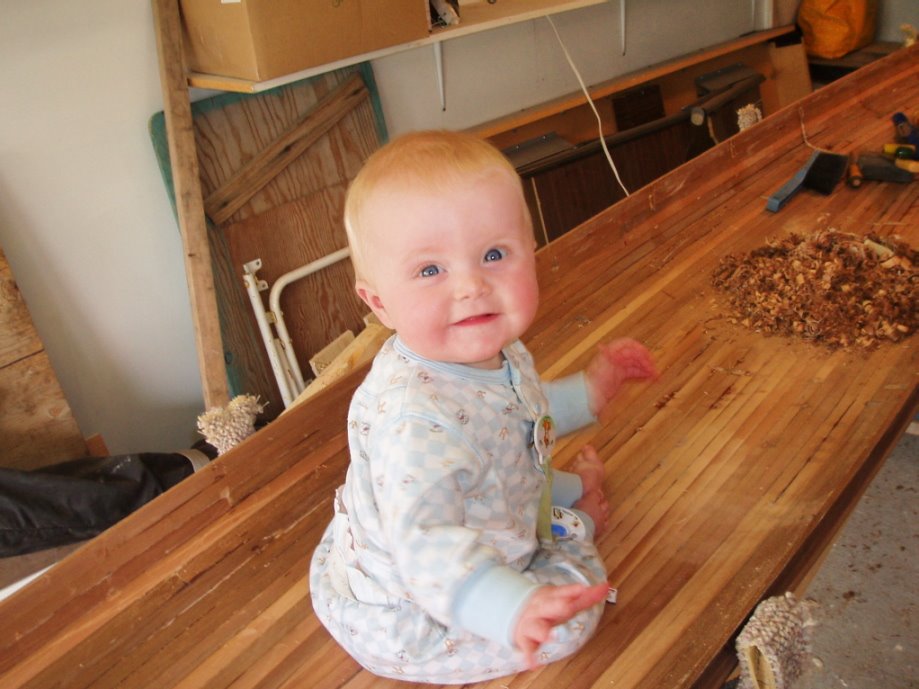
Below: One final photo for the night - taken on Saturday when my daughter was helping me sand/scrape/grind the inside of the hull in preparation for fiberglass. 


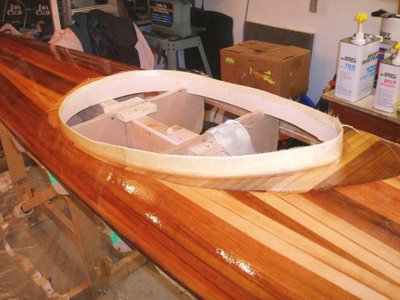
 Above: The 1/8 birch ply coaming that caused some grief while glassing, and the region of where the wrinkle was cut out. Below: A close-up of the cut and overlapped region.
  One spot I was a bit concerned about was on the fore deck ahead of the cockpit. I inserted into the deck a hand-carved feature (which I'll discuss further in some other posting) which had a fair bit of relief to it. My concern was that the hollows of the carving would trap air and not fill properly with epoxy (although the carving had been previously coated and the hollows were partially filled). We took care of this area by lifting the cloth and filling the hollows of the carving with unthickened epoxy, then laying the cloth back down, and continuing to brush on the epoxy on the deck as we had been doing. It seemed to tun out fairly well with only a couple of smallish bubbles trapped under the glass (I may try to get these out with a syringe & needle). I must be getting better at squeegeeing because this went much better this time than on the hull. All in all I'm extremely happy with how the deck has turned out so far.
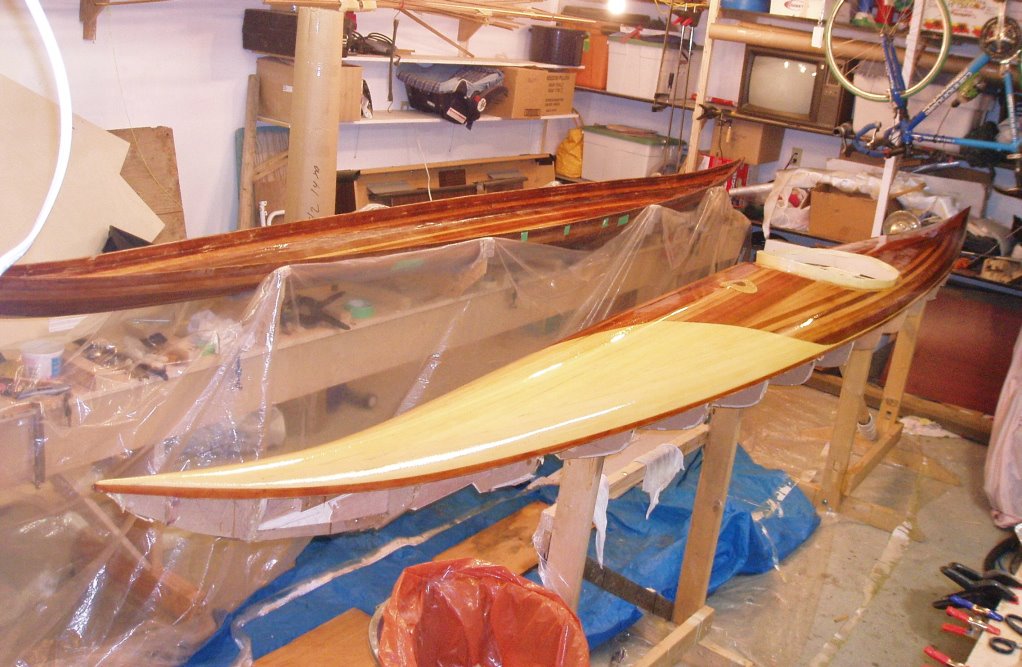 Above: The glassed deck in the foreground, the hull in the background.