 |
| Screen capture of the Lee Valley Newsletter. |
Showing posts with label Boatbuilding. Show all posts
Showing posts with label Boatbuilding. Show all posts
Thursday, January 23, 2014
Nick Offerman, Actor & Boatbuilder
I've posted before about Nick Offerman when he was on David Letterman talking about canoe building. Now he's really made it big, appearing in the Lee Valley newsletter. Go read the interview for yourself at http://www.leevalley.com/en/newsletters/Woodworking/8/3/Article2.htm


Friday, August 17, 2012
Adaptive Paddling
This summer I had the privilege of paddling with a fellow that is a c5-6 quadriplegic. It was a 2 hour parent + kid class and he was there along with his wife and daughter. I surely learned more that day from that family than they did for me. I look forward to continuing that learning for both of us and hope that we get to paddle together again.
He had a kayak that was adapted with a seat and outriggers much like the one that is shown in this video. In addition, he had special connectors that connected his hands (wrists, actually) to the paddle. He mentioned that the new connectors he was using were a great improvement over what he used to do, which was to duct tape his hands to the paddle.
The video, featuring a paraplegic paddler and his adapted cedar-strip kayak is very inspiring.
Enjoy!
He had a kayak that was adapted with a seat and outriggers much like the one that is shown in this video. In addition, he had special connectors that connected his hands (wrists, actually) to the paddle. He mentioned that the new connectors he was using were a great improvement over what he used to do, which was to duct tape his hands to the paddle.
The video, featuring a paraplegic paddler and his adapted cedar-strip kayak is very inspiring.
Enjoy!
Tuesday, November 22, 2011
What A Great Stripper!
I found this today via Twitter on Water Fun Cartoons. It's a web site with a weekly paddling cartoon so go check them out. This one's for the boatbuilders:


Friday, September 30, 2011
Dave Learns About Boatbuilding
David Letterman learns about boatbuilding and woodworking from "Parks and Recreation" actor, Nick Offerman. OK, I had no idea who that was, or what Parks and Recreation was, so I had to look it up.
Monday, May 16, 2011
Boat Building Music
Thanks to Rider over on the WCP forum for pointing out this video to the paddling community. I love Matt Mays & El Torpedo!
Matt Mays & El Torpedo "Building a Boat"
Matt Mays & El Torpedo "Building a Boat"
Friday, October 23, 2009
Paddles
This likely to be the final instalment in my series of posts moving material off of my about to be deleted Geocities site (Geocities is schduled to shut down permanently on October 26th). Some of the text has been edited & updated from the original.
A Greenland Paddle
I started building a Greenland-style kayak paddle several years ago and it was shelved shortly after gluing up the central part of the blank. Years later I came back to the project to finally complete it. The paddle is made of cedar and poplar laminated together such that the poplar forms the outer part of the shaft area (loom) and extends through the length of the blades. The blades are made from additional pieces of cedar glued to the central shaft and each of the four blades should have been made from the same piece of wood. Unfortunately, I forgot why I had been hanging onto those pieces of cedar and at some point I turned one of them into a toy canoe (shown in an earlier post). Since I no longer had a piece of cedar long enough, I glued together two shorter pieces. I should have used a scarf joint and glued them up properly, but instead I simply butted them together and glued them to the shaft. The result is a weak point in terms of aesthetics and possibly also in terms of structural strength. However, lack of strength has yet to become a problem witht the finished paddle. The excellent and free plans used for this paddle were those by Chuck Holst. The picture below was taken after carving. I waited to try it on the water before adding a finish.
 The first thing you will notice when you look at the picture is that it doesn't look like most kayak paddles you may have seen. It is such a different style and that is one reason I wanted to build one - just to see what they are like to paddle with. The following is quoted from the introduction in Chuck Holst's plans:
Kids Paddles

 I have made two small beaver-tail style paddles scaled down to be suitable for small children. The plans I used were scaled down from those in the book Canoe Paddles - A Complete Guide to Making Your Own by Graham Warren & David Gidmark. These paddles are very easy to carve out of cedar and one can be made quite quickly. The latest one that I have finished was for my daughter & I completed that shortly before we went on a canoe trip when she was 3. The graphic with the seal is just clip-art printed with an ink-jet printer onto a plastic overhead sheet. I cut out the graphic and used epoxy to glue it onto the face of the paddle. I then fibre-glassed over top and the graphic is now entombed on the paddle blade. This method may not be suitable for something which may flex since any flexing could possibly result in separation of the layers above and/or below the plastic. However, it has stood up to 4 years of abuse from two kids just fine. On the other side I practiced my wood burning technique to draw a flower & my daughter's name. With the whole blade covered in fibreglass, it is quite strong and has withstood much abuse. (These pictures were taken after a season worth of use and therefore there are numerous cosmetic scratches.)
Canoe Paddle
 This is a "voyageur"-style paddle I built several years ago based on plans from the book Canoe Paddles - A Complete Guide to Making Your Ownby Graham Warren & David Gidmark. The paddle is laminated from maple and ash gleaned from the scrap bins of the local Habitat Re-Store. Both woods are strong and able to flex without breaking. Due to the strength inherent in the woods used, I was able to make the blade and shaft both quite thin and as a result the weight of this paddle is very reasonable. The tip has a mahogany insert running across the width in order to protect the tip from abuse and to prevent the laminations from splitting.
This paddle is LONG. The blade alone is approximately 30" long and as a result, this paddle is for use in deep water only. I think I also made the handle a bit too long for me. Unfortunately, it is tough to use in the shallow South Saskatchewan River and I have never really gotten the hang of using this paddle effectively. It sure looks nice though. (I need to take a better picture where the minor imperfections aren't magnified such that they seem far more prominent than they do in real life.)
2009 Update: I never really got the hang of using this paddle, it simply seemed too long. However, in 2007 my wife & I did an 7 or 8 day trip on Lac La Ronge & the Churchill River and I forgot my usual touring paddle (a basic Grey Owl bent-shaft) at home. Thus I was "forced" to use my voyageur paddle (we still had one more spare with us - on of those awful plastic & aluminum things). After several hours I started to finally develop a relationship with this paddle. Before long, I came to love it. It's light weight, thin edge, generous flex are endearing features. With such a long blade, it does best when the blade remains underwater, being knifed forward in and underwater recover stroke such as the "Indian" or "Canadian" strokes. I slowed down my paddle stroke, but put more power behind them, and the recovery becomes part of the correction to maintain a course.
A Greenland Paddle
I started building a Greenland-style kayak paddle several years ago and it was shelved shortly after gluing up the central part of the blank. Years later I came back to the project to finally complete it. The paddle is made of cedar and poplar laminated together such that the poplar forms the outer part of the shaft area (loom) and extends through the length of the blades. The blades are made from additional pieces of cedar glued to the central shaft and each of the four blades should have been made from the same piece of wood. Unfortunately, I forgot why I had been hanging onto those pieces of cedar and at some point I turned one of them into a toy canoe (shown in an earlier post). Since I no longer had a piece of cedar long enough, I glued together two shorter pieces. I should have used a scarf joint and glued them up properly, but instead I simply butted them together and glued them to the shaft. The result is a weak point in terms of aesthetics and possibly also in terms of structural strength. However, lack of strength has yet to become a problem witht the finished paddle. The excellent and free plans used for this paddle were those by Chuck Holst. The picture below was taken after carving. I waited to try it on the water before adding a finish.
The first thing you will notice when you look at the picture is that it doesn't look like most kayak paddles you may have seen. It is such a different style and that is one reason I wanted to build one - just to see what they are like to paddle with. The following is quoted from the introduction in Chuck Holst's plans:Apart from its romantic association with the people who taught Europeans to kayak and to roll, the narrow-bladed Greenland paddle is popular because it is easy to brace and roll with and is not very susceptible to strong winds. Also, because it slips a little at the beginning of a stroke, it is easier on the muscles, and thus less fatiguing on day-long trips than wide-bladed “Euro”-style paddles. A further benefit for northern kayakers is that the Greenland paddle is adapted for paddling in freezing conditions. The shoulders where the blades and loom meet make an ice-coated loom easier to grip, while the narrow ends of the blades, which are immersed in water while paddling, offer an ice-free grip for emergency braces and rolls. The Greenland paddle is also popular because it is very easy and inexpensive to make with simple tools in a home workshop, which is the subject of this article. Working entirely with hand tools, it is possible to make a Greenland paddle with less than $10 worth of materials and 24 hours of labor.I spent more than $10 on materials and more than 24 hours in the construction, but it was fairly inexpensive and once I got around to actually doing it, the project went fairly quick. Those who paddle with these "sticks" get pretty passionate about it. I haven't put a huge number of miles on the paddle, but I have used it a fair bit and really like it. The first impression was that it really wasn't all that different from the more familiar modern paddle. It still catches a fair bit of water, I can accelerate quickly and can paddle in a "normal" manner just fine. I like the long reach I have with it when I want to do a sweep stroke. Although I've attempted rolls with it, I can't say that it works any better, or any worse, in that department. So far, my rolling has not been terrible effective (one of these days I'll take some lessons on that). I should probably build a couple more greenland paddles and reduce the weight as well as possibly trying out different lengths.
Kids Paddles
I have made two small beaver-tail style paddles scaled down to be suitable for small children. The plans I used were scaled down from those in the book Canoe Paddles - A Complete Guide to Making Your Own by Graham Warren & David Gidmark. These paddles are very easy to carve out of cedar and one can be made quite quickly. The latest one that I have finished was for my daughter & I completed that shortly before we went on a canoe trip when she was 3. The graphic with the seal is just clip-art printed with an ink-jet printer onto a plastic overhead sheet. I cut out the graphic and used epoxy to glue it onto the face of the paddle. I then fibre-glassed over top and the graphic is now entombed on the paddle blade. This method may not be suitable for something which may flex since any flexing could possibly result in separation of the layers above and/or below the plastic. However, it has stood up to 4 years of abuse from two kids just fine. On the other side I practiced my wood burning technique to draw a flower & my daughter's name. With the whole blade covered in fibreglass, it is quite strong and has withstood much abuse. (These pictures were taken after a season worth of use and therefore there are numerous cosmetic scratches.)Canoe Paddle
This is a "voyageur"-style paddle I built several years ago based on plans from the book Canoe Paddles - A Complete Guide to Making Your Ownby Graham Warren & David Gidmark. The paddle is laminated from maple and ash gleaned from the scrap bins of the local Habitat Re-Store. Both woods are strong and able to flex without breaking. Due to the strength inherent in the woods used, I was able to make the blade and shaft both quite thin and as a result the weight of this paddle is very reasonable. The tip has a mahogany insert running across the width in order to protect the tip from abuse and to prevent the laminations from splitting.This paddle is LONG. The blade alone is approximately 30" long and as a result, this paddle is for use in deep water only. I think I also made the handle a bit too long for me. Unfortunately, it is tough to use in the shallow South Saskatchewan River and I have never really gotten the hang of using this paddle effectively. It sure looks nice though. (I need to take a better picture where the minor imperfections aren't magnified such that they seem far more prominent than they do in real life.)
2009 Update: I never really got the hang of using this paddle, it simply seemed too long. However, in 2007 my wife & I did an 7 or 8 day trip on Lac La Ronge & the Churchill River and I forgot my usual touring paddle (a basic Grey Owl bent-shaft) at home. Thus I was "forced" to use my voyageur paddle (we still had one more spare with us - on of those awful plastic & aluminum things). After several hours I started to finally develop a relationship with this paddle. Before long, I came to love it. It's light weight, thin edge, generous flex are endearing features. With such a long blade, it does best when the blade remains underwater, being knifed forward in and underwater recover stroke such as the "Indian" or "Canadian" strokes. I slowed down my paddle stroke, but put more power behind them, and the recovery becomes part of the correction to maintain a course.
Wednesday, October 21, 2009
A Canoe & A Kayak
Another in the ongoing saga of moving things off of my very soon-to-be-deleted Geocities site. Originally published online 3 or 4 years ago.
I built two boats in my garage in the spring of 2005. First was a Chesapeake 17 stitch & glue kayak based on the plans in the book The New Kayak Shop by Chris Kulczyki of Chesapeake Light Craft. The kayak was constructed of 1/32" birch plywood, "stitched" together with cyanoacrylate glue (aka slow-drying crazy glue). The hull was covered with a single layer of ~6 oz. fibreglass and the deck and cockpit sealed with epoxy. The second boat was a 17/6 Redbird canoe based on plans from the book "CanoeCraft" by Ted Moores. The canoe as I've built it is some sort of cross between cedar strip & dugout canoe construction. The hull was first made of cedar "strips" and the interior of the hull subsequently carved out. Again, the outside of the hull was covered with one layer of fibreglass and the interior sealed with epoxy.
OK, if you haven't yet looked at the pictures below you're probably wondering what the heck I'm talking about. The boats were 1:12 scale models. Barbie can paddle them, but that's about it. (Actually I was disappointed to find that Barbie doesn't fit in the kayak - her hips are too wide. Maybe I should steal one of my daughter's barbies and use various power tools to administer some cosmetic surgery to make her fit - all in the name of getting a nice photo.) I made these boats as toys for my daughters and as "fun" little projects. Another reason for building these boats was to practice techniques (stitch & glue construction for the kayak, carving was used for the canoe). The kayak was a PITA and I'm not sure I would attempt another (at least with a normal size boat your pieces are big enough to hold properly). It was very tedious to get the thin plywood panels (cut with a scissors) to line up just right and to stay in precisely the right orientation until the glue dried (clamped with binder clips, tape and my fingers - which often became a structural part of the hull thanks to the glue). There are bulkheads in place so that the bow and stern compartments are fully sealed so it won't fill with water and sink. The kayak is very strong and should stand up to a fair bit of abuse.
As alluded to above, the canoe was made by first gluing together some scraps of cedar. I then pasted onto this block outline drawings of the canoe copied to the correct scale from the book CanoeCraft. I then used the drawings as a guideline to cut the general canoe shape out of the block using a band saw. With the rough blank cut, I used a spokeshave to carve away anything that didn't look like a canoe. This was very easy and went well. I'm sure it doesn't share the same lines as the original canoe design it is based on, but it still looks pretty fair and it is just a toy. I once tried the band saw to remove a bit more material, but ended up slicing into the canoe and had a patch I had to repair. I find that often I don't save any time by using the power tools, I just create a mess to repair. With the outside of the hull carved, I used a gouge to hollow out the inside. Carving the interior of the canoe was much more work and I never did get it perfect (it's just a toy after all). There are three reasons this portion of the carving did not go well: 1) I had only one gouge to use with a fairly narrow width (I opted to purchase one good tool rather than a set of multiple mediocre tools); 2) I did not sharpen the gouge after purchasing it (though it was still plenty sharp to cut me very easily when I slipped); and 3) I don't know what I'm doing. All three of those factors can only improve with time.


The picture below shows the plywood panels of which the kayak is constructed. The hull (bottom) is composed of 4 panels and the angle where they meet at the side is called a "hard chine." The presence of a chine gives particular handling characteristics to this style of boat with it's own pros & cons. The deck is curved over a masik or deck beam located just ahead of the cockpit opening. I constructed the curved deck beam by steam bending strips of 1/32" plywood and forming them around a spray can. Once dried, I glued the strips together, again using the can as a form. This laminated beam was then sanded smooth on the sides and cut to fit and glued to the shear clamps (strips of wood where the hull and deck meet, not visible in these photos).


 As a sad conclusion and 2009 update, my kids have lost the very tedious to build kayak. I really hope it turns up again sometime, but it's been missing for a year or two now so I don't expect to see it again.
I built two boats in my garage in the spring of 2005. First was a Chesapeake 17 stitch & glue kayak based on the plans in the book The New Kayak Shop by Chris Kulczyki of Chesapeake Light Craft. The kayak was constructed of 1/32" birch plywood, "stitched" together with cyanoacrylate glue (aka slow-drying crazy glue). The hull was covered with a single layer of ~6 oz. fibreglass and the deck and cockpit sealed with epoxy. The second boat was a 17/6 Redbird canoe based on plans from the book "CanoeCraft" by Ted Moores. The canoe as I've built it is some sort of cross between cedar strip & dugout canoe construction. The hull was first made of cedar "strips" and the interior of the hull subsequently carved out. Again, the outside of the hull was covered with one layer of fibreglass and the interior sealed with epoxy.
OK, if you haven't yet looked at the pictures below you're probably wondering what the heck I'm talking about. The boats were 1:12 scale models. Barbie can paddle them, but that's about it. (Actually I was disappointed to find that Barbie doesn't fit in the kayak - her hips are too wide. Maybe I should steal one of my daughter's barbies and use various power tools to administer some cosmetic surgery to make her fit - all in the name of getting a nice photo.) I made these boats as toys for my daughters and as "fun" little projects. Another reason for building these boats was to practice techniques (stitch & glue construction for the kayak, carving was used for the canoe). The kayak was a PITA and I'm not sure I would attempt another (at least with a normal size boat your pieces are big enough to hold properly). It was very tedious to get the thin plywood panels (cut with a scissors) to line up just right and to stay in precisely the right orientation until the glue dried (clamped with binder clips, tape and my fingers - which often became a structural part of the hull thanks to the glue). There are bulkheads in place so that the bow and stern compartments are fully sealed so it won't fill with water and sink. The kayak is very strong and should stand up to a fair bit of abuse.
As alluded to above, the canoe was made by first gluing together some scraps of cedar. I then pasted onto this block outline drawings of the canoe copied to the correct scale from the book CanoeCraft. I then used the drawings as a guideline to cut the general canoe shape out of the block using a band saw. With the rough blank cut, I used a spokeshave to carve away anything that didn't look like a canoe. This was very easy and went well. I'm sure it doesn't share the same lines as the original canoe design it is based on, but it still looks pretty fair and it is just a toy. I once tried the band saw to remove a bit more material, but ended up slicing into the canoe and had a patch I had to repair. I find that often I don't save any time by using the power tools, I just create a mess to repair. With the outside of the hull carved, I used a gouge to hollow out the inside. Carving the interior of the canoe was much more work and I never did get it perfect (it's just a toy after all). There are three reasons this portion of the carving did not go well: 1) I had only one gouge to use with a fairly narrow width (I opted to purchase one good tool rather than a set of multiple mediocre tools); 2) I did not sharpen the gouge after purchasing it (though it was still plenty sharp to cut me very easily when I slipped); and 3) I don't know what I'm doing. All three of those factors can only improve with time.
The picture below shows the plywood panels of which the kayak is constructed. The hull (bottom) is composed of 4 panels and the angle where they meet at the side is called a "hard chine." The presence of a chine gives particular handling characteristics to this style of boat with it's own pros & cons. The deck is curved over a masik or deck beam located just ahead of the cockpit opening. I constructed the curved deck beam by steam bending strips of 1/32" plywood and forming them around a spray can. Once dried, I glued the strips together, again using the can as a form. This laminated beam was then sanded smooth on the sides and cut to fit and glued to the shear clamps (strips of wood where the hull and deck meet, not visible in these photos).
As a sad conclusion and 2009 update, my kids have lost the very tedious to build kayak. I really hope it turns up again sometime, but it's been missing for a year or two now so I don't expect to see it again.
Monday, August 10, 2009
Chance Meeting
Last week in the office at Prince Albert National Park while booking in for camping on Kingsmere Lake, I met a fellow boat builder that is currently building a Redfish Spring Run. This fellow was also at the boatbuilding workshop hosted a couple of years ago by Kisseynew Canoe Company. If you happen to be the guy I was chatting with, could you please contact me? I'd love to chat some more and check out your current build.
By the way, we had the guillemot & the kid's kayak out for that trip (actually my entire fleet of 4 boats was used on that trip). We camped at Southend for 4 nights and took day tours up to Grey Owl's cabin, the Bagwa Route, and just to play on the beach. I'll try to post specifically about this trip and the one immediately before on the Churchill River.
By the way, we had the guillemot & the kid's kayak out for that trip (actually my entire fleet of 4 boats was used on that trip). We camped at Southend for 4 nights and took day tours up to Grey Owl's cabin, the Bagwa Route, and just to play on the beach. I'll try to post specifically about this trip and the one immediately before on the Churchill River.
Thursday, June 04, 2009
The Mobies Are Coming! The Mobies Are Coming!
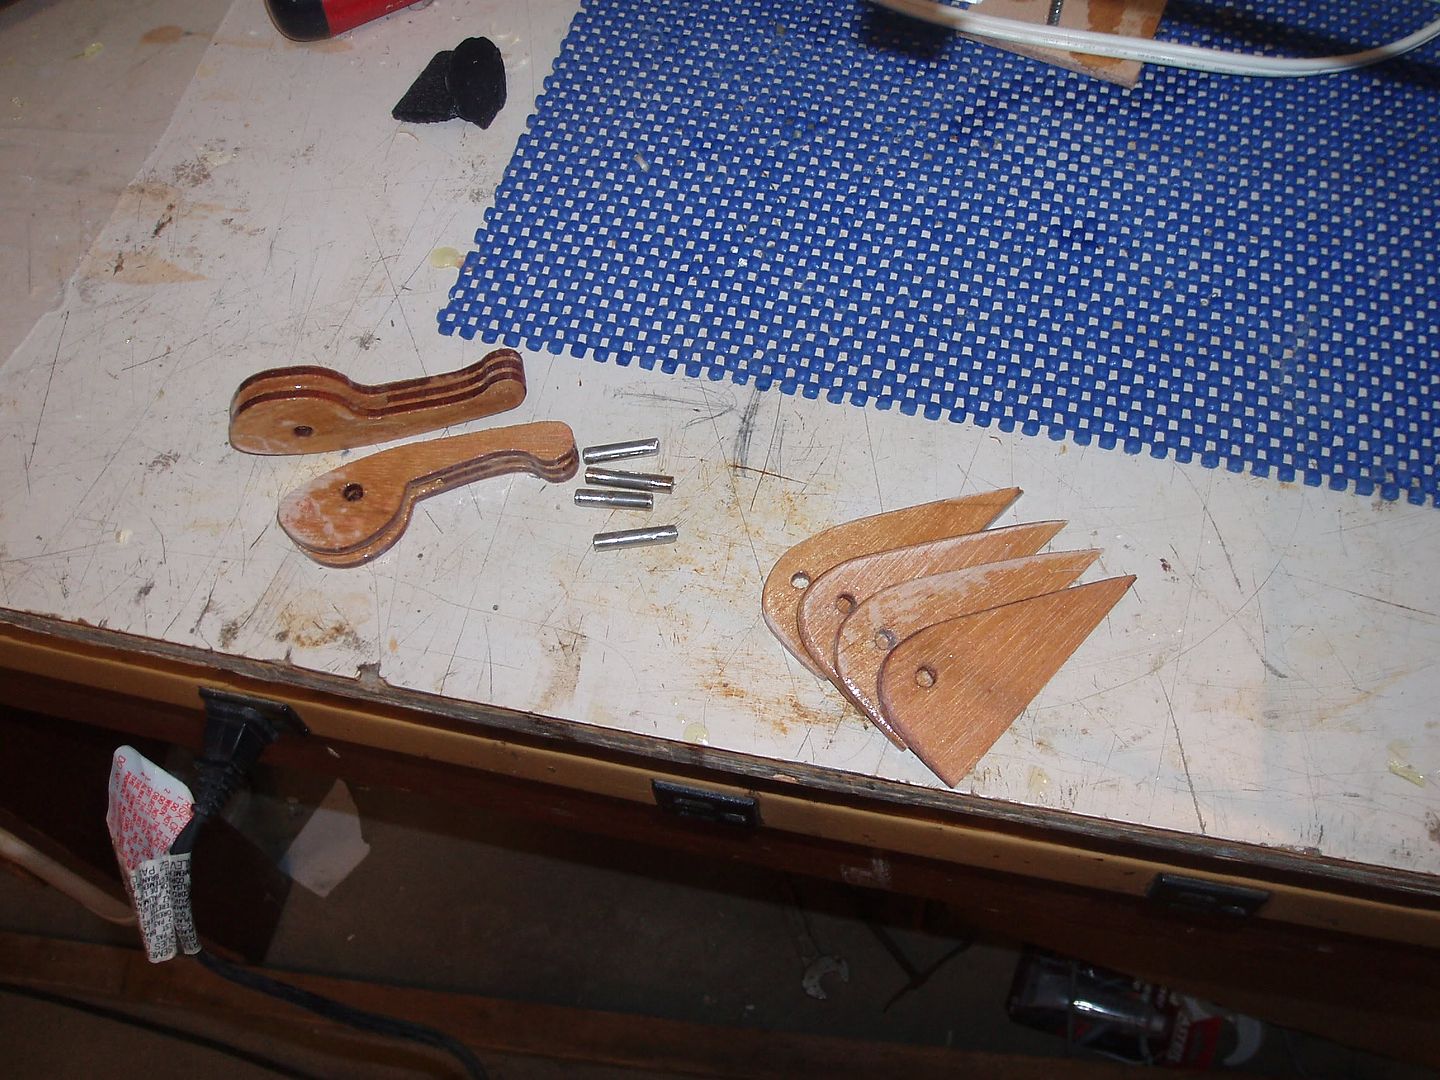
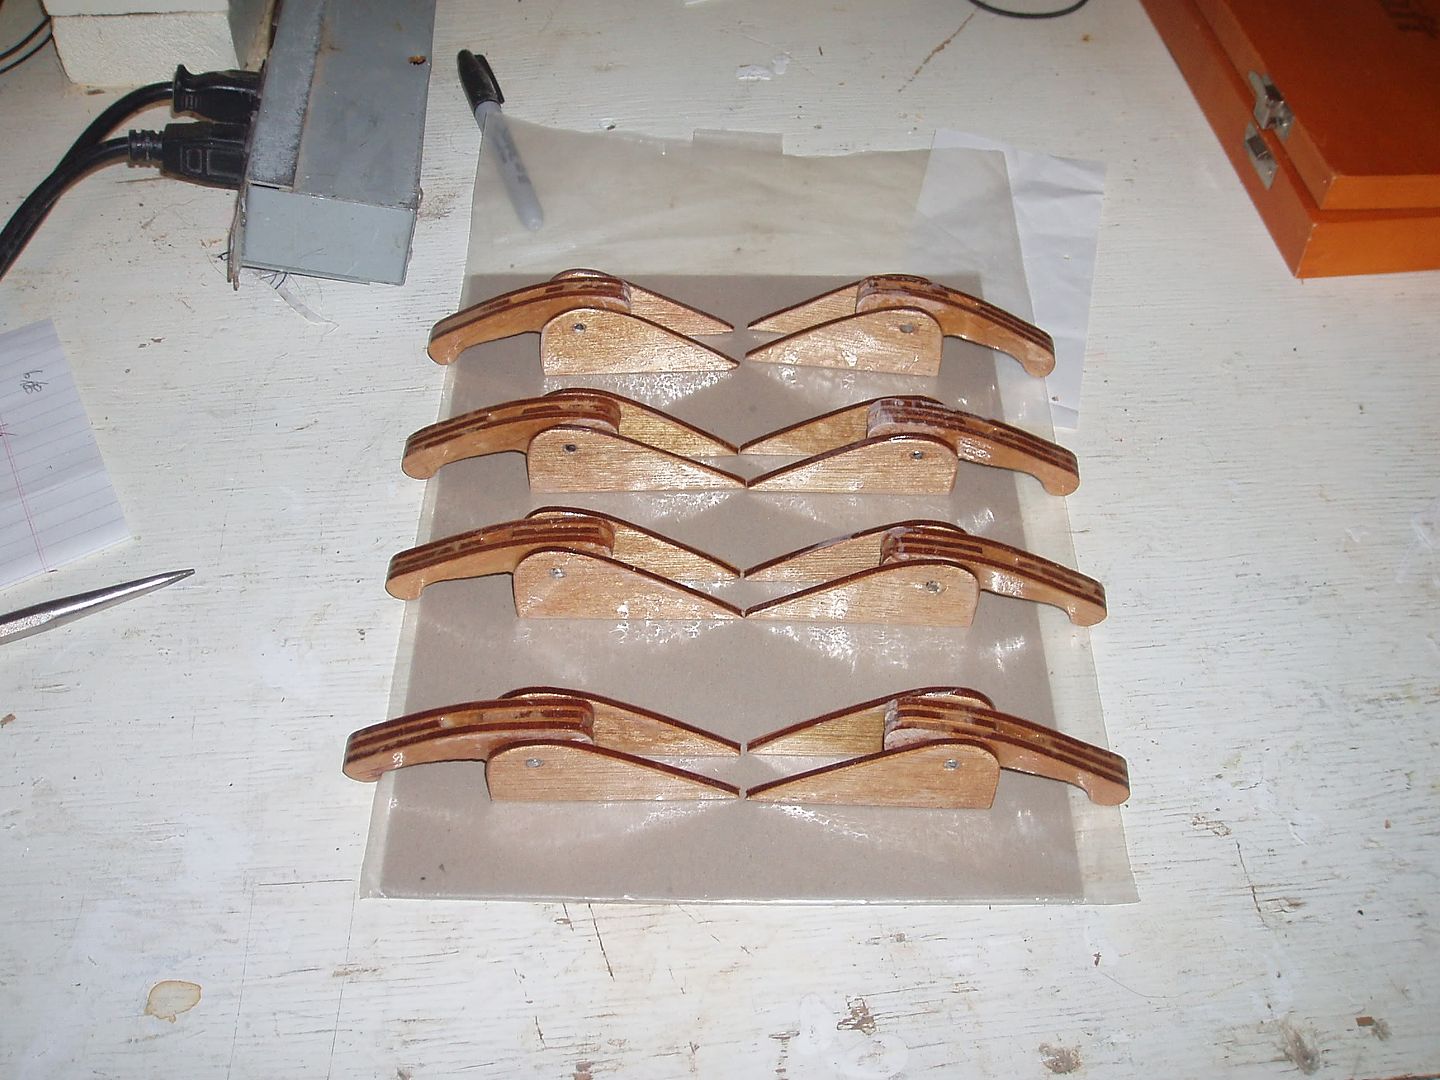
So, "what's a moby" you might ask. A moby (plural, mobies) is a hidden latch mechanism for the purpose of keeping the hatch of a kayak closed. The moby, is a lever attached to the underside of the hatch cover that under the tension of bungie cords presses against the underside of the kayak deck and holds the hatch securely closed. I added mobies to the kayak when I built the kayak 2 years ago, but I built them using 1/8" recycled mahogany plywood. That proved too weak and 2 of 8 of them have broken. So, I am rebuilding the mobies. This time I have made them much beefier. They are being constructed of 1/4" poplar wood, with the grain in the direction of required strength. The poplar was reinforced before cutting out the pieces by adding a layer of fiberglass on each side. They are also larger in every dimension than the older version, which will make them stronger again.
This post was just intended to be a quick update. I have been taking pictures along the way in preparation for a future comprehensive Moby post, perhaps a "how to". So far, I have fiberglass-reinforced 1/4" poplar, drawn a new and enlarged moby template, cut out all the pieces, and cut off the old mobies and cleaned up the hatch lids. This evening, I glued the mobie components together with thickened epoxy and added another layer of glass to the underside of the hatch lids.
In the meantime, here are a couple of pictures from when I made the Mobies, Mark I.
 A pod of mobies ready for installation.
 Mobies on hatches.

This post was just intended to be a quick update. I have been taking pictures along the way in preparation for a future comprehensive Moby post, perhaps a "how to". So far, I have fiberglass-reinforced 1/4" poplar, drawn a new and enlarged moby template, cut out all the pieces, and cut off the old mobies and cleaned up the hatch lids. This evening, I glued the mobie components together with thickened epoxy and added another layer of glass to the underside of the hatch lids.
In the meantime, here are a couple of pictures from when I made the Mobies, Mark I.
Partially assembled pieces.
 A pod of mobies ready for installation.
 Mobies on hatches.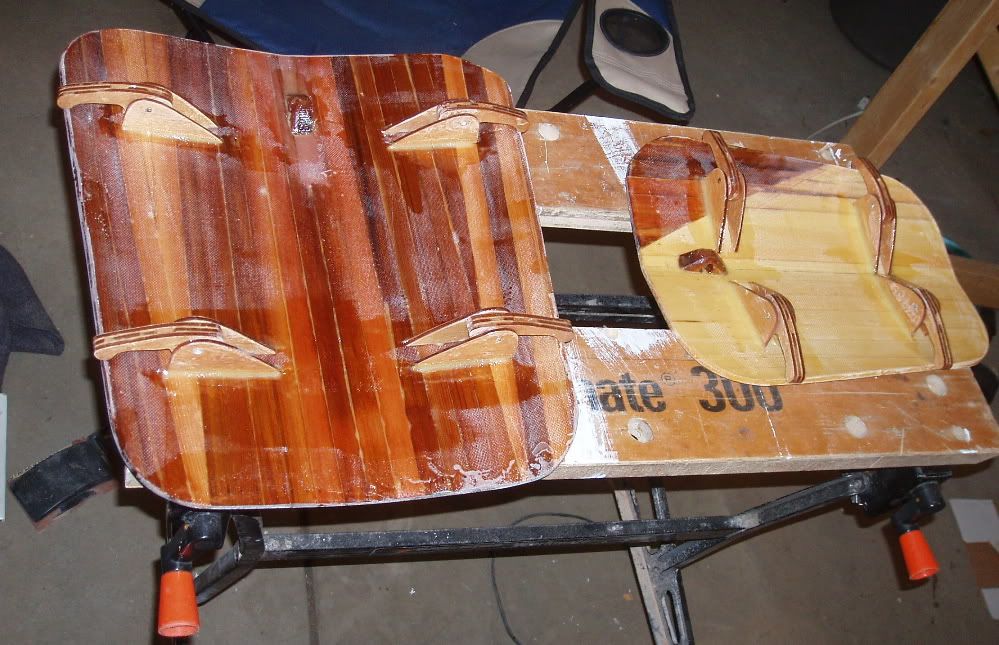
Tuesday, September 09, 2008
New Brunswick Boat Building
While on vacation this summer on Canada's East Coast, I heard a bit of a radio article regarding a kayak builder. I missed almost everything from the piece, but I did hear the reporter's name. Marc Genuist was a CBC reporter in Saskatchewan a number of years ago, and he is also a canoeist so I recognised and remembered the name when I heard it. Some time after our return home I contacted Marc regarding the article. He was kind enough to e-mail me the mp3 file of the article that aired in July. He agreed that I could share it via my blog, as long as I credited CBC New Brunswick with the piece. The piece features Don Rittwage, owner of Moncton's Kayak Exchange. Don runs boat building workshops during the winter.
To hear the full interview, click here.
(The link is to an mp3 file, you can either click it to play it, or right click to save it to your computer.)
The mp3 file was provided by Marc Genuist and is courtesy of CBC New Brunswick
(The link is to an mp3 file, you can either click it to play it, or right click to save it to your computer.)
The mp3 file was provided by Marc Genuist and is courtesy of CBC New Brunswick
Monday, July 28, 2008
Stapleless Boat Building
Today Glen posted on the Kayak Building Bulletin Board a link to photos from the recent joint WCHA reunion and Bear Mountain Rendezvous 2008. Going through a few of those photos, something caught my eye (aside from many beautiful wooden boats). It was a series of photos that depicted a novel method of securing strips for stapleless building. Building with wood strips requires that the strips be held tightly to adjacent strips while the glue dries, and to the station mold for the duration of the stripping. 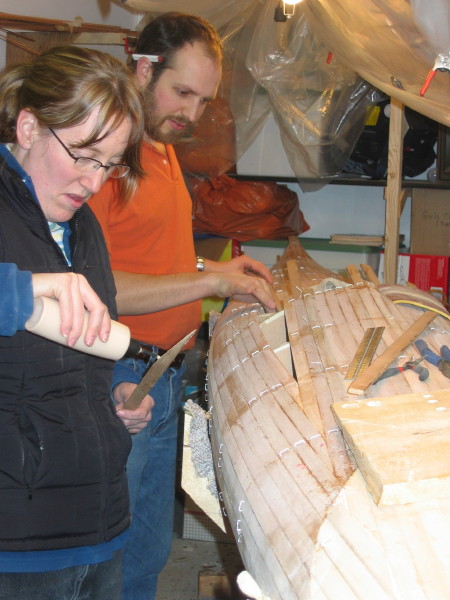 Typically, staples are used to achieve this. Staples are fast and effective, but they do leave behind a row of little holes at each station. Many builders use clamps, jigs, tape and bungee cord (or all of the above) to hold the strips in place while building.
 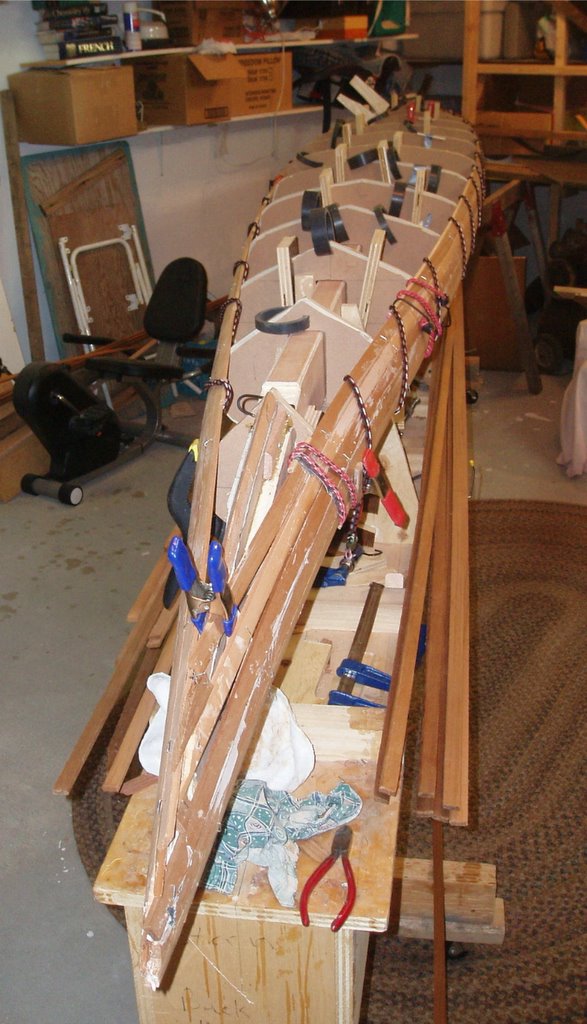 I tried this initially while building the Guillemot, but I decided to revert to staples in the name of speed and efficiency. The method shown in Glen's photos from the BM Rendezvous uses a wire device attached to bungee to hold the strips down against the previous strips, the bungee is tightened using a chain that can be hooked to the right length to the strongback. Meanwhile, a strap which goes around each form keeps the strips tight to the forms. This latter component seems to solve one of the perpetual problems of some stapleless methods which would allow the joined strips to move away from the forms. In areas such as at the bow of the Guillemot kayak which have a concave curve, wedges would probably be needed to maintain the pressure to hold the strips tightly to the forms.
The straps and jigs are being assembled and sold as a kit by Ron Frenette of Canadian Canoes. The kits are pricey ($375) but seem like a pretty slick system for building a fine piece of woodcraft.

 Typically, staples are used to achieve this. Staples are fast and effective, but they do leave behind a row of little holes at each station. Many builders use clamps, jigs, tape and bungee cord (or all of the above) to hold the strips in place while building.
  I tried this initially while building the Guillemot, but I decided to revert to staples in the name of speed and efficiency. The method shown in Glen's photos from the BM Rendezvous uses a wire device attached to bungee to hold the strips down against the previous strips, the bungee is tightened using a chain that can be hooked to the right length to the strongback. Meanwhile, a strap which goes around each form keeps the strips tight to the forms. This latter component seems to solve one of the perpetual problems of some stapleless methods which would allow the joined strips to move away from the forms. In areas such as at the bow of the Guillemot kayak which have a concave curve, wedges would probably be needed to maintain the pressure to hold the strips tightly to the forms.
The straps and jigs are being assembled and sold as a kit by Ron Frenette of Canadian Canoes. The kits are pricey ($375) but seem like a pretty slick system for building a fine piece of woodcraft.
Thursday, June 26, 2008
Launch of the Sea Flea
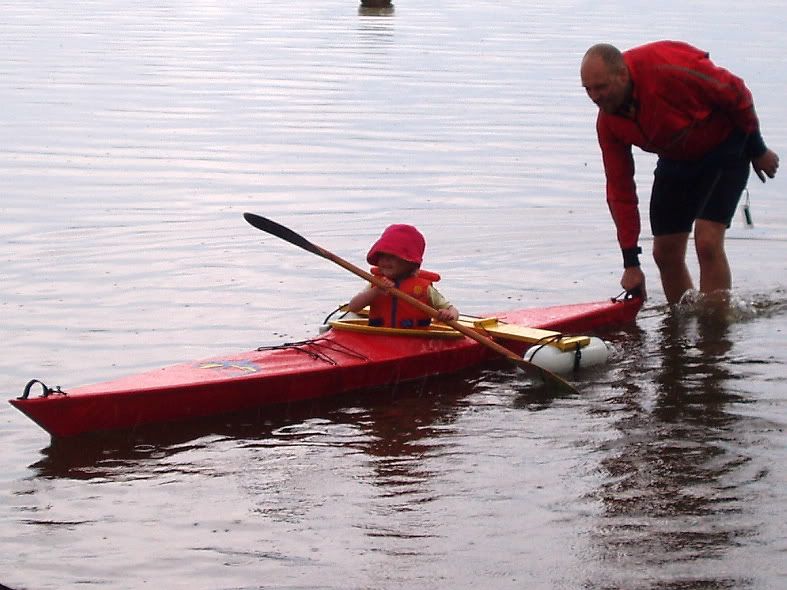
We launched the kid's Yost Sea Flea 11 a couple of weekends ago at Pike Lake, a small oxbow lake in a local provincial park. The launch was a bit hurried due to some incoming weather and the start of a rain shower (I had just finished a day of kayak lessons), but within a few minutes our older daughter had figured out how to make her kayak go forward, backward, and turn. The outriggers are very similar to that described in the Chris Cunningham book, Building the Greenland Kayak. In my version the boat bumpers (the floats) are held onto the crosspiece by a bungee and a webbing strap. It seemed to work quite well and breaks down easily for transport or storage. The outrigger is secured to the kayak using a deck rigging slider which works quite well.
  Mom heads out too.
 My wife is paddling her guillemot kayak, launched exactly one year earlier (the Saturday prior to Father's Day).

 Our younger daughter gets her turn too, just as the rain started.
 The next day (Father's Day Sunday) we took another tour. This time we had beautiful sunny skies and warm weather. We launched at the main beach and paddled through the lily pads and visited one of the large beaver lodges.
  The younger girl & I paddled the canoe while Mom and our other daughter were in the kayaks. After a while, my wife gave a tow. She reported that the Sea Flea towed very easily, offering little resistance (until our daugther learned to use her paddle to increase the drag!). While being towed, she made a game of paddling hard to overtake and pass Mom.
 Unfortunately, we never did try the kayak without the outriggers. I wish we had at least tried it without them while we were playing at the beach.
 Our little girl played in Mom's kayak by the beach.
  For more posts about the Sea Flea and the build, click here or click on the label "kid kayak."
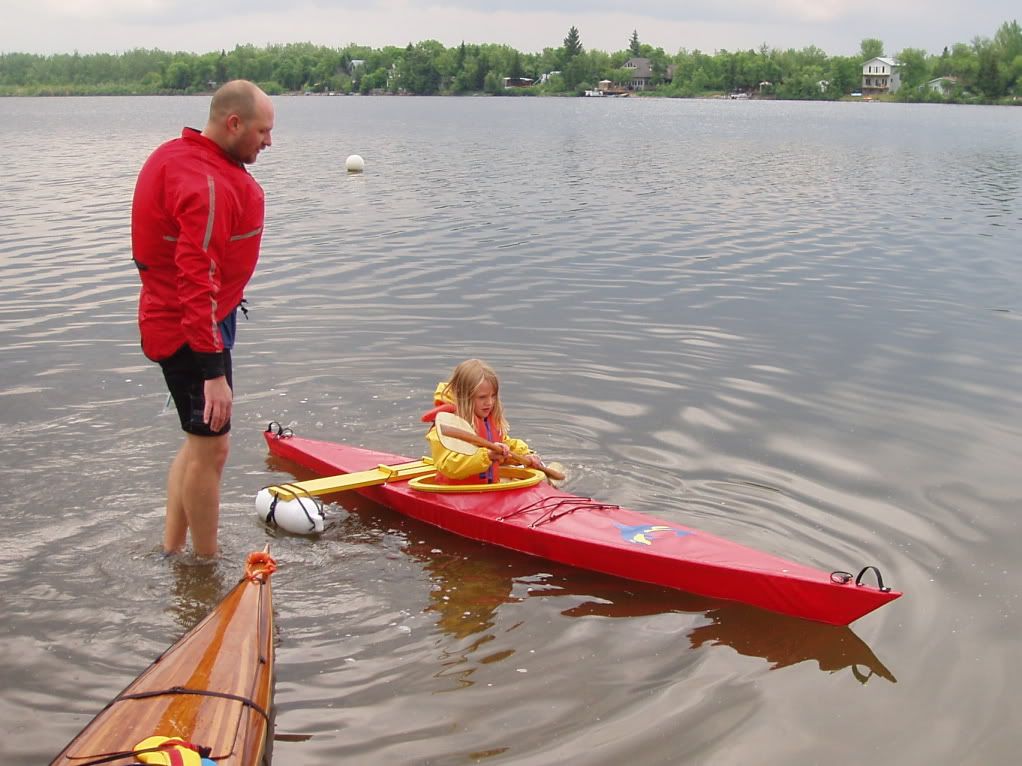 The outriggers are very similar to that described in the Chris Cunningham book, Building the Greenland Kayak. In my version the boat bumpers (the floats) are held onto the crosspiece by a bungee and a webbing strap. It seemed to work quite well and breaks down easily for transport or storage. The outrigger is secured to the kayak using a deck rigging slider which works quite well.
 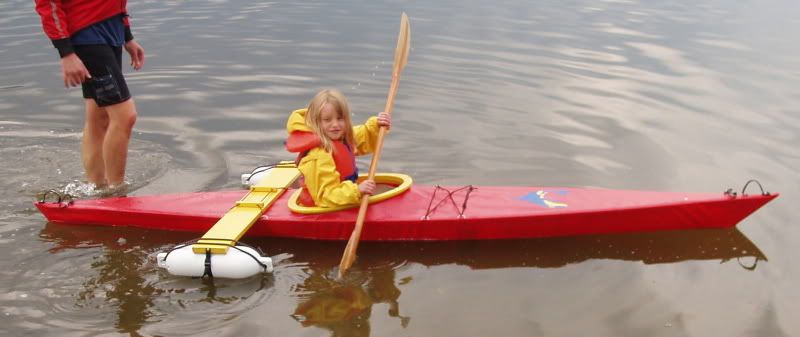 Mom heads out too.
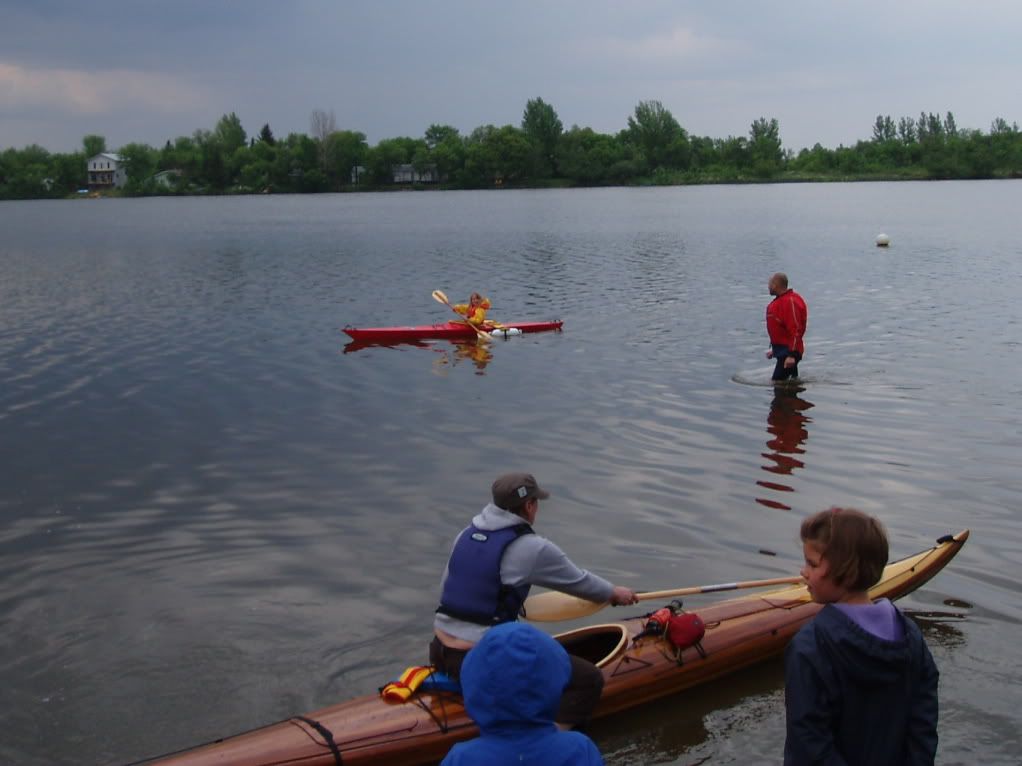 My wife is paddling her guillemot kayak, launched exactly one year earlier (the Saturday prior to Father's Day).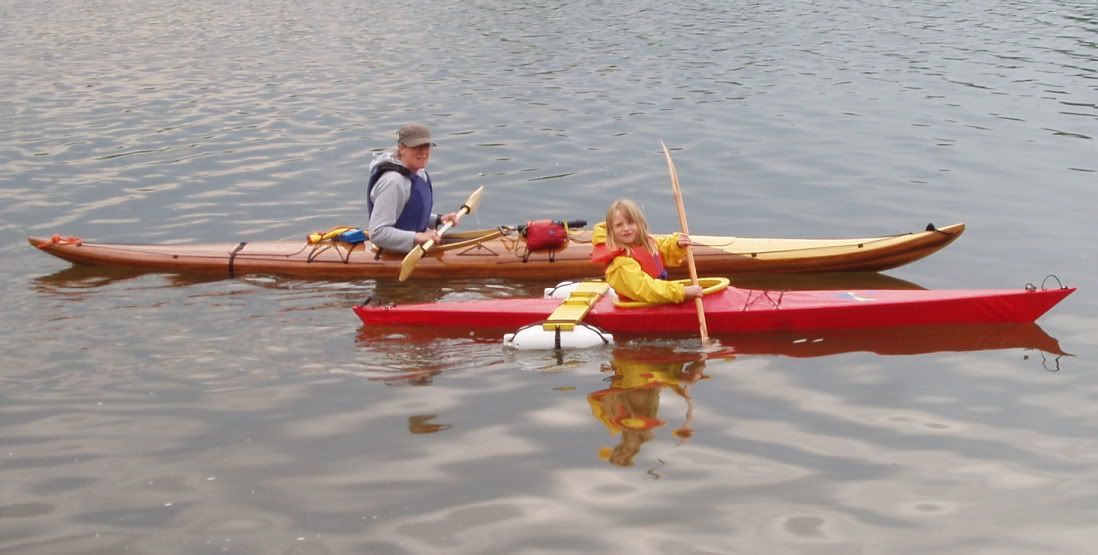
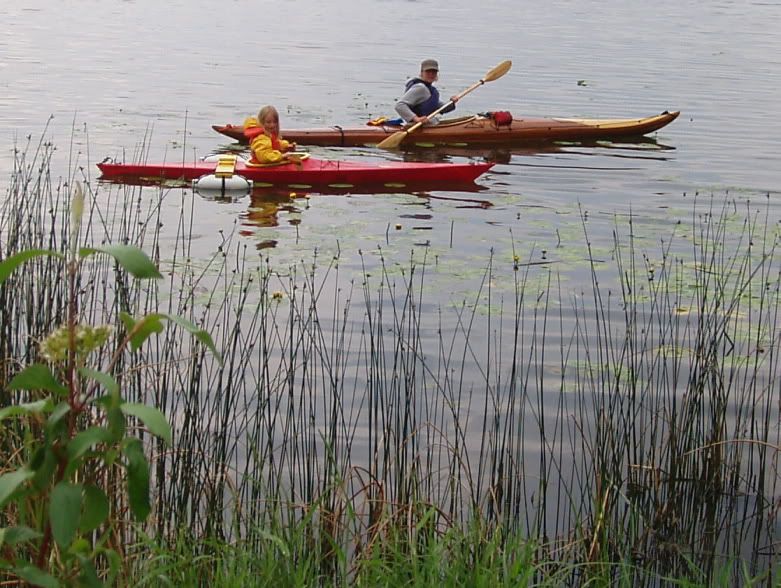 Our younger daughter gets her turn too, just as the rain started.
 The next day (Father's Day Sunday) we took another tour. This time we had beautiful sunny skies and warm weather. We launched at the main beach and paddled through the lily pads and visited one of the large beaver lodges.
 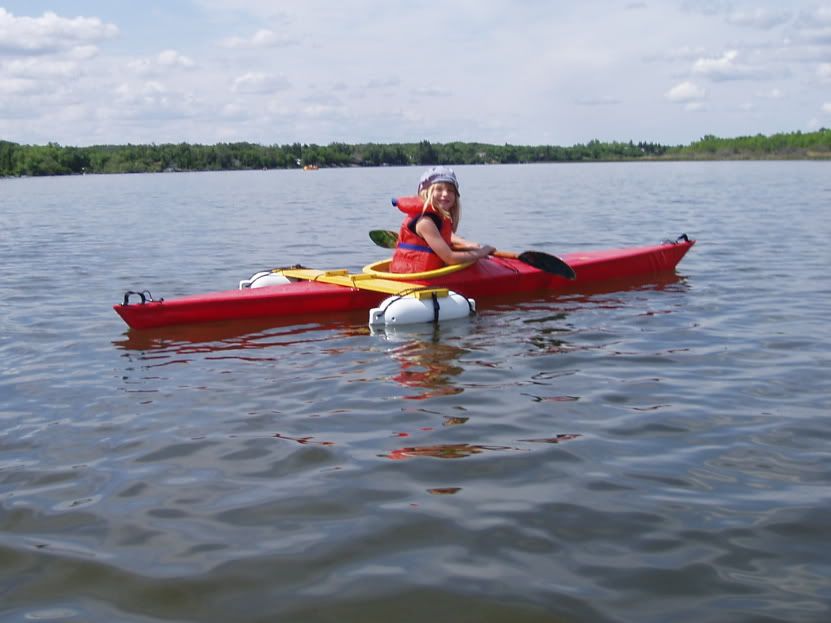 The younger girl & I paddled the canoe while Mom and our other daughter were in the kayaks. After a while, my wife gave a tow. She reported that the Sea Flea towed very easily, offering little resistance (until our daugther learned to use her paddle to increase the drag!). While being towed, she made a game of paddling hard to overtake and pass Mom.
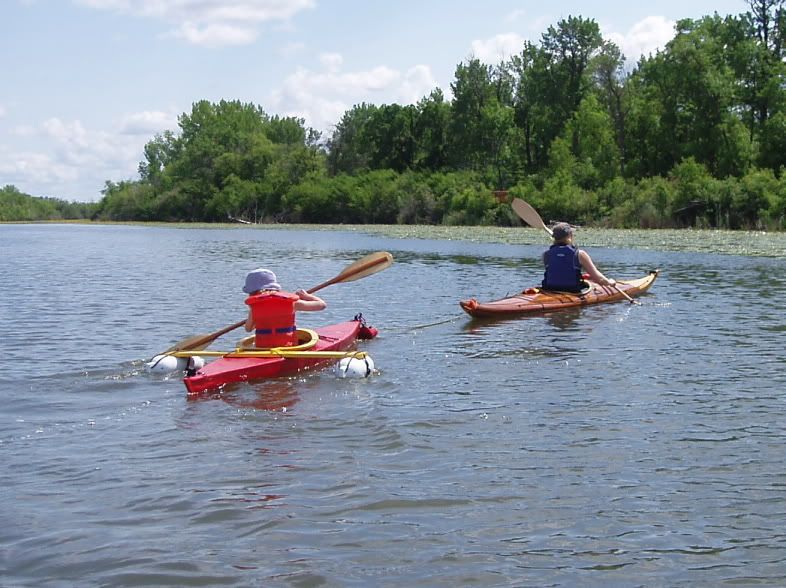 Unfortunately, we never did try the kayak without the outriggers. I wish we had at least tried it without them while we were playing at the beach.
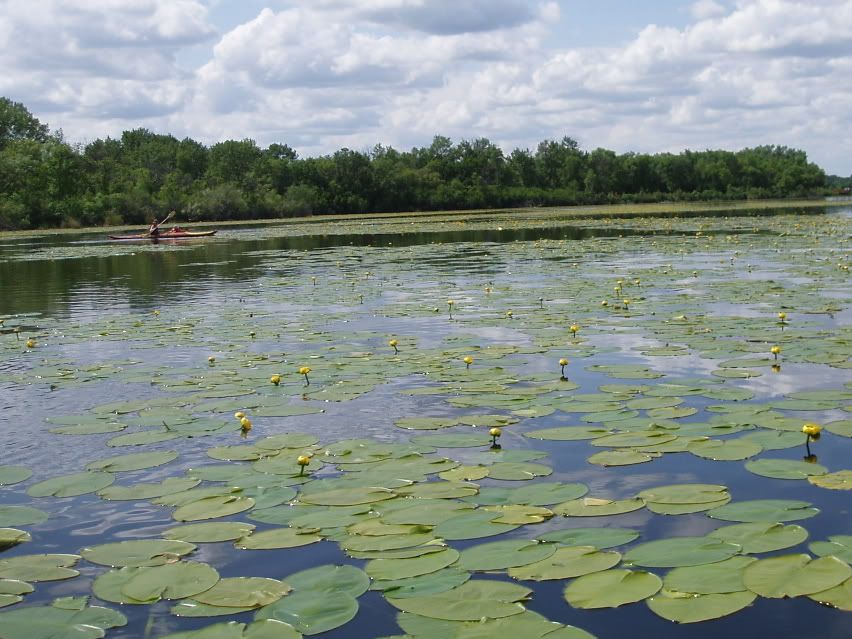 Our little girl played in Mom's kayak by the beach.
 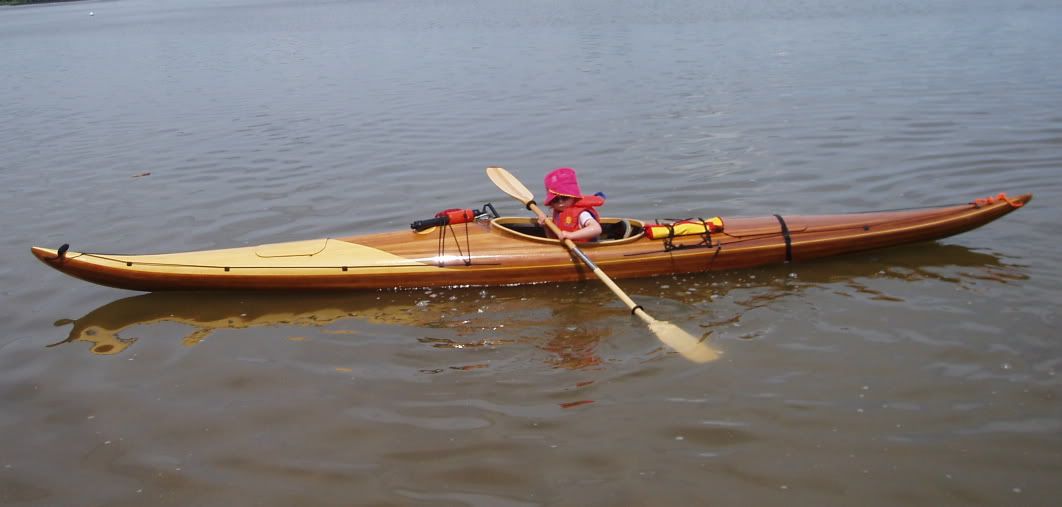 For more posts about the Sea Flea and the build, click here or click on the label "kid kayak."
Monday, June 23, 2008
Mark In The News
 Mark's now well underway on his journey from La Ronge to Hudson Bay, paddling 1400 km in his solo canoe. He is about 9 days into the trip and should now be nearing the eastern border of the province.
Mark has gotten a fair bit of media coverage this time around. Over the course of his trip, Mark will be phoning in to CBC Radio every two weeks for an interview with the local Saskatchewan program, Blue Sky. The week before leaving, Mark did a radio interview with Blue Sky. That interview was aired last Tuesday (June 17th) and you can listen to the interview here (Real Audio file). His next interview will air tomorrow, Tuesday, June 24th between 12 and 1 pm. If I'm lucky, I'll remember to turn on CBC radio and listen this time. If not, hopefully it shows up in their archive. You can hear the interview for yourself at 540 am anywhere within about 500 km of Watrous, 94.1 FM in Saskatoon, and many other local frequencies. For those of you outside of Saskatchewan, or for those who, like me, don't have a functioning radio, you can listen online.
Here is a schedule of his CBC radio interviews as pasted from his blog:
| Tuesday June 24th | Between 12 - 1 pm |
| Tuesday July 8th | Between 12 - 1 pm |
| Tuesday July 24th | Between 12 - 1 pm |
| Tuesday August 5th | Between 12 - 1 pm |
| Tuesday August 19th | Between 12 - 1 pm |
His June 24th interview is now available online. Find it here.
Mark also did an interview with the Saskatoon Sun which appeared in my mailbox this weekend. It was a full page article with a picture of Mark in his canoe sitting alongside the boathouse dock. I'd like to provide a link to an online version but it doesn't appear to be available anywhere. Mark also did an interview with the PA Herald which appeared a week and a half ago. You can read it here. He was also planning on doing an interview with the La Ronge Northerner prior to launching.
You can learn more about Mark Lafontaine and his epic journey from his website (www.wildpaddler.com), including a map of the route. Mark has also been keeping a blog where he detailed some of the construction of his custom-designed expedition canoe and other aspects of preparation for the trip (wildpaddler.blogspot.com).
By the way, I got a chance to paddle his new canoe for a couple of minutes two weeks ago. Although I was only in it briefly, it felt very nice. I had just come out of the canoe club's Swift Osprey (mentioned in a previous post), so Mark's canoe felt rock solid in terms of stability. It was tougher to turn, but not bad. The narrow beam at the gunwales made paddling very easy. Of course, it had no load in it so it wasn't a real good test. I expect that upon Mark's return he'll have a clearly defined set of goals to achieve in the next canoe he builds, characteristics he likes and others he wants to improve upon.
Update: Mark ended up suffering physical and equipment problems. These issues (I'm not clear on what problems he encountered), forced him to turn around when he was well into Manitoba and retrace part of his route in order to get himself out. I believe area forest fires were also a concern and could have prevented rapid egress had he proceeded farther.
Sunday, June 22, 2008
Shaman Kayaks & Durability
The perception is that wood kayaks are fragile, skin-on-frame kayaks doubly so. Watch the video at the link below and see what you think.
Video: Shaman Kayaks by John Petersen
After watching the video, browse the site to see his kayaks & paddles.
Video: Shaman Kayaks by John Petersen
After watching the video, browse the site to see his kayaks & paddles.
Wednesday, June 18, 2008
Paddle for a Flea, Part 2
I posted about the girls painting the blades for their new paddle a little while ago but I didn't show the completed paddle. I finished the paddle last week so here are a few pictures of that process, though I still need to give it a final sanding and a coat of varnish.
With blades painted, I epoxied them onto the shaft of the paddle, cut and shaped from cedar left over from the Sea Flea stringers. The shaft has a curved profile at the point of attachment of the blades. A fillet of thickened epoxy was added to the blade/shaft joint, and the back of the shaft shaped such that it becomes quite thin near it's extremities and gradually increases to full thickness. The shaft at the back of the blade also has a curved profile. Once the blades were attached and the shaft backing the blades shaped, a 14 gauge copper wire was added to the edge of the blade in order to protect the blade in use. Getting the copper wire attached to a blade edge that was less than 1/8" thick was a bit of a challenge. In order to provide some backing to the wire to keep it in the right spot, I clamped some additional 1/8" plywood to the blade with wax paper to keep glue from sticking to it. I then used Krazy Glue (cyanoacrylate glue) to tack the wire in place.
 I worked progressively around the blade, starting at the tips and tacking the wire in place as I went. I would hold and/or clamp the wire in place then tack it in a couple of spots with glue then after a fwe seconds for the glue to take hold I could let go. I would give it a further few minutes for the glue to set before moving the clamps to tack the next series of spots. I only glued my fingers to the paddle a few times.
 With the wire in place, the backing piece of plywood was removed and the glue residue seen below was cleaned up.
 After a bit more shaping of the shaft on the back of the blade, it was ready for fiberglass. I used 6 ounce cloth left over from the guillemot kayak. I could have used 4 ounce, but it wasn't quite as close at hand as this stuff. The photo below shows both blades with cloth pieces and ready for epoxy.

 The silvery sheen of woven glass fibers turns clear as it wets out with epoxy.
 Below, the blade nearly fully wet-out.

 The back of the blade after a coat of epoxy.
 After the epoxy was partially cured to a green stage (somewhat rubbery, stiff but still flexible), the excess glass was trimmed with a sharp blade. The blades then received a fill coat of epoxy which was allowed to mostly cure before sanding and a third coat of epoxy was applied. The shaft also received a coat of epoxy along it's length.
The next photos I have of the paddle are of it in use during the launch of the girls' new kayak so stay tuned for the "launch" post. Later I will have to update this post with a weight and length (it's about 155 cm I believe).
With blades painted, I epoxied them onto the shaft of the paddle, cut and shaped from cedar left over from the Sea Flea stringers. The shaft has a curved profile at the point of attachment of the blades. A fillet of thickened epoxy was added to the blade/shaft joint, and the back of the shaft shaped such that it becomes quite thin near it's extremities and gradually increases to full thickness. The shaft at the back of the blade also has a curved profile. Once the blades were attached and the shaft backing the blades shaped, a 14 gauge copper wire was added to the edge of the blade in order to protect the blade in use. Getting the copper wire attached to a blade edge that was less than 1/8" thick was a bit of a challenge. In order to provide some backing to the wire to keep it in the right spot, I clamped some additional 1/8" plywood to the blade with wax paper to keep glue from sticking to it. I then used Krazy Glue (cyanoacrylate glue) to tack the wire in place.
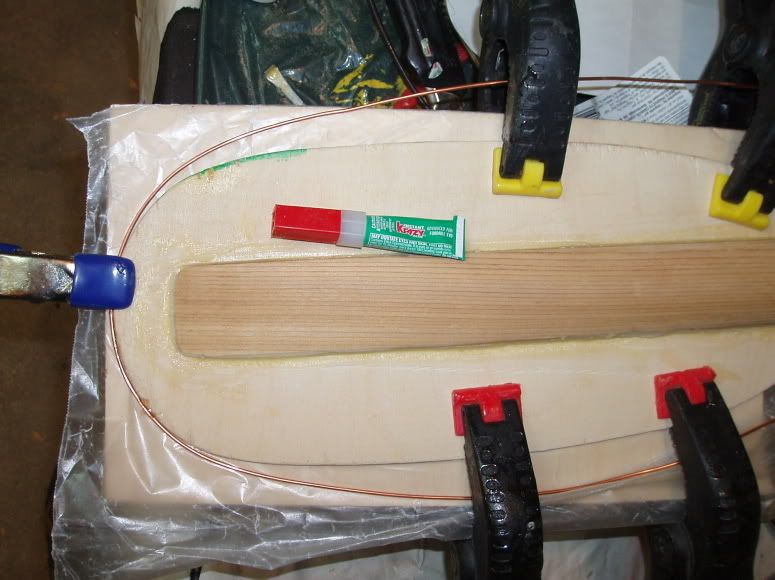 I worked progressively around the blade, starting at the tips and tacking the wire in place as I went. I would hold and/or clamp the wire in place then tack it in a couple of spots with glue then after a fwe seconds for the glue to take hold I could let go. I would give it a further few minutes for the glue to set before moving the clamps to tack the next series of spots. I only glued my fingers to the paddle a few times.
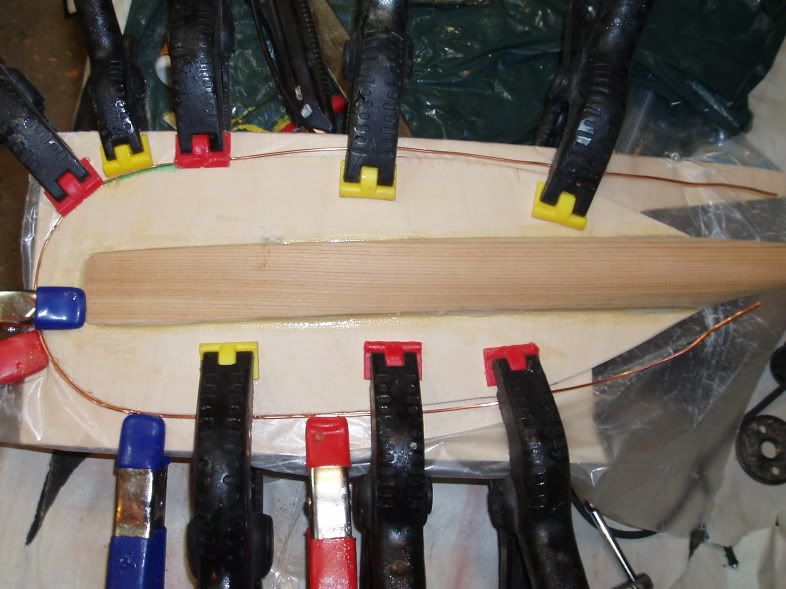 With the wire in place, the backing piece of plywood was removed and the glue residue seen below was cleaned up.
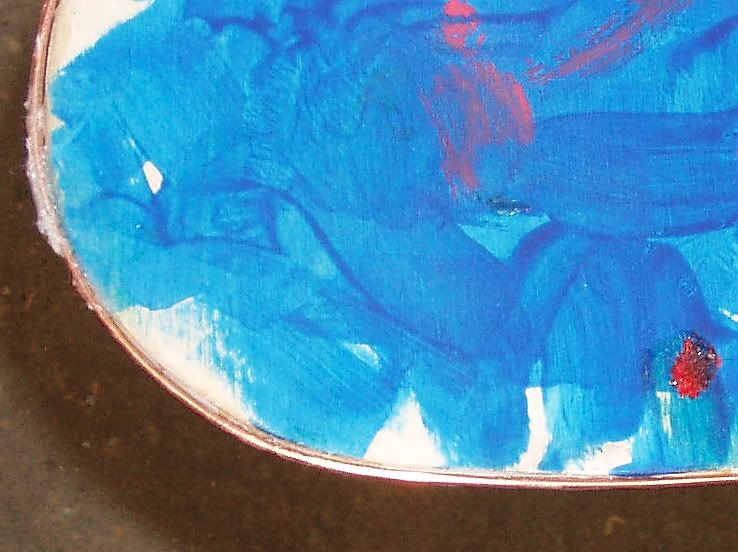 After a bit more shaping of the shaft on the back of the blade, it was ready for fiberglass. I used 6 ounce cloth left over from the guillemot kayak. I could have used 4 ounce, but it wasn't quite as close at hand as this stuff. The photo below shows both blades with cloth pieces and ready for epoxy.
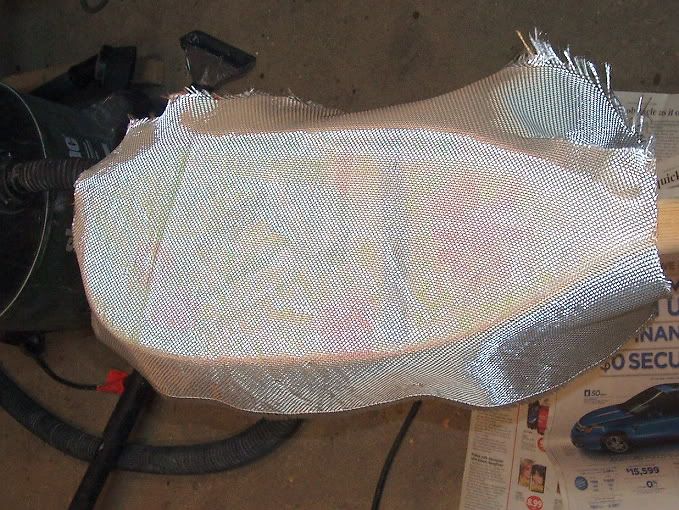 The silvery sheen of woven glass fibers turns clear as it wets out with epoxy.
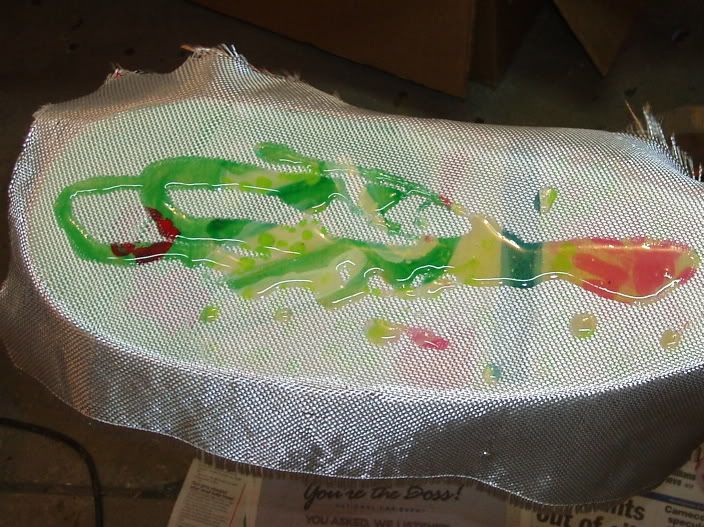 Below, the blade nearly fully wet-out.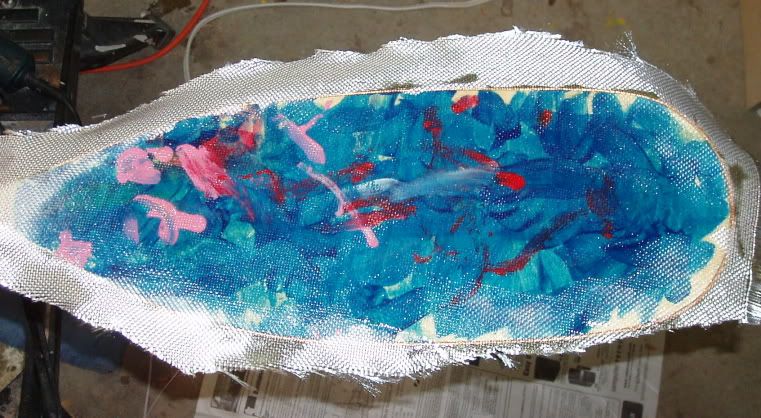
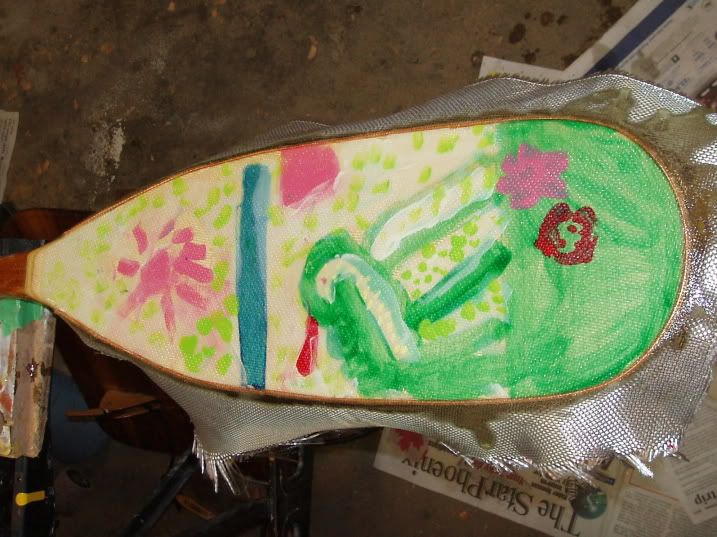 The back of the blade after a coat of epoxy.
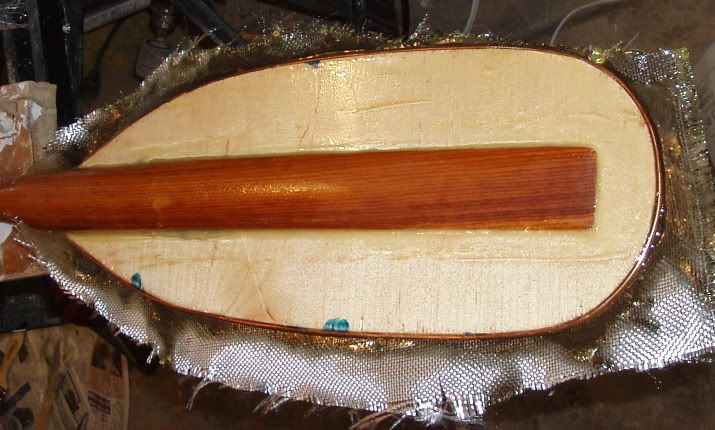 After the epoxy was partially cured to a green stage (somewhat rubbery, stiff but still flexible), the excess glass was trimmed with a sharp blade. The blades then received a fill coat of epoxy which was allowed to mostly cure before sanding and a third coat of epoxy was applied. The shaft also received a coat of epoxy along it's length.
The next photos I have of the paddle are of it in use during the launch of the girls' new kayak so stay tuned for the "launch" post. Later I will have to update this post with a weight and length (it's about 155 cm I believe).
Thursday, May 29, 2008
Paddle For A Flea
The girls need a paddle to go along with their new kayak, so we started to build one. First, I drew a paper template based largely on what just looked right. I used mom's Grey Owl kayak paddle as a point of reference for blade size, and made the template about 2/3 of the adult paddle. Unlike the adult paddle, the kid's paddle is symmetrical so that there is no right or left side to it, simplifying it's use. The paper template was folded in half (to ensure symmetry) and cut out, then the shape drawn onto some 1/8" birch plywood I had left over from the cockpit coaming of the guillemot. The blades were then cut out using the band saw, and sanded to the line. Once the blades were ready, the girls took over, each putting her unique artistic style on one of the blades.


 I used some leftover cedar from building the frame of the Sea Flea for the shaft of the paddle. The piece was 1.5" x 1.5" and I cut it down to 150 cm long (Grey Owl sells a kids paddle that is 150 cm long). Using a bandsaw, I cut a curve into the end 15" of the paddle shaft blank to give the blades a curved shape, and cut the shaft so that it is 1" in the height dimension and 1 1/8" in width dimension. The full 1.5" height of the shaft blank was maintained at the paddle blades but the thickness tapers to a point at the ends. I should have taken some pictures of the paddle blank as it was being shaped but I didn't.
Prior to attaching the blades I also rounded the shaft. First, I marked the shaft as described in Warren & Gidmark's paddle building book using an easily constructed spar gauge (also described in the book). I then, with help from my daughter, planed down the four corners to give an octagon in cross section. We then took down those eight corners to give a 16-sided shaft which was sanded smooth to oval. On Wednesday evening I glued the blades onto the paddle blank using colloidal silica-thickened epoxy and I have since begun to shape the part of the shaft that backs the blade. Ideally, there will be no corners, just smooth flowing lines. The paddle shaft will flow into a thickened backing of the blade. In reality, I'm not sure how achievable this is as the shaft backing the blade is only 1.5" wide, much narrower than the rest of the blade which is 1/8" thick.
After the shaping is completed, the blades will be glassed with 4-ounce cloth on the front, and possibly on the back as well. The glass on the front will strengthen the paddle as well as protect the artwork. I am considering adding some aluminum or copper wire to the edge in order to add a degree of protection since it's certain the paddle will see hard use and the blade edges will take the brunt of that. It's ironic that due to their lesser strength, the paddle must be as light as possible, yet due to their lesser coordination, the paddle must also be as tough as possible.
More pictures will follow soon.
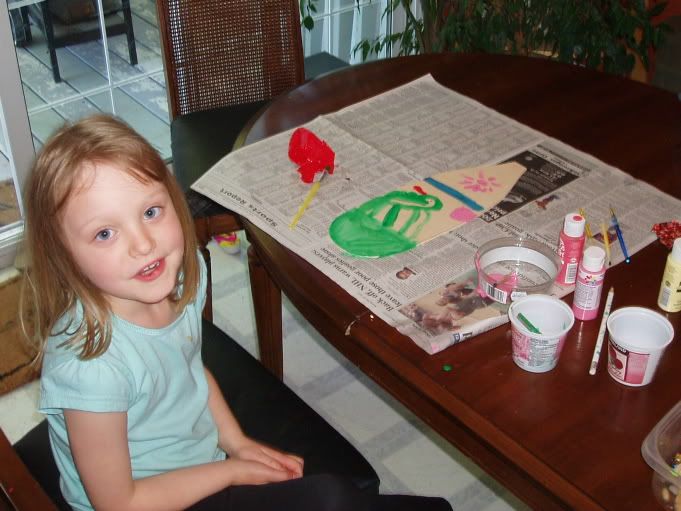
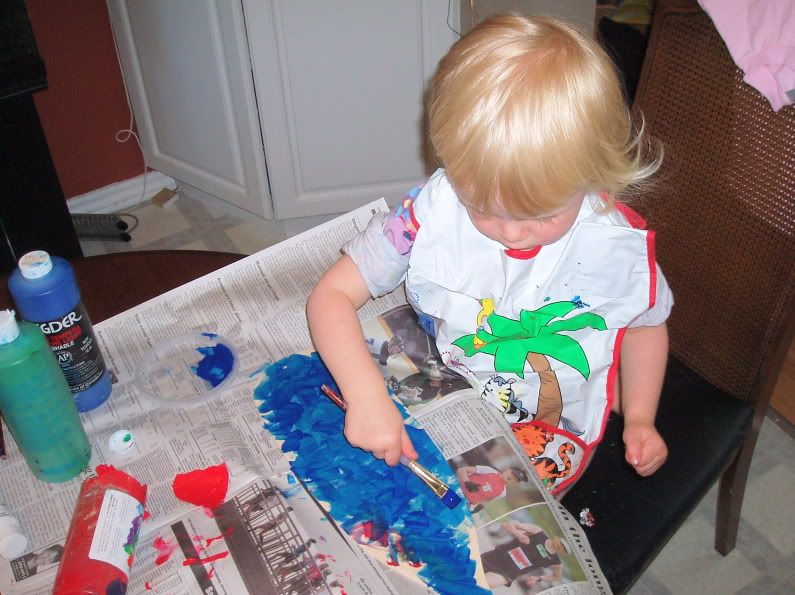
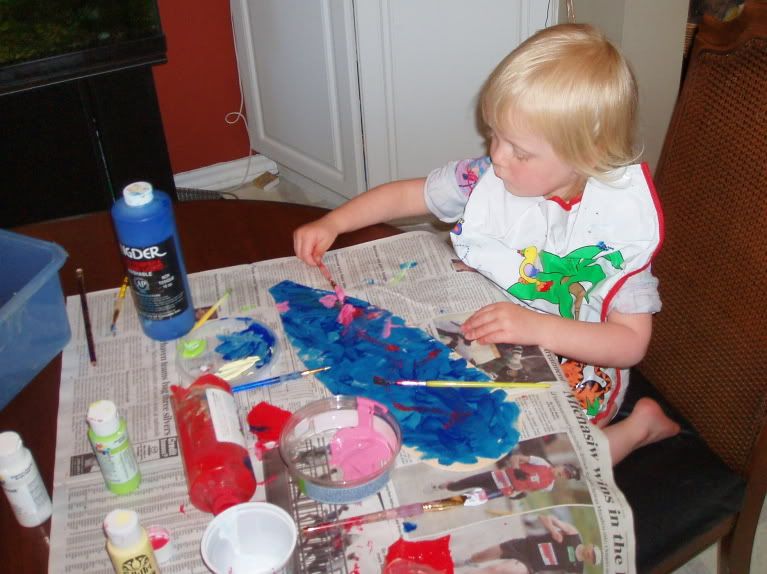
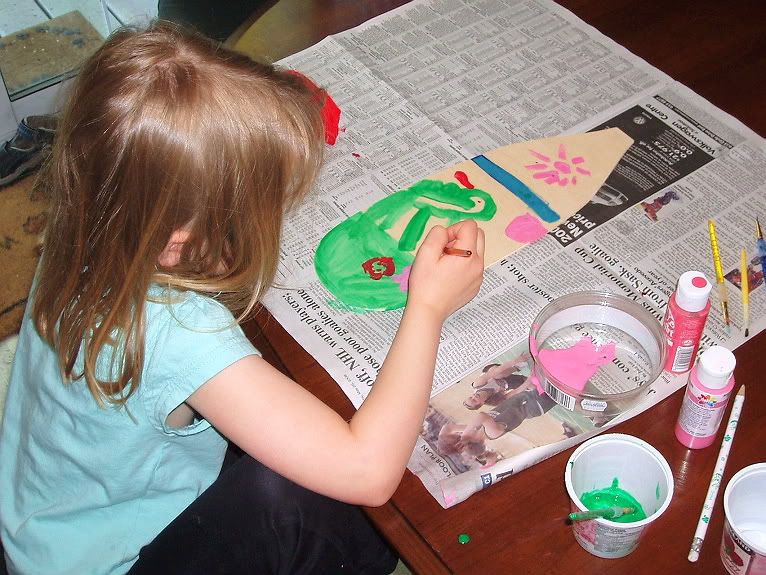 I used some leftover cedar from building the frame of the Sea Flea for the shaft of the paddle. The piece was 1.5" x 1.5" and I cut it down to 150 cm long (Grey Owl sells a kids paddle that is 150 cm long). Using a bandsaw, I cut a curve into the end 15" of the paddle shaft blank to give the blades a curved shape, and cut the shaft so that it is 1" in the height dimension and 1 1/8" in width dimension. The full 1.5" height of the shaft blank was maintained at the paddle blades but the thickness tapers to a point at the ends. I should have taken some pictures of the paddle blank as it was being shaped but I didn't.
Prior to attaching the blades I also rounded the shaft. First, I marked the shaft as described in Warren & Gidmark's paddle building book using an easily constructed spar gauge (also described in the book). I then, with help from my daughter, planed down the four corners to give an octagon in cross section. We then took down those eight corners to give a 16-sided shaft which was sanded smooth to oval. On Wednesday evening I glued the blades onto the paddle blank using colloidal silica-thickened epoxy and I have since begun to shape the part of the shaft that backs the blade. Ideally, there will be no corners, just smooth flowing lines. The paddle shaft will flow into a thickened backing of the blade. In reality, I'm not sure how achievable this is as the shaft backing the blade is only 1.5" wide, much narrower than the rest of the blade which is 1/8" thick.
After the shaping is completed, the blades will be glassed with 4-ounce cloth on the front, and possibly on the back as well. The glass on the front will strengthen the paddle as well as protect the artwork. I am considering adding some aluminum or copper wire to the edge in order to add a degree of protection since it's certain the paddle will see hard use and the blade edges will take the brunt of that. It's ironic that due to their lesser strength, the paddle must be as light as possible, yet due to their lesser coordination, the paddle must also be as tough as possible.
More pictures will follow soon.
Wednesday, May 28, 2008
A Hole In The Boat!, or The Red-Hot Screw!
Aaaarrrghhh!
Last week I cut off the ends of the too-long machine screws that attach the coaming. About 1/2" too long, the machine screws extended down into the coaming and the ends scratched my daughter's legs when she was trying out the kayak in the pool. I used my dremel with a cut-off wheel to cut about 3/8" off of the installed screws. The first one dropped a red-hot piece of machine screw onto the seat and I realised that I had better do something to catch the cut-offs lest they fall onto the PVC fabric. The second one did the same thing and I had the same thought. The third one fell between the seat pieces and, surprise, surprise, burned a hole tight through the hull. I'm sure it would have been funny seeing me run into the house to grab a coffee cup of water and dump it (way too late to be effective) into the kayak only to have all of the water flow out of the nice clean hole melted in the fabric.
After that learning experience, I was finally motivated to prevent more holes. I used a wet rag laid out in the cockpit to catch the smoking hot screw pieces (wet to quickly cool the cut-offs and prevent the rag from burning). I also spread my cutting around a little more, cutting the screws nearly through then coming back to them later for a short final cut preventing the pieces from getting quite so hot. Once cutoff, the sharp ends of the machine screws were covered with an acorn nut.
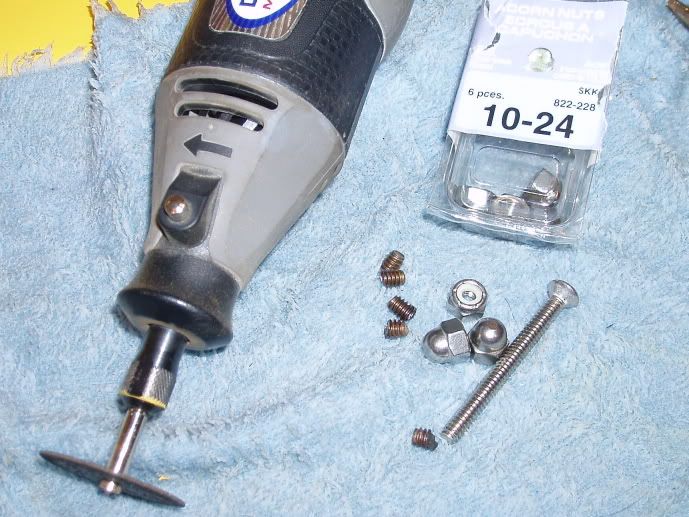
The picture below shows the full-length stainless steel machine screws, the locking nuts, the acorn nuts and the cut off pieces, as well as the dremel with cut-off wheel.
 Below, a freshly trimmed machine screw. The tube to inflate the bow flotation bag can be seen.

Below, a machine screw with locking nut and acorn nut.
 The nice clean hole, about 1/4" in diameter, created by a piece of red-hot screw.

The patch to fix the hole, perhaps the last item to complete the kayak, installed this evening. The patch is about 2" by 1", many times larger than the actual hole, and is adjacent to the keel line.
 By the way, the Yost-designed Sea Flea I think is now officially done. I'll take some pictures and post them soon. In addition to adding the patch, this evening I finished the outriggers. The girls and I are now working on a paddle.
Last week I cut off the ends of the too-long machine screws that attach the coaming. About 1/2" too long, the machine screws extended down into the coaming and the ends scratched my daughter's legs when she was trying out the kayak in the pool. I used my dremel with a cut-off wheel to cut about 3/8" off of the installed screws. The first one dropped a red-hot piece of machine screw onto the seat and I realised that I had better do something to catch the cut-offs lest they fall onto the PVC fabric. The second one did the same thing and I had the same thought. The third one fell between the seat pieces and, surprise, surprise, burned a hole tight through the hull. I'm sure it would have been funny seeing me run into the house to grab a coffee cup of water and dump it (way too late to be effective) into the kayak only to have all of the water flow out of the nice clean hole melted in the fabric.
After that learning experience, I was finally motivated to prevent more holes. I used a wet rag laid out in the cockpit to catch the smoking hot screw pieces (wet to quickly cool the cut-offs and prevent the rag from burning). I also spread my cutting around a little more, cutting the screws nearly through then coming back to them later for a short final cut preventing the pieces from getting quite so hot. Once cutoff, the sharp ends of the machine screws were covered with an acorn nut.
The picture below shows the full-length stainless steel machine screws, the locking nuts, the acorn nuts and the cut off pieces, as well as the dremel with cut-off wheel.
 Below, a freshly trimmed machine screw. The tube to inflate the bow flotation bag can be seen.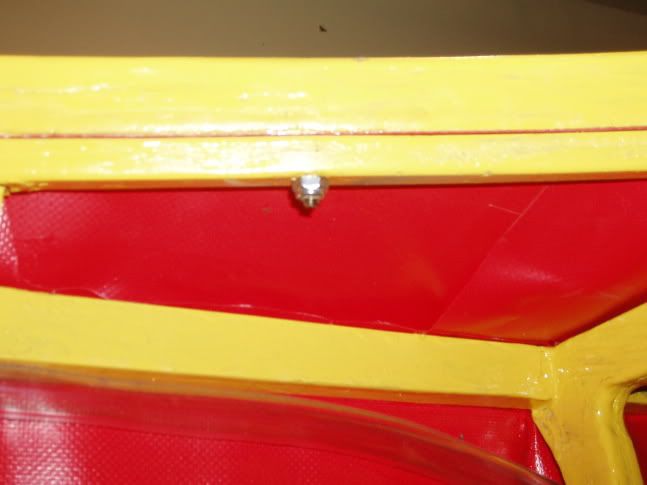
Below, a machine screw with locking nut and acorn nut.
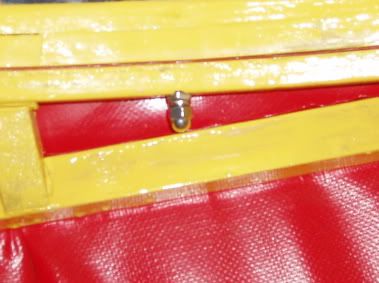 The nice clean hole, about 1/4" in diameter, created by a piece of red-hot screw.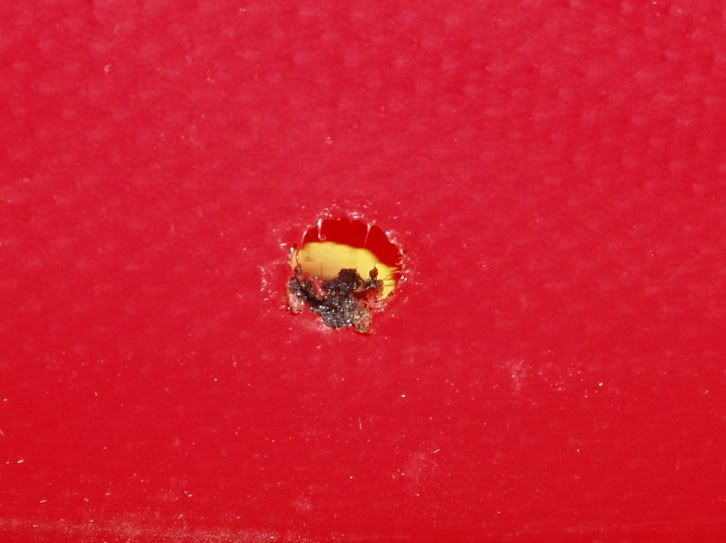
The patch to fix the hole, perhaps the last item to complete the kayak, installed this evening. The patch is about 2" by 1", many times larger than the actual hole, and is adjacent to the keel line.
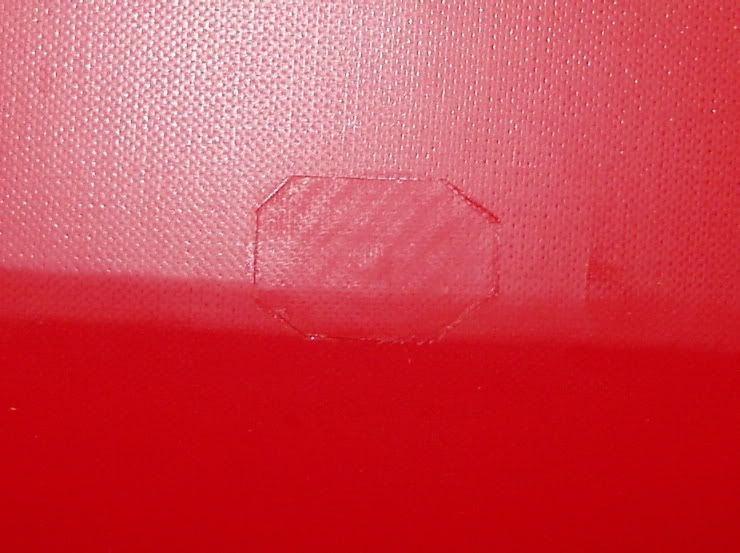 By the way, the Yost-designed Sea Flea I think is now officially done. I'll take some pictures and post them soon. In addition to adding the patch, this evening I finished the outriggers. The girls and I are now working on a paddle.
Thursday, May 15, 2008
Almost There!
Here is a photo from a week ago, after the deck was fully skinned and before the coaming was installed. The deck was skinned in three pieces. small nails were poked through the fabric to help align it and to ensure the holes for the coaming could be located.
 Since that time the coaming has been installed, mostly. I ran out of machine screws so had to buy two more.
In order to create tie down points for carrying handles, and the rest of the deck rigging, padeyes using 1" D-rings (bought at Fabricland, probably not the cheapest or the best selection but they had them) were installed. Pieces of PVC, 1" x 6" were cut, glued then folded over and trimmed (as per Tom Yost's instructions) to create 3" long padeye anchors to be glued to the sides of the kayak with the D-ring at the deck. The narrow strip of masking tape created a glue-free spot in the center where the D-ring sits and


 These were then glued to the kayak, one pair at the bow, one pair at the stern, two pair for bow deck bungees and two pair for the stern deck rigging (which will use cords and a pair of sliders to tighten them).
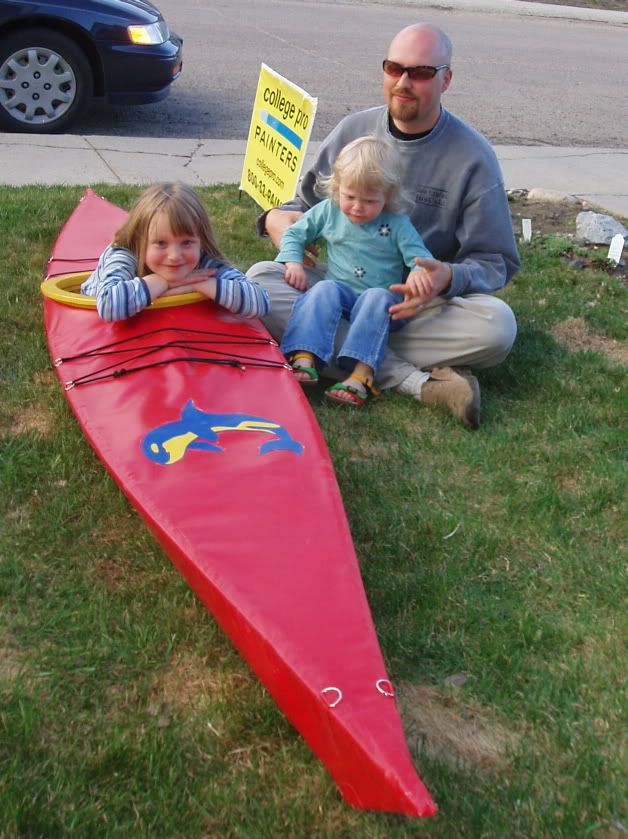
The Orca-style decoration was also glued on today. The whole thing was cut from blue PVC then the yellow patches were glued on afterwards.

 I have to remember to draw the eyeball on the Orca yet with black marker.
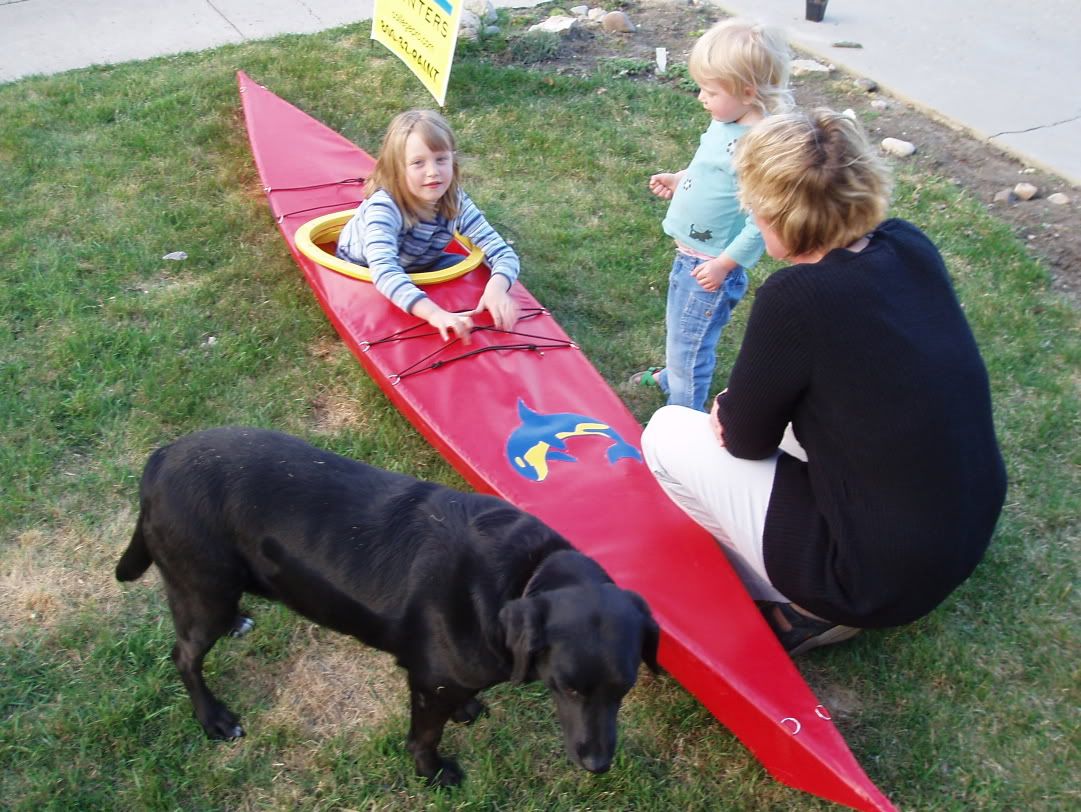
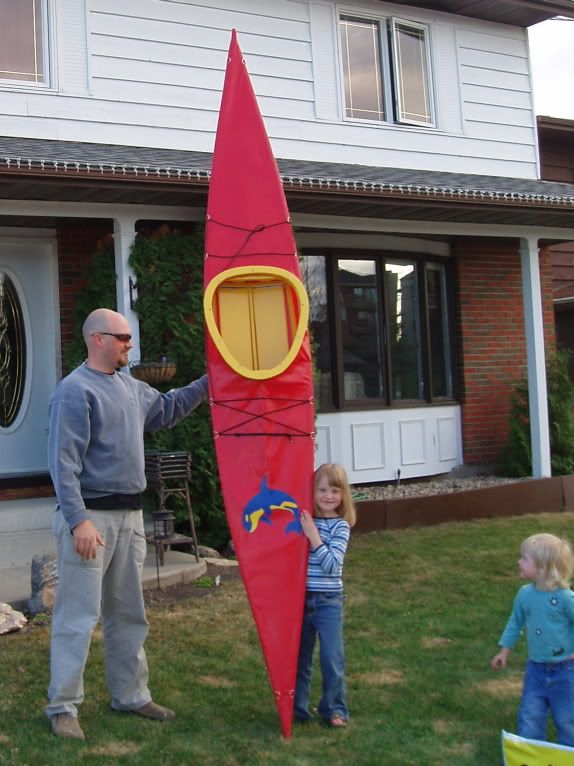
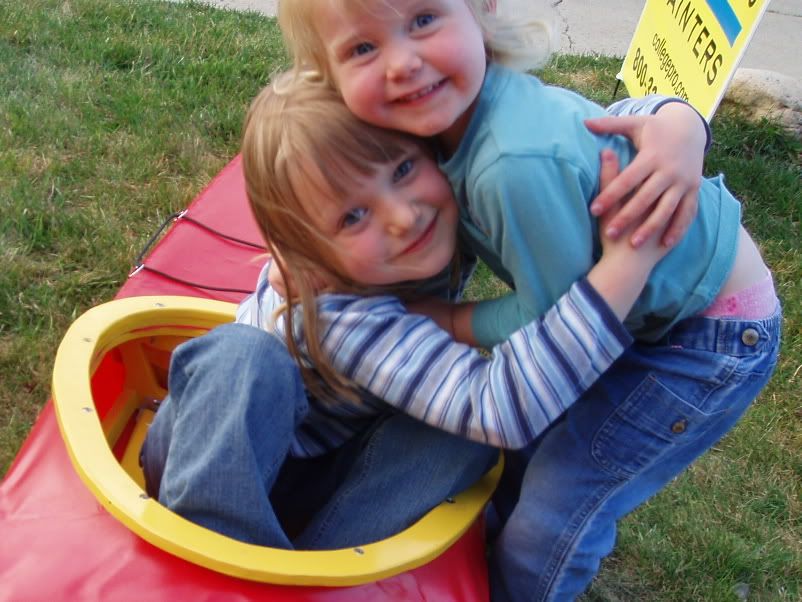
With the kayak very nearly complete (I still need to make the outriggers, cut off the coaming bolts, and fit out the cockpit with foam) the girls were trying it out on the lawn this evening. My older daughter loves to pose, so we indulged her by taking a few more pictures of the girls with the kayak.


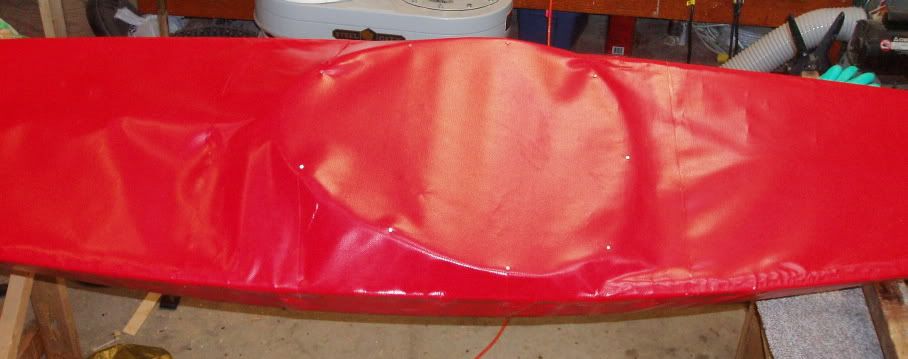 Since that time the coaming has been installed, mostly. I ran out of machine screws so had to buy two more.
In order to create tie down points for carrying handles, and the rest of the deck rigging, padeyes using 1" D-rings (bought at Fabricland, probably not the cheapest or the best selection but they had them) were installed. Pieces of PVC, 1" x 6" were cut, glued then folded over and trimmed (as per Tom Yost's instructions) to create 3" long padeye anchors to be glued to the sides of the kayak with the D-ring at the deck. The narrow strip of masking tape created a glue-free spot in the center where the D-ring sits and
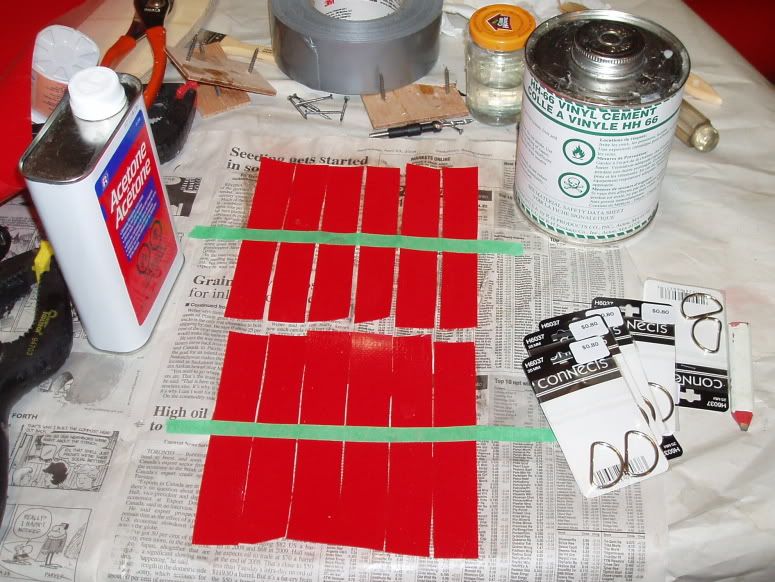
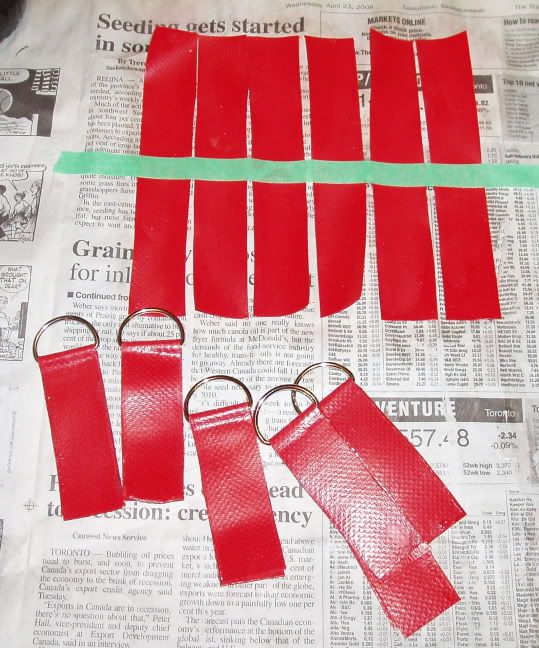
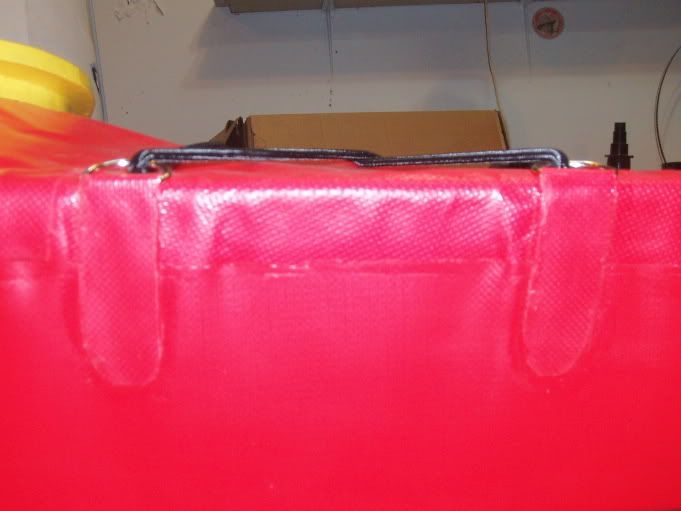 These were then glued to the kayak, one pair at the bow, one pair at the stern, two pair for bow deck bungees and two pair for the stern deck rigging (which will use cords and a pair of sliders to tighten them).
The Orca-style decoration was also glued on today. The whole thing was cut from blue PVC then the yellow patches were glued on afterwards.
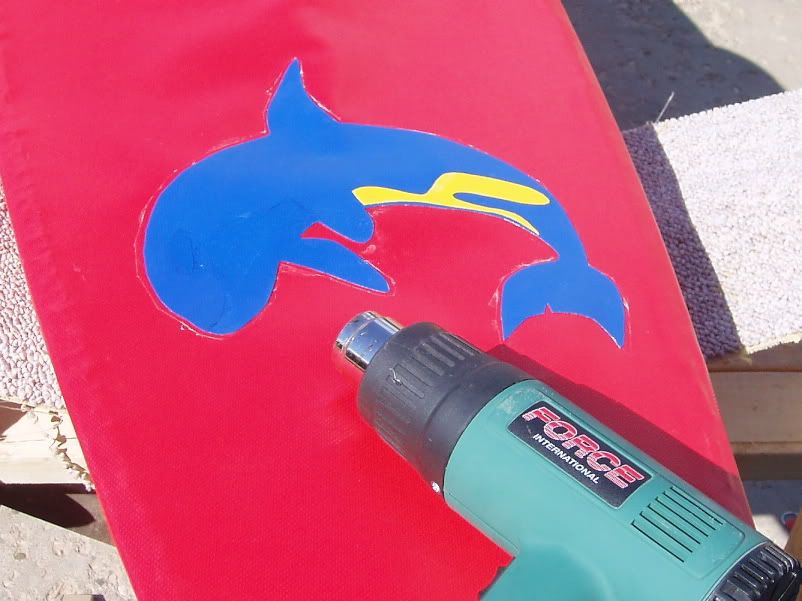
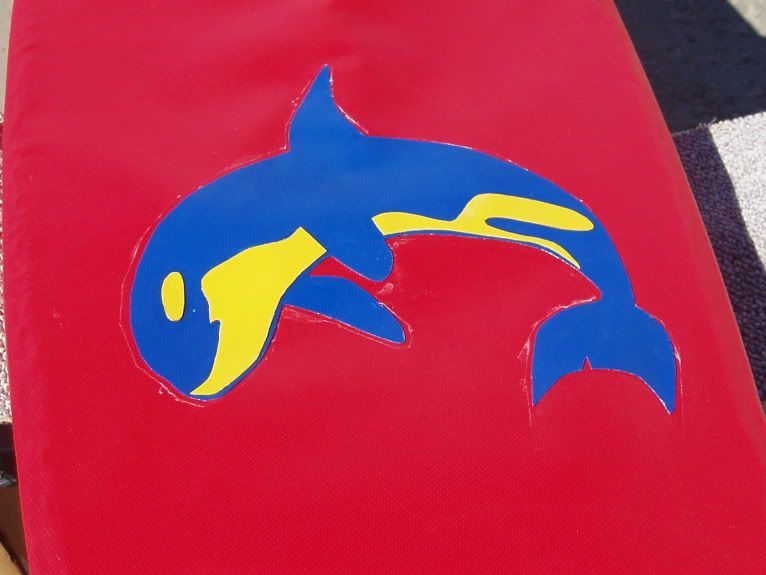 I have to remember to draw the eyeball on the Orca yet with black marker.
With the kayak very nearly complete (I still need to make the outriggers, cut off the coaming bolts, and fit out the cockpit with foam) the girls were trying it out on the lawn this evening. My older daughter loves to pose, so we indulged her by taking a few more pictures of the girls with the kayak.
Subscribe to:
Posts (Atom)