Tuesday, April 25, 2006

Hull Off of the Forms

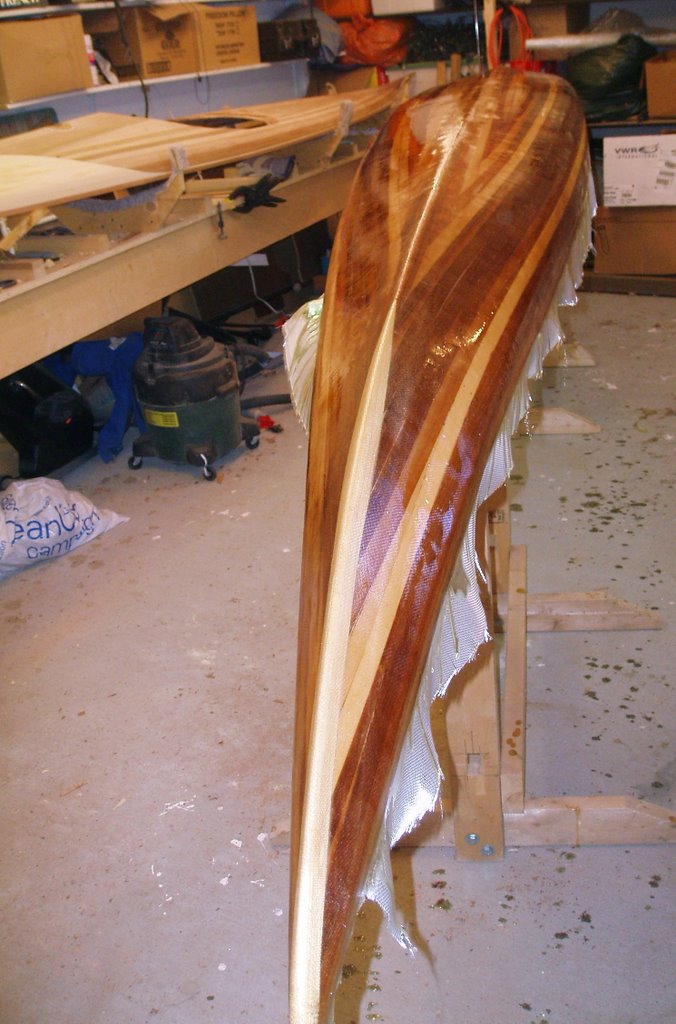
Having given the hull fibreglass a few days to cure, I pulled the hull off of the forms last night. It was a bit tough to break it free of the forms. The contoured shape lends itself to hugging tightly to the forms, especially at the ends. Also, every staple hole bled epoxy through and into the form where ever a staple used to be. These tiny epoxy bonds aren't much individually but they add up over the whole boat. A third factor was the masking tape I used to prevent glue from sticking to the forms - glue & epoxy stick to masking tape quite nicely. Clear packing tape would have done a much better job and allowed easier separation. A fourth factor was the internal stems that were hot-glued in place to the end forms (masked with duct tape) and I had also added epoxy thickened with sawdust in that region in order to strengthen the bond between stem & strips, but some of this bonded to the duct tape on the endforms too (not a strong bond, but something extra holding on to the forms).

In order to separate the hull from the forms, I had to go along the boat, breaking the bonds at each individual form - first breaking the sides at each form on each side, then going back and breaking the bottom of the boat away at each form. With only the endforms holding things in place, I used a screwdriver to pry the boat up off of the endform prying against the internal stem (mahogany) piece. With a minimum of disturbing cracking sounds and groans the hull lifted up off of the forms.

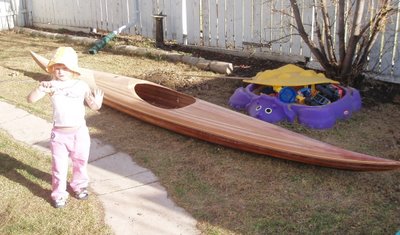
With the half-glassed hull off of the forms, I took the opportunity to lay it on the lawn and take a couple of photos along with the unglassed and somewhat fragile deck. I allowed the kids to try it out, but refrained from sitting in it myself.

Above: A look inside the hull. You can see the masking tape that pulled away at each form, staying with the hull as well as the duct-tape I used to mask off the internal stem before hot gluing it to the end form. You may also notice the tons of epoxy drips where epoxy leaked through all my loose joints between strips. Anybody know the best way to remove those rock-hard drips?

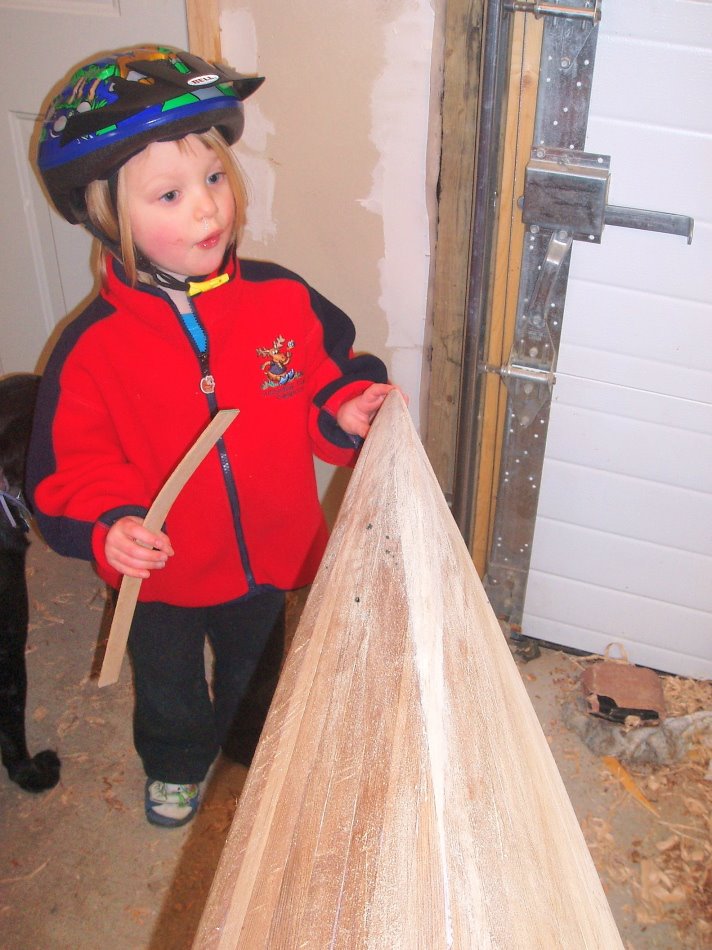
Above: My daughter shows off the partially completed kayak. Below: Both daughters try out the boat for size. I made sure that they put no pressure on the deck at all, especially the cockpit recess. I decided they could forgo the life jackets this time around.

With a look at everything in the sunlight and having satisfied my curiosity regarding what it might look like when complete, I turned the forms around on the stands and put the deck back on the forms. I have a bit more sanding to do to remove excess dookie schmutz/epoxy filler on the deck (seen as a brown splotch near the stern in the second photo above) but I should be able to glass that on the weekend (Sunday?). The hull is now sitting on the same cradles used to support it while I stripped the deck so that I can work on smoothing the inside and preparing it for glass. Perhaps I'll be able to do that at the same time as the deck's topside.

Monday, April 24, 2006

Fiberglass, Stage I

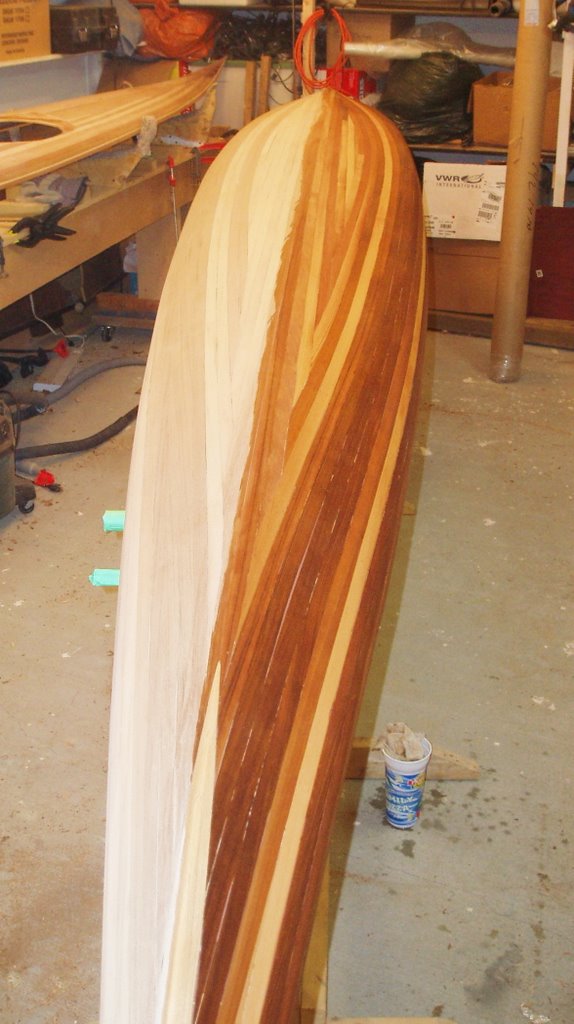
I had a very satisfying moment late Saturday night. In the final preparations prior to fibreglassing the hull, I wet down the hull with a damp rag. This brought out the colours of the cedar from the dull tan colours I've grown familiar with, to vibrant rich browns ranging from deep chocolate to bright amber and that beautiful cedar colour that people love. It was amazing.

It was about 12:30 am and my wife had been asleep for some time. I wanted to run in to the house and get her so that I could show her, but I decided against that. She assures me that that was the right decision. Instead I posted a note on the Kayak Building Bulletin Board – those folks are much more appreciative of this sentiment, and some of them also happened to have been up late working on their boats.

The above photo shows the hull supported on the forms & internal strongback, which in turn is supported on the stands. The deck has been removed from the forms for the moment and is sitting in the background. I'll put the deck back onto the forms prior to fibreglassing.

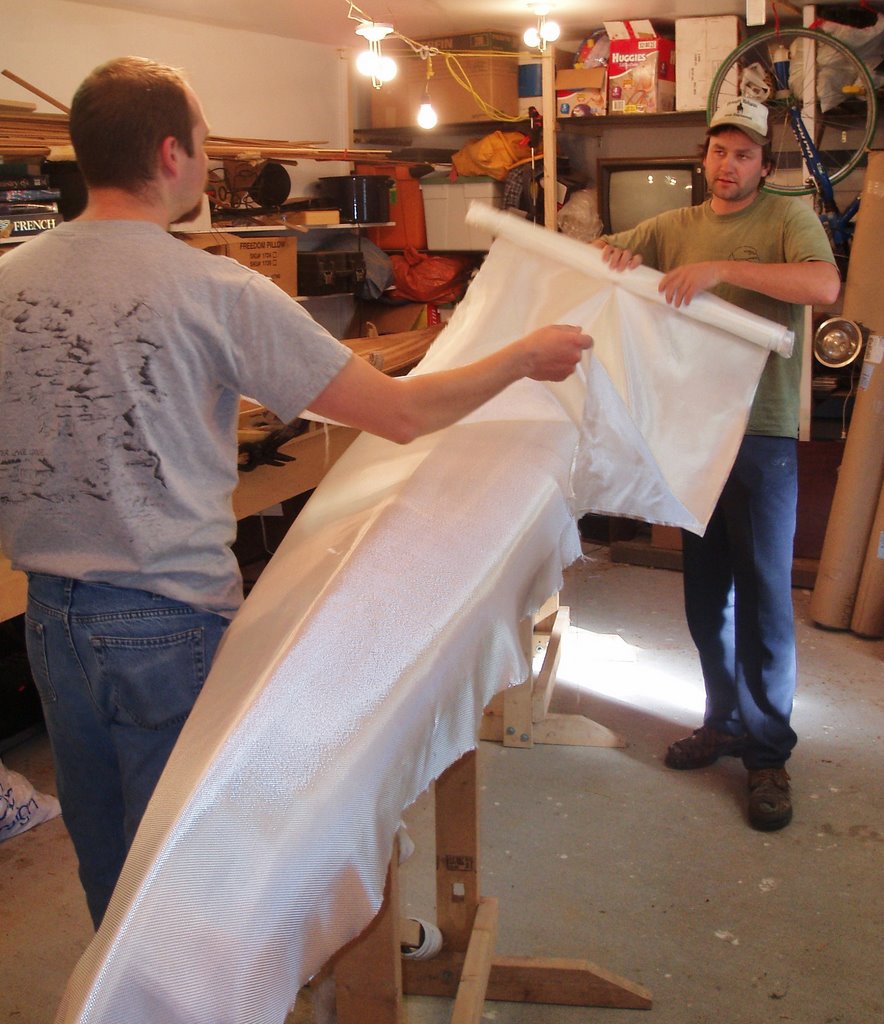
Early the next morning I gave the hull a final sanding with 120 grit paper and wiped it down with acetone to remove the dust and any contaminats. With the aid of Rob & Martin (the latter of Kisseynew Canoe Co.), we began the task of fibreglassing the hull. Initially, I was going to lay on 3 layers of fibreglass: a full layer of 6 oz cloth, an additional layer of either 4 or 6 oz over the central bottom area (the football), and another layer of either 4 or 6 oz along the keel line towards the stems. Martin cautioned me against this approach, feeling that it would add a lot of weight, but not much strength or abrasion resistance (my main reason for the additional layers). Instead, we used the full layer of 6 oz cloth with a strip of the same approximately 4” wide along the entire length of the boat. After some deliberation, we opted not to put the smaller piece on top as suggested in Nick’s book, but rather to hide it underneath the larger sheet. In the end, I believe we were correct to do it this way, as I had a very smooth transition at the edge of the lower layer rather than a step which can be sanded into as described in the book.

The above photo shows Martin & I rolling out what is to become a second layer of cloth. In the photo below, we're probably discussing the merits of various quantities of cloth.

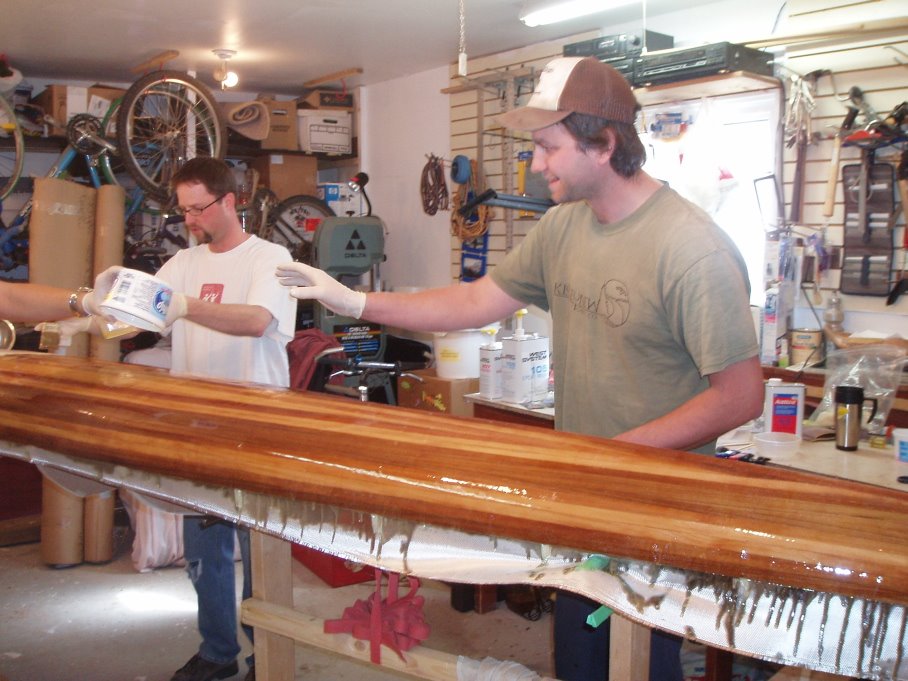
The fibreglassing went well I think. Martin pumped & mixed small batches of epoxy while Rob & I brushed it on with paint brushes to wet out the cloth, working from bow to stern. As we did this, Martin kept watch to ensure we were doing things correctly and keeping a watch for areas where the wood had soaked up much of the epoxy. We then squeegeed off the excess resin, again working bow to stern, just as the epoxy began to thicken. It would seem that I was not as efficient at this as was Martin. While sanding later I could tell the difference between which areas he had squeegeed and which I had. The areas he had done were largely flat and even. The areas I had done were less so. I think I did not remove sufficient resin in some areas as there were hills and valleys (albeit slight ones) present. At first I thought the hills were excess epoxy on top of the glass, but when I started to scrape & sand, I realised that the areas with visible weave were not the valleys as I first thought, but rather the hills. The areas where the glass was completely buried in epoxy were actually lower. It seems to me that the glass must have floated up on excess resin, creating the hills. Damn! That gives me something to work on for the deck I guess.

In the above photo Rob & I pour on the epoxy while Martin waits to mix up a new batch of epoxy.


Below, Martin mixes.

Once the fibreglass had cured to a “green” stage (no longer soft, but not yet hard) approximately 4 ½ hours later, I applied a second coat of epoxy, brushing it on then removing the excess by squeegee. I then allowed this to cure overnight before spending an hour the next morning sanding the whole hull with 120 grit to take off all of the high points. I’ll have to add a 3rd coat to completely fill the weave, but I think I’ll wait until the hull and deck have been reunited and the deck seams glassed before I do that.


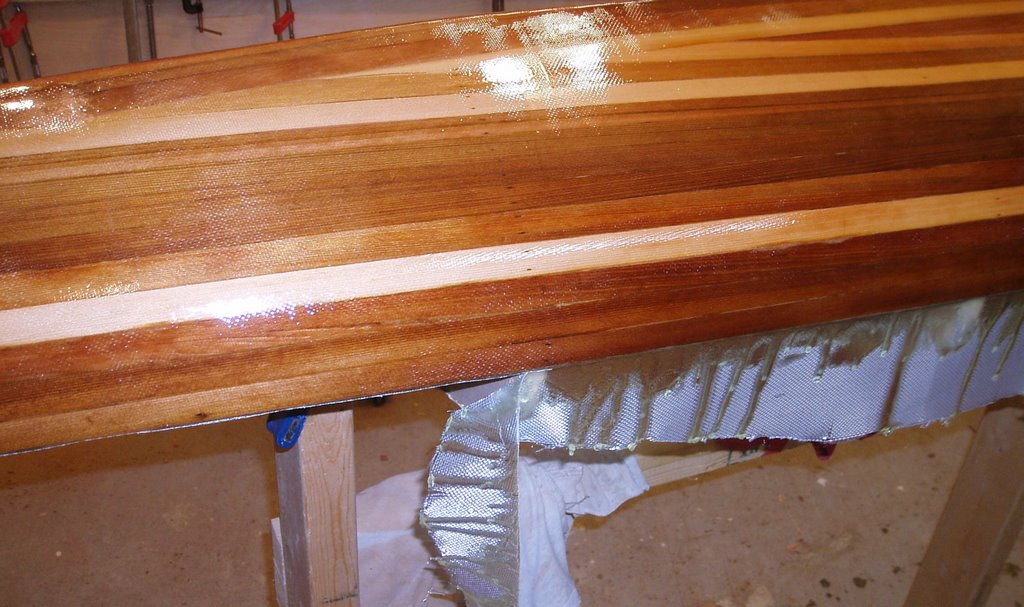
Above: The cloth overhangs the hull and helps to catch drips. Below: Once partially cured, I trimmed the excess cloth with a utility knife.

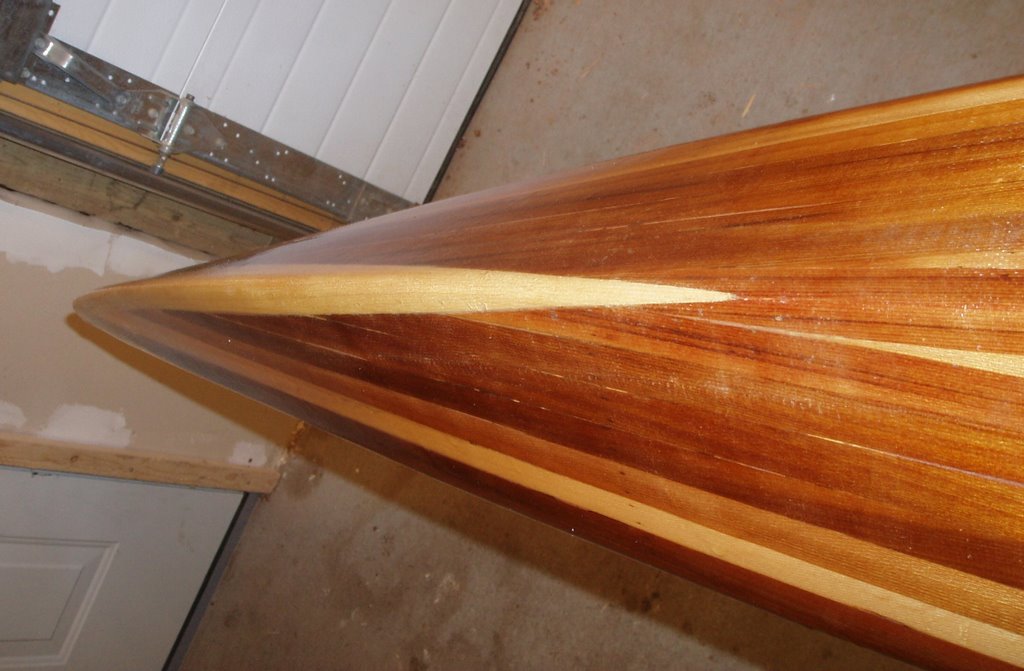
Below: One final photo for the night, this one of the ash stem on the bow.


Monday, April 10, 2006

Like Wrestling a Greased Pig

I made some more progress over the past week, having made a big push in order to try to get ready for fiberglassing by yesterday (Sunday) morning. I didn't get that far, but at least I'm closer.

I had filled all the gaps on the deck with thickened/coloured epoxy, and I did the same for the gaps in the hull. I then set about scraping all the excess epoxy & thickener off. Well, that has turned out to be quite a chore. I have sanded, scraped (with a sharp paint scraper and with cabinet scrapers), planed in an effort to remove this rock-hard crap. {For future reference: it's probably way easier to do this when the epoxy is in the "green" stage of curing rather than the "granite" stage.} I eventually got all of the extra dookie schmutz (that's the technical term) off of the hull, only to have revealed more gaps in the process. Frankly, I think I'd best leave those alone before things start getting worse. I am only half done cleaning up the excess dookie schmutz from the deck.

I also attempted to get those stems laminated into place. I had wanted to make use of some walnut I had laying around (cutoffs bought from the local Habitat Re-Store) so I cut it into approximately 1/8" x 1" x 3-4' strips on the band saw. These strips were pretty uneven in their thickness and were far from smooth, but I figured they oughta be good enough to do the job of protecting the stems from wayward rocks. As mentioned in my last post, I steam bent them, and taped them in place to dry. I later decided that the job of bending was pretty unsatisfactory at the tips where the bend is greatest. It was hard to get them to bend just the right way and have them align well and remain clamped in place on a rounded tapered surface. I decided instead to try ash, since it is renowned for being easy to bend, and is well suited to the job of protecting the softer cedar while being easy to carve to match the shape of the boat. I went to my local Windsor Plywood and picked up a 4/4 6" x 4' piece of ash and another of walnut. While there, I paid a few extra dollars and had them cut the ash into 1/8" strips and they did a MUCH nicer job than I did on the bandsaw. Before using the ash strips, I decided it was worth a try to cut a solid piece of walnut to fit, rather than attempting to bend wood. I made a template out of cardboard and transferred the shape to the walnut and cut it out on the bandsaw. The fit needed tweaking, but I found working on the concave curve to be difficult, so I turned my attention instead to using the ash strips. In order to make handling the strips manageable, I taped one end of 6 strips together, then taped this bundle to the keel on the bottom of the hull. I then bent the strips to the keel and taped the strips in place as I went. Once the curve became greater near the tip, I used the heat gun to soften the wood fibers and allow the wood to bend more. What I found with my (mis)application of this technique was that I could create a very sharp bend in the wood (a sharp 90 degree bend was easy), but it was hard to get the wood to bend gradually over a short distance. This probably was a factor of my inexperience. Regardless, I got the wood bent acceptably to match the curve of the stem and taped & bungeed in place until it could cool. With the wood pre-bent in this manner I then mixed up some dookie schmutz using epoxy and the 406 Colloidal Silica to create a mayonnaise consistency glue and painted this on to each side of the wood strips, stacked this up then attempted to wrestle this slimy greased up mess onto the bow stem, taping it in place with fiber-reinforced tape. This proved to be a bit tricky, as two gloved hands were required to keep the pile of strips in place, another hand was needed to wrap the tape around, and another hand was needed to cut the tape with a knife. The whole operation is complicated by the fact that the substrate being attached to is round and tapered. Add to this the fact that my rubber gloves kept disintegrating (if Home Hardware made condoms, I think they'd have an awful lot of paternity suits on their hands; if the gloves I used at work were this crappy, I'd probably have died of strep pneumonia or a staphylococcal infection by now), and I was not a happy camper. However, I managed it by myself and soon left the taped, bungeed, strapped conglomeration alone to cure. Thankfully, Rob was able to come by in the evening and this made the repeat process on the stern a lot easier.

I shoulda had a look at this guy's blog - maybe those inner tube straps would have worked better than the tape.

Here's a picture or two of the stern stem laminations taped in place. I used the green masking tape to mask off the area so that there would be less epoxy to clean off of the hull. This is the one Rob helped me with; the one I did alone wasn't quite so neat.
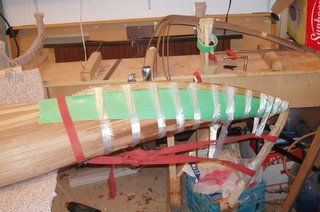
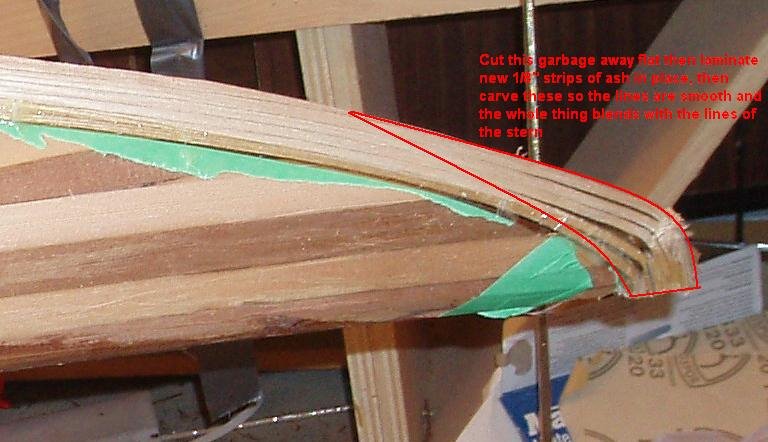
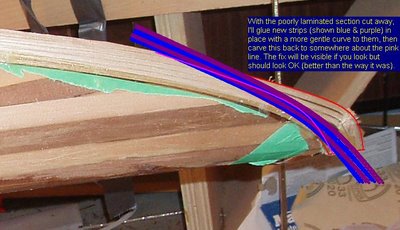
Once I removed the strapping tape a problem at the stern tip became evident:
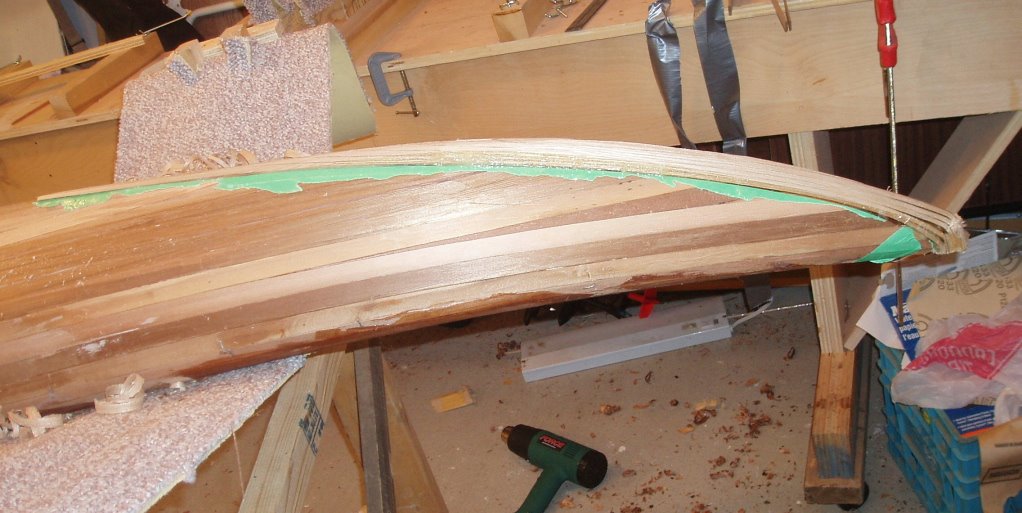
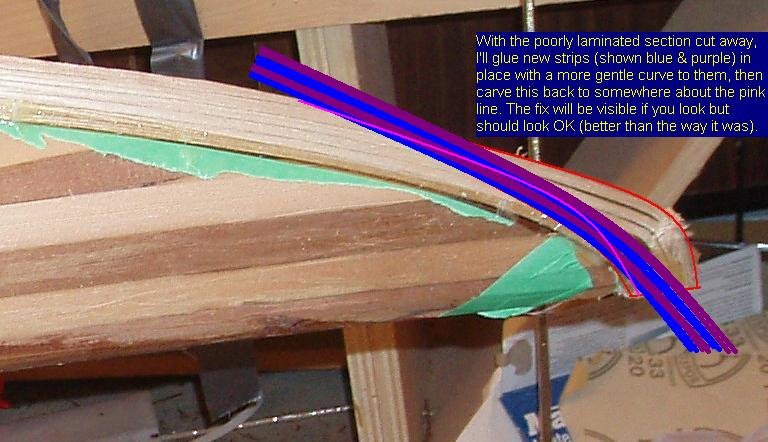
Looks pretty bad, doesn't it? It seems I didn't have things aligned well enough at the tip and/or it wasn't taped in place tight enough. I began shaping the stem with the block plane anyway.Note that I masked off the hull too close to the stems, trapping green masking tape under the stem edges. This was all planed away in the process of shaping the stem so it's not so bad as it looks. The next couple of images show how I intend to fix the problem of the crappy lamination & bends. I'll cut away all of the poorly laminated section, leaving a gently curving squared off area on which I'll glue some new pieces.

Once those pieces are glued in place, I'll shave them down to match the flowing lines of the stern. The only thing I'm not too sure about is how in the heck I'm going to clamp those suckers in place until the glue sets. One thing I thought of was to maybe use thick cyanoacrylate glue with accelerator so that they wouldn't need to be held for long. Anybody know if this will work? Is it strong enough to withstand the abuse that planing would put on the glue?
Wednesday, April 05, 2006

Steam Bending and Gap Filling

Things have been pretty slow going around here recently but I have gotten a few things done.
  1. I rough sanded the deck.
  2. Last week I cut out the cockpit hole, so the boat, again, has a hole in it. This is as far as I'll take the cockpit until after the deck has been glassed.
  3. I cut another hole in the kayak, this one is a circle of about 4" or so in diameter and is located just fore of the cockpit and was cut to accept a carved feature I made for insertion in the deck (more on this in a subsequent post).
  4. I finished the carved feature mentioned above and after a great deal of mucking about with it, inserted the carved piece with walnut center into the kayak deck and glued it in place.
  5. More sanding on the deck.
  6. I made a fairing board for sanding by attaching handles to a piece of 1/8" hardboard sized to accommodate a layed out sanding belt (from a belt sander). This works well, I should've done it sooner.
  7. I built a plywood box for steam bending the walnut strips which are to become the external stems (bow & stern).
  8. I screwed around with an old electric kettle to get it to work properly for the steam box. First I had to bypass the thermostat so that it would continue to boil for the necessary time. Second, I had to come up with a pipe set-up in order to carry the steam into the box. It seemed that the steam would have rather gone anywhere other than into the box (no, the box was not sealed too tightly) prefer to escape at the several weak points in my system. The final set-up used a PVC pipe (1 1/2"?), duct taped to the kettle with a second piece of pipe (2"?) slipped over top and a third piece (1 1/2"? again) which fit inside the larger piece, giving a telescoping arrangement. The pipes were sealed with duct tape, and sealed to the box with duct tape. Too bad duct tape sucks with respect to resisting steam. Oh well, it worked long enough to hold in the steam for 20 minutes or so at a time.
  9. I made forms to replicate the shape of the stems on which to bend the steamed walnut stems and hold them while they dried.
  10. I steamed the walnut, bent it around the forms, and clamped it in place for it to dry overnight.
  11. I mixed up and applied some thickened epoxy to fill the gaps on the deck, using a light yellow mixture as shown in an earlier post for the alaskan yellow cedar section of the deck, and a brownish mixture for the western red cedar section of the deck.
  12. I learned that if you mix up ~2 ounces of epoxy (1 pump resin + 1 pump hardener) and let it sit in front of the heater for a couple of minutes so that it becomes warm to reduce the viscosity, it will get smoking hot (very literally) when it begins to "kick". It seemed the perfect consistency when I started to use it to coat my carving (I wanted to ensure it would flow into all the nooks without trapping air) but I was really surprised how quickly the epoxy went from a thin liquid to semi-solid. Although I managed to get the carving mostly coated before the resin became unusable, it was only barely and I didn't fill all the valleys as I planned (no problem, I'll get it on the next go around).
The next few steps will be to scrape/sand off the excess epoxy putty, sand things smooth again, glue the stems in place, shape the stems, fill gaps on the hull. At that point, I think I should be ready for glassing.

Saturday, April 01, 2006

Veritas� Pouchless Tool Belt - Lee Valley Tools

Since my block blane, chisel, scraper or saw are invariable on the other side of the strongback and boat, I thought the new Veritas "Pouchless Tool Belt" from Lee Valley Tools was a great idea. I'm gonna order one as soon as I can get my credit card remagnetized.

Sunday, March 19, 2006

Cockpit recess stripped

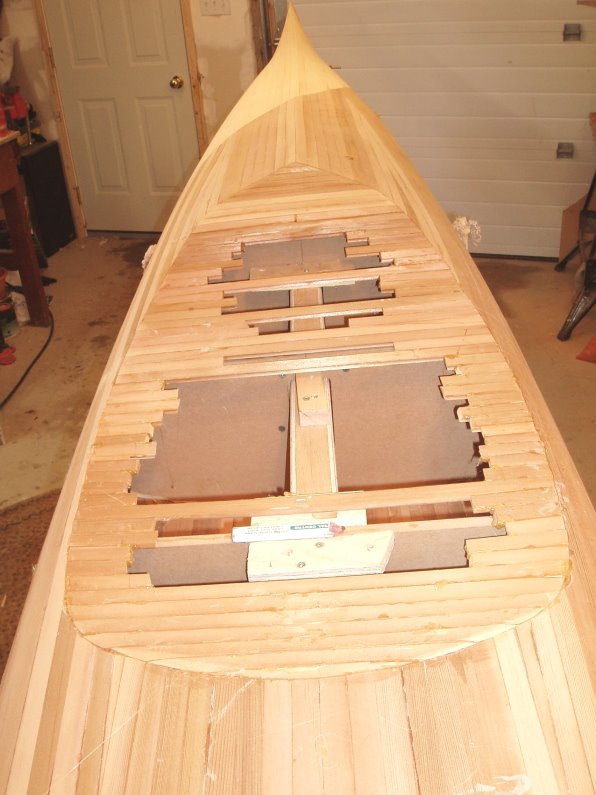
Well I finally got a bit of time to do some more work on the boat this weekend. I finished stripping the recessed cockpit area. Short strips were glued in place with the Lee Valley 2002 GF wood glue that I've used for most of the boat, but dabs of hot glue were used on the inner end of each piece to hold it in place so that I didn't have to wait for the glue to dry before moving on to the next series of strips. Dabs of hot glue were used here and there in other places too to ensure that all the short strips stayed where they were put. The whole recess took an ridiculous amount of time for something so simple. Next time I think I would seriously consider laying in a piece of thin, flexible plywood instead.

Stern to bow shot:

Bow to stern shot:
Side profile:The above photo shows how the recessed area lowers the final cockpit position, especially on the rear deck.

Finally, a frankensteinian panorama:
That's it the deck is practically finished right??....... (stay tuned to see what's in store next)

p.s. If anyone can tell me how to quickly do a passable job of adjusting the colours in a digital photo to have things look a little bit realistic, I'm all ears. I play with the colour balance, gamma, tone, brightness, contrast and that thing with the curve that does wicked things to a photo, with limited success at best. I've got all the tools, I know how to turn them on, but I don't properly understand what they do or when to use them. Most of my shop pictures turn out too orange maybe due to the colour of the wood and a light source with a warm tone as seen by the camera.

Friday, March 17, 2006

What some folks do to their boats

Recently on the kayak building bulletin board, there was a discussion regarding the perceived fragility of the fiberglass composite boats know as "strippers" or cedar-strip canoes & kayaks. One of the folks to relate their experiences was Bjorn Thomasson, who replied:
"A stripper is a delicate thing! Look what happened to my Nomad, just for a simple somersault backwards in 13 ft breaking sea and hitting the rocky bottom with the stern! Disappointing..."
The post was followed by a picture of his broken kayak with the rear 2 feet sheared right off. In case you didn't notice, Bjorn was speaking very much tongue in cheek in his answer. Bjorn has also provided the story (Swedish with English translation) behind the "incident" and pictures of the broken kayak and the ensuing repairs. It's worth a look if only for the dramatic pictures. It also shows another advantage of wood boats - their ability to be repaired. Simply put, if you can build it, you can fix it.

Another response in the same discussion was posted by "Ken C":
"I keep my strip kayak hanging from webbing loops in the garage ... one day, I was bringing it down and in a momentary lapse of coordination, I lost control of the boat ... it came crashing down onto the corner of my jointer table (rock-solid cast-iron surface with lotsa angular corners, if you haven't seen one), and then bounced down onto the bare concrete floor ...
"oh, darn" says I ...
I took a minute to calm down and jump-start my heart again, before inspecting the damage ... the neighbors must have been wondering what the commotion was all about ... I was sure I'd be patching a gaping wound, but when I finally got up the nerve to go and look, I couldn't even find a mark ... no dent, no scratch, no glass showing ...... nothing.
I no longer walk on eggshells - these glass/wood/glass panels are TOUGH. "

Not as dramatic as Bjorn's testing efforts but perhaps relates closely to something I'm likely to encounter (not often we see 13' breaking seas on the South Saskatchewan River or at Lakeview Pond).

Monday, March 13, 2006

Google Mars

Tired of paddling the same old places? Need a new frontier to bag a "first"? Try here.

Monday, March 06, 2006

Lack of Progress

Kayak progress has been pretty much stopped lately. Between sickness (the whole family seems to be just continuously cycling through colds), work, and getting our house ready to sell I haven't done a thing on the boat in about 2 weeks. We bought a house last week (20'x24' attached garage with 10' ceilings, insulated and drywalled - I need to add lots of light, lots of power, a source of heat and I'll have a boatbuilding shop ready to go) so now I have to finish all sorts of things around our house and get it ready to sell. We've gotten a lot done on that front over the last couple of weekends so the list is getting shorter. Then I'll have to clean up the shop and make it presentable. By the way, if you want to buy a boatbuilding workshop (220V, lots of light, electrical outlets every 6', insulated, drywalled) with nice yard and detached house, let me know!

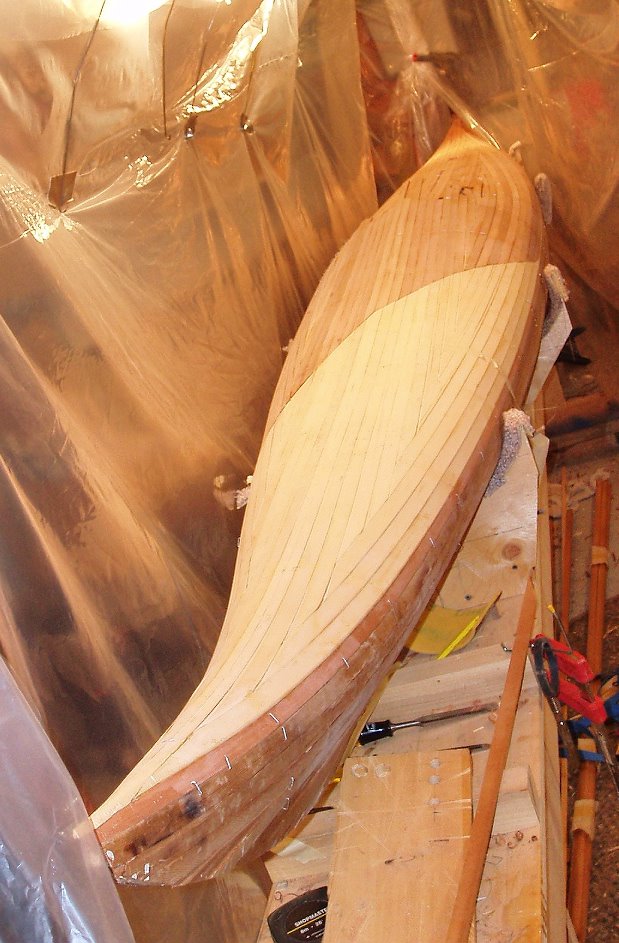
As you see it in my previous posts is pretty much how the kayak sits right now. I'm not in super big hurry right now anyway since the next few steps involve epoxy so I'll have to warm it up and keep it warm for a period. Thus, I want to wait until it's a bit warmer outside and also where I can do a lot of work on it in a single stretch. Aside from the actual fiberglass work, I need to fill all the gaps and I'll use a epoxy putty mixture to do that with. I also need to attach hardwood stems which will be glued in place with epoxy (though I could use a polyurethane glue or another glue).

Right now I'm 1/3-1/2 way through filling in the cockpit recess, a flatish area (curves in only 2 dimensions instead of 3) where the cockpit hole will eventually be cut and it's proving to be a PITA because it takes time to properly fit all the short horizontal strips just so without a gap. I was considering using a chunk of thin plywood (walnut or mahogany or luan?) and bending it in place to fill the recess much as would be done for a stitch & glue kayak, but I decided to do it the way the book said since I am too cheap to go buy plywood and preferred to use up my scraps of cedar. Now I'm wishing I had used the plywood. If I had gotten the ply, I would also use it for the whole cockpit area including the riser and the rim (there is a lip that sits above the cockpit opening about an inch which allows you to attach a spray skirt and also keeps the water out when not using the skirt). I'm still thinking about plywood - I think mahogany/luan might look OK with the cedar, and I think in the end it would be lighter, maybe stronger, and easier. (I just called around & I can get a 4x8 sheet of 1/8" ribbon mahogany for $19 - I think I'm sold but I'll have to see what it looks like and how flexible it is). Once the recessed area is finished, sanded and all the gaps filled (filled for two reasons - aesthetics and so that they don't just fill with plain epoxy during glassing which would add weight) I'll fiberglass the deck then flip it over to work on the bottom. I already had it flipped over and was working on the stems and have the bottom half smoothed, but the deck flexed a lot because it wasn't being properly supported and I think it would be better to have the deck strengthened with fiberglass before I flip it over again. Either that or I have to make some cradles to better support the deck while it's upside down (my cradles are shaped to fit the bottom - probably just the webbing slings of my boat stands will work too without creating pressure points). By spring I should have a boat that floats but doing the finish work will take some time too (seat, back rest, hip padding, deck lines, varnish).

So here is what I have yet to do in approximate order, though that may change:
  1. Fill in the cockpit recess whether with strips or plywood.
  2. Fill the gaps in the deck.
  3. Cut a 4" hole in the deck in front of the cockpit and insert a hand-carved feature piece inlay (which is almost complete but isn't quite there yet).
  4. Seal the deck with epoxy (might be done shortly before fiberglassing).
  5. Fiberglass the deck top with 4 ounce glass.
  6. Flip the boat over into the boat stands with webbing.
  7. Bend strips of walnut to form the the keel strips & glue in place. (I've already got the strips cut and bent using a heat gun, but I have to decided if they are good enough)
  8. Plane, scrape, sand the bottom and fair the keel strips into the hull.
  9. Fill the gaps.
  10. Precoat then fiberglass the bottom (multiple layers).
  11. Flip the boat back over.
  12. Cut out the cockpit opening.
  13. Build the cockpit riser (short strips of cedar or a piece of plywood)
  14. Fiberglass the riser.
  15. Build a cockpit lip (by laminating thin strips of hardwood or cutting the lip out of plywood), trim the riser above the lip and smooth the edges.
  16. Fiberglass the lip.
  17. Pull the deck and hull off of the forms.
  18. Scrape, plane and sand the inside of the kayak fair.
  19. Fiberglass the inside, reinforcing certain areas.
  20. Cut hatch openings.
  21. Install fittings for deck lines.
  22. Attach the two halves.
  23. Install bulkheads.
  24. Apply the epoxy fill coats to fill the weave of the fabric.
  25. Varnish
  26. Build and install seat, back rest.
  27. Install deck lines.
  28. Paddle.
Wow, maybe I shouldn't have started that list. I was feeling OK with the progress but now I'm overwhelmed with what remains.

Saturday, February 18, 2006

Colourful Epoxy

Martin brought over my newly purchased fiberglass cloth (West Systems glass: 14 yds of 4 ounce, 14 yards of 6 ounce), epoxy (West Systems 105 resin + 207 hardener), and two types of fillers (WS 406 & 407). The fillers are mixed in with the epoxy to change the thicken it and comes in a variety of types for different functions.

The 406 filler is "colloidal silica" adhesive filler, particularly good for gluing things together (like laminated stems), and is made of extremely small particles of silica. It was available in two sizes, 1.7 ounce or 5.5 ounce. Well 1.7 oz doesn't sound like a heck of a lot for something you mix in by the handful to thicken a batch of epoxy so I figured I'd better get the larger size. Well I now own a tub of colloidal silica. This stuff is light! It looks like very fine, very light, white snow. It literally floats out of the container on it's own when you open the lid.

The 407 filler is the "low density fairing filler" and is intended for filling gaps or hollows and can be sanded easily and isn't heavy. It's also purple. Here's how West System describes it:
407 Low-Density filler is a blended microballoon-based filler used to make fairing putties that are easy to sand or carve. Reasonably strong on a strength-to-weight basis. Cures to a dark red/brown color.
Sounds like it should be perfect and blend fairly well with the darker wood on the kayak to fill all those gaps where my joints weren't perfect right? Perhaps if my boat was built of purple heart.


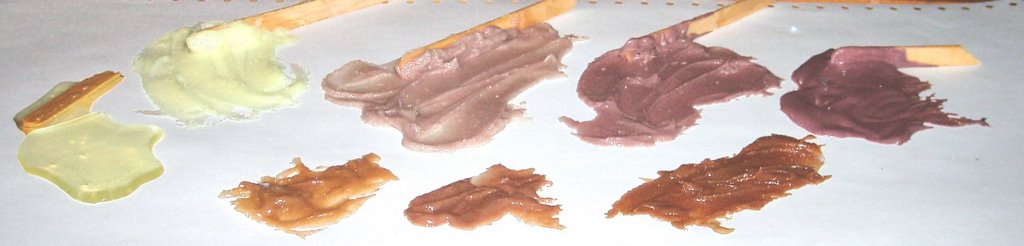
In order to have some idea of how the epoxy and fillers could be combined to get a variety of colours to match the wood on my boat I mixed up a few batches in different combinations to see what shades I can come up with. I also collected half a large peanut butter container of the dust left over from the sander. The problem with using wood flour is that it continues to absorb epoxy after it's mixed to the desired consistency, it ends up being heavy and hard to sand because the fibers are saturated with epoxy, and it has a colour much darker than the original wood.

The silica in the mix seems to give everything sort of a silvery hue. The 406 has quite a yellowish appearance when mixed with the epoxy and this will actually probably match fairly well with the yellow cedar at the front of the deck. In order to match the rest of the wood I'll probably end up using mostly 406 with a bit of wood flour mixed in for the brown colour, and a very small amount of the 407 stuff in areas that are a bit darker. Flour can also be used as a an additive to lighten the colour so I might play with this a bit too; maybe rye flour would have a bit of brown colour?

The putties mixed for the above picture were all about the consistency of peanut butter or a bit thinner. It's interesting that the 407 filler gives a much smoother texture than the mixes that include the 406 silica.

Friday, February 17, 2006

A Boat With A Hole In It

On Wednesday night I got the deck planed and sanded fairly smooth (fair) and also cut out the hole for the recessed cockpit. (To see what the cockpit recess on this kayak should look like, have a look at the one John Caldeira did on his, it's a great excuse to have a look at his beautiful Guillemot kayak.)

The line was first marked onto the deck in pencil following a half template cut from 1/8" hardboard. A half-template is a template which is only half of the opening and is then flipped over to do the other half. This helps to assure that the two sides are actually symmetrical and prevents the appearance of any errors in the way the curves are drawn between the two sides (the template is drawn from a set of "offsets which are essentially a series of x & y coordinates then you connect the dots to get the full shape). I was initially a bit timid about how to get the flat template to lay properly on the deck which is highly curved in in this particular spot. Should I push it down and force it to conform to the shape of the deck as best I can, or allow it to sit flat and just trace straight down from the edge of the template, even though it may sit 5" or more above the kayak in places. I eventually decided it probably doesn't matter too much and stapled the template down to the deck in a couple of spots to ensure it didn't shift on me, curving it to follow the contour of the deck somewhat but not forcing it down anywhere. I then held my pencil fairly vertical and traced around the template. I then flipped it over and repeated for the other side.

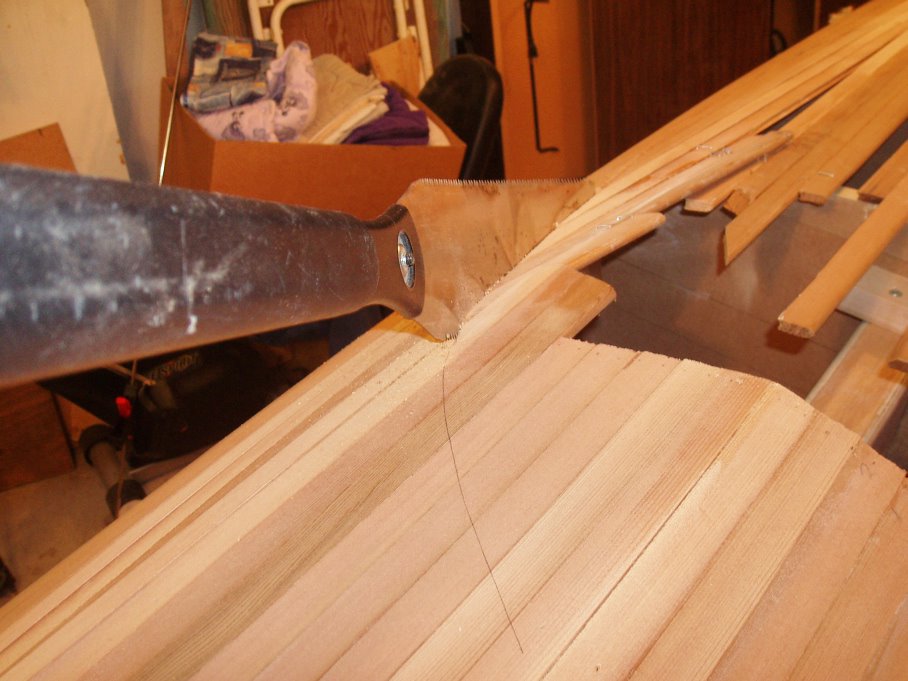
The hole was cut just slightly to the inside of the line, to be trimmed to the line later with sandpaper, chisels, etc. The cut was started using a broken off hacksaw blade clamped in vice grips. This narrow blade allowed for a very thin kerf and was able to cut a fairly tight radius around the corner. Once around the corner at the back of the cockpit, I switched to the japanese pull saw (shown in the pictures) to cut the more gently curving portions.
The hacksaw blade in vice grips saw worked OK, but it wasn't terrific. Also the japanese saw worked well, but wouldn't work for anything more than a gentle curve. Cutting the recess (and later the actual cockpit opening) is a trial in advance of cutting hatch openings later on. Cutting the hatches will require something able to cut a smooth line and follow a curve well. Often a power jig saw is used, but I have some misgivings about using my hand-me-down 30 year old saw for this purpose, or any other power tool for that matter. In my experience, nothing screws up a project faster than trying to save a bit of time using a power tool. I think then, that this little saw (or this one) from Lee Valley Tools might be just the ticket.It would allows for a thin kerf, the fine and easy cut of a japanese saw, and it's narrow and would have no problem cutting the oval shape of a hatch. At $18 it's not prohibitive either. I think I will get this saw now, but I just wanted to rule out a couple of options first (one more option to try would be to use a fine tooth jigsaw blade in the vicegrips). I also think small saw like this would have been handy for rough cutting strips while stripping the kayak.

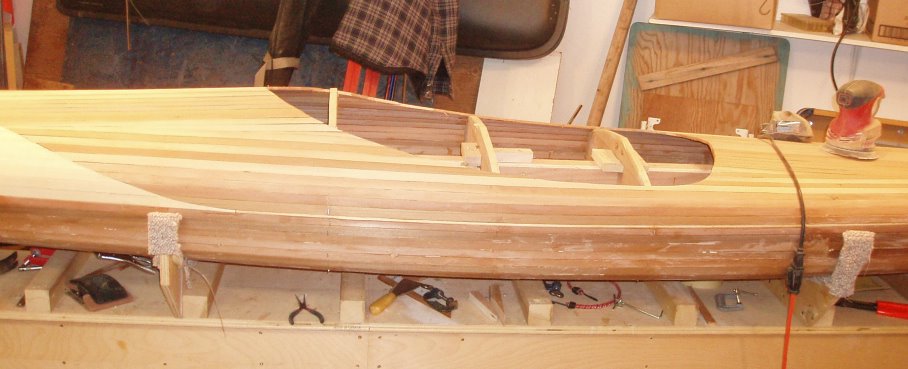
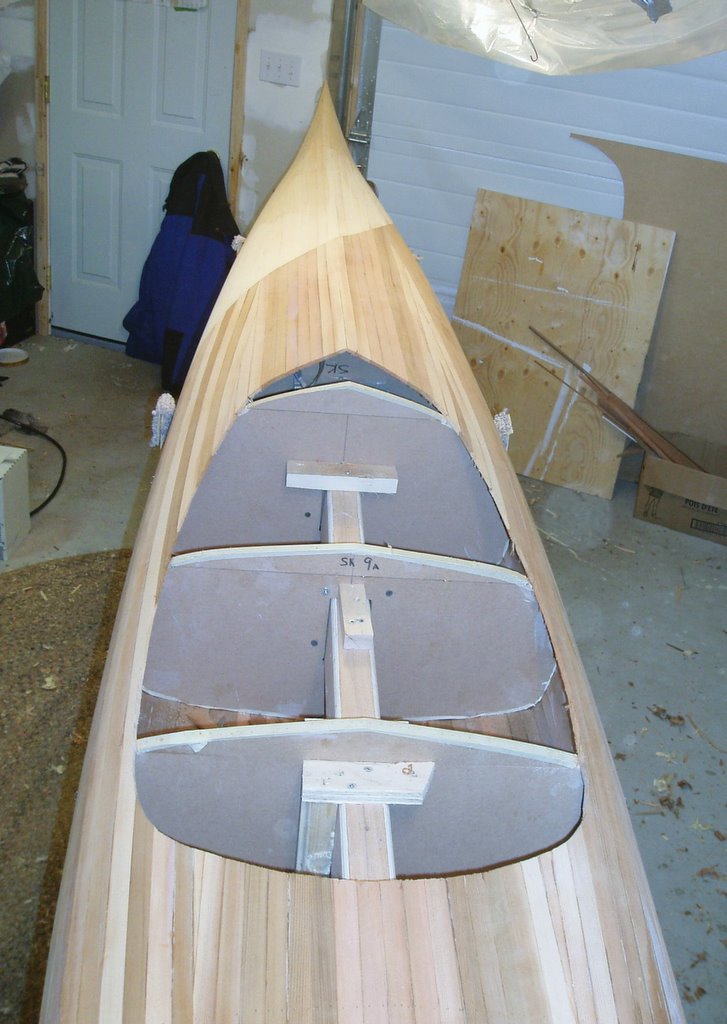
Here are a couple more photos of the cut out cockpit recess.
Looks nicer with a hole in it doesn't it?

Now I have to fill that hole back in, at least partially so that there is a couple of inches worth of wood all the way around the outer edge. The difference from what was cut out is that the pieces that are put in will go in horizontally across the opening such that they sit parallel to the floor on a flat curve from the peak at the front to the sides where it is lowest then up just a bit at the back (that second last picture above should help to visualize this). The tops of the forms in the recess area have now been broken away (they were pre-cut then hot-glued back in place prior to stripping) so that they are out of the way for the building of the recess. Once that recess has been stripped, I can cut out the hole for the actual cockpit opening (actually that probably won't occur until after the deck has been glassed on the outside).

After I had planed off the high points, I started up the sander with 80 grit paper just to see how that goes. I never bothered with the dust mask or connecting the shop-vac up to collect the dust because I was only going to be sanding for a couple of minutes. Well I ended up doing a fair bit of sanding, the whole deck in fact. It took me about an hour or so. I figured there wasn't much dust being kicked up so I didn't worry about the mask, even though I know that wood dust isn't very good for the lungs, and cedar dust is the worst. After being at it for a while I looked up across the room and realised that the air was full of dust. When I went to bed later that night I began to hack and cough, and it got worse the next day. 48 hours later and I think I'm nearly back to normal (I am/was on the tail end of a cold so it is a bit difficult to say what's due to dust and what's due to virus). Of course the next day in the lab Justin, a lung function specialist with whom I share lab space, noticed the hacking cough and after my explanation admonished me for my foolishness. He's right of course. Ever wonder why people use cedar chests to store quilts and long term clothes storage, or use cedar inserts in dresser drawers to ward off insects? It's because cedar trees have gotten very good at producing chemicals that some insects aren't particularly fond of. And your lung epithelial lining isn't particularly fond of it either. Even without the toxic compounds, it's probably not particularly good to have these extremely fine fibers (the small size of the dust allows them to get into the deepest cavities of your lungs) irritating your alveoli (remember, Justin's the expert on that stuff not me). But (cough) I digress.

Monday, February 13, 2006

Deck Completed

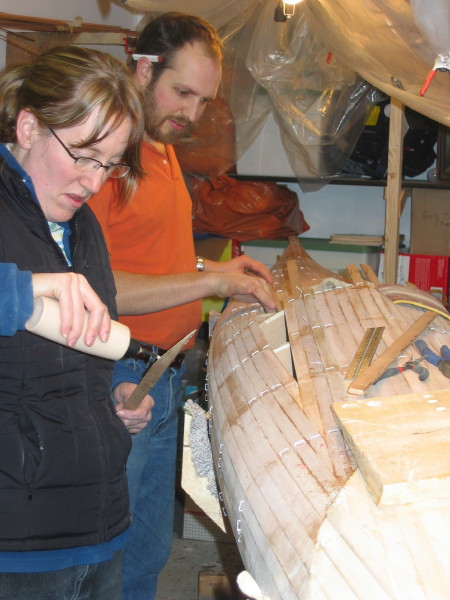
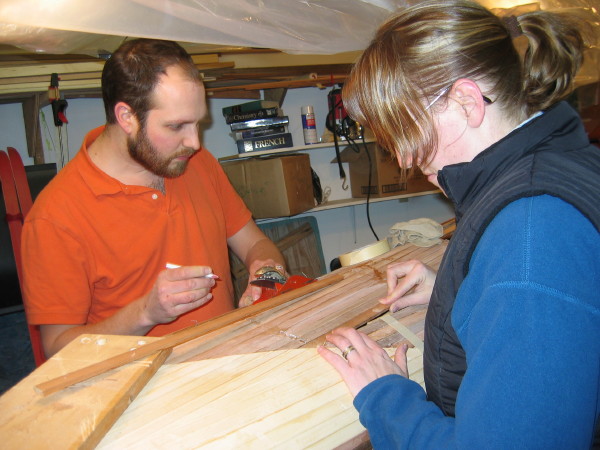
I had some help from my wife last weekend fitting some of the final strips on the kayak deck. Here are a couple of photos of her working on her boat for the first time.

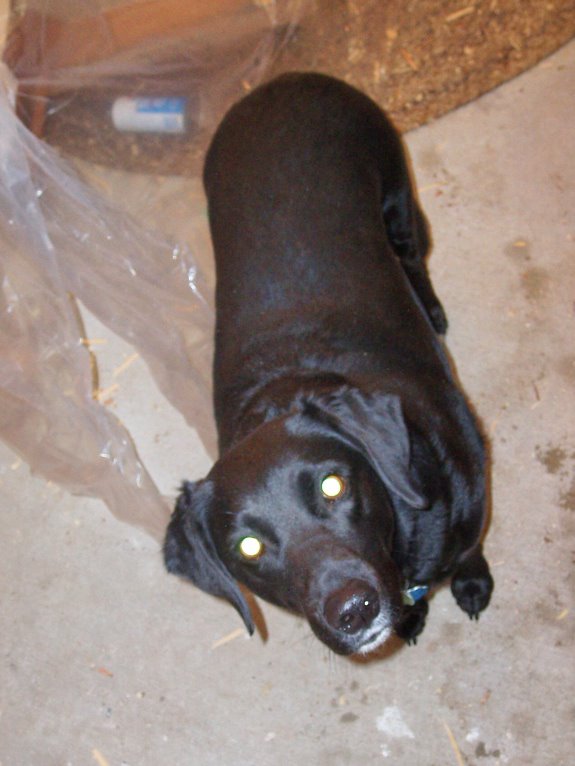
Here's a picture of my main helper, Kaya:

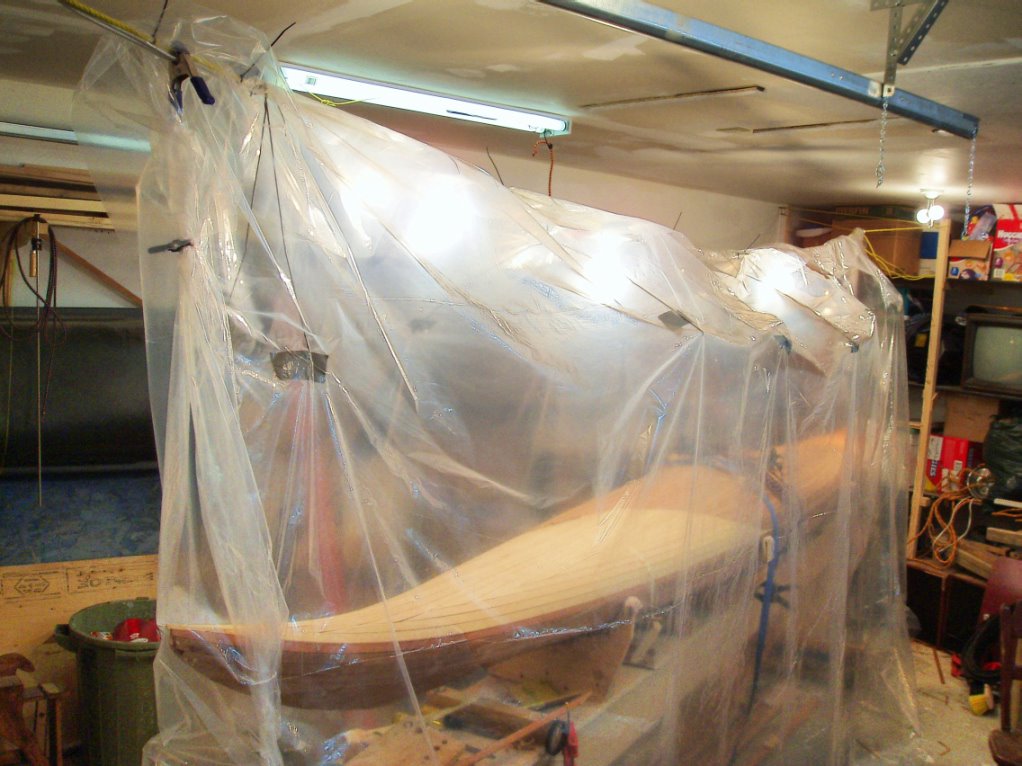
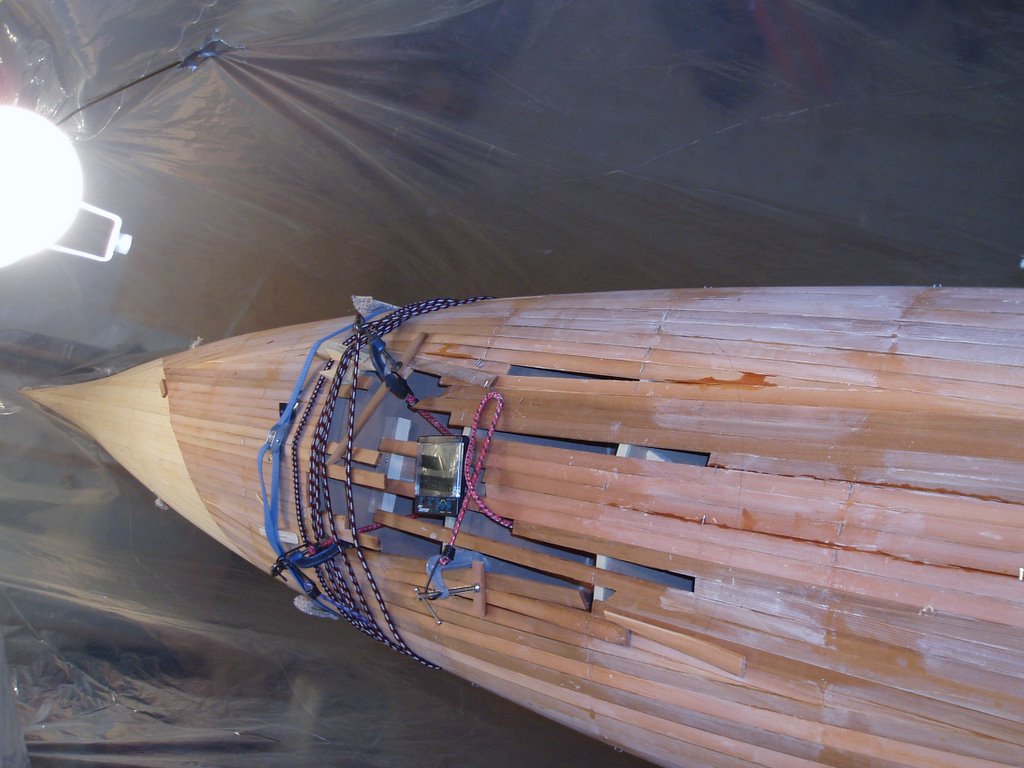
I recently set up a tent over the kayak to keep things a bit warmer over the boat without having to keep the whole garage warm. I ran a rope from one corner to the other to hold a plastic sheet over the boat, then ran a string of lights under the tent to throw some heat in the enclosure. Wire hangers with the bottom cut and spread apart are being used to spread the plastic away from the lights (credit for that idea goes to Paul G Jacobsen). The plastic is sealed up at the ends with a few clips and the lights are plugged in. Six 100 watt bulbs keeps it about 12C under the tent while it is about 0C in the garage (and -15C outside). That's better than keeping the 4800 watt heater on until the glue cures. In order to work on the boat I raise the plastic and fold it up over top of the whole apparatus and add a couple of clips to keep it there. It's not too annoying to work under but if I were any taller I'd want to raise it more. The lights are also helpful to work by.

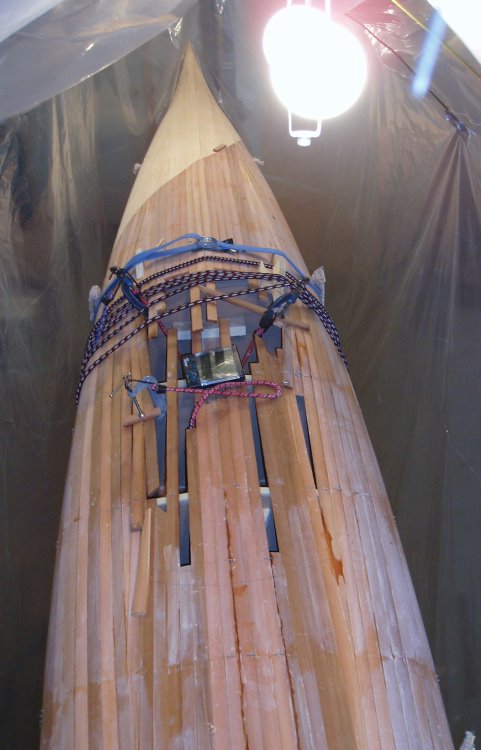
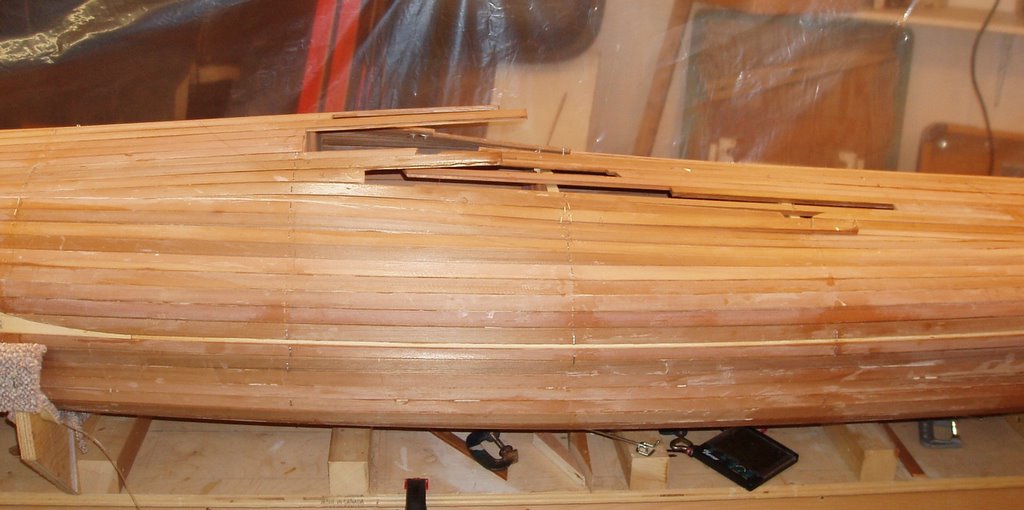
The final strips over the deck around what will become the cockpit opening proved to be rather difficult. Those last 4 strips were buggers because they are so short and they twist so much, with not much to actually attach them to. A little heat and lots of bungees, staples, clamps and a couple of nails helped to get them in place and hold them there.


I then pulled most of the staples from the deck. I had a major "Oh Sh*t!" moment when I pulled the last staple from a region of the deck just behind the cockpit. A section three strips wide and ~2 1/2 feet long broke free from the deck along the glue joints, but remained attached on the end. I had been pulling the staples by using a pliers and simply yanking the staples straight out. I hadn't realised that the staples actually had a pretty good hold on the cedar they go through and that hold proved stronger than the glue and wood on the back deck. I was able staple it back down and glue the piece back in place using cyanoacrylate glue (a thick version of Krazy Glue). It should be OK now, but I was more careful removing the rest of the staples, choosing to pry them out with a screwdriver rather than yanking with pliers.
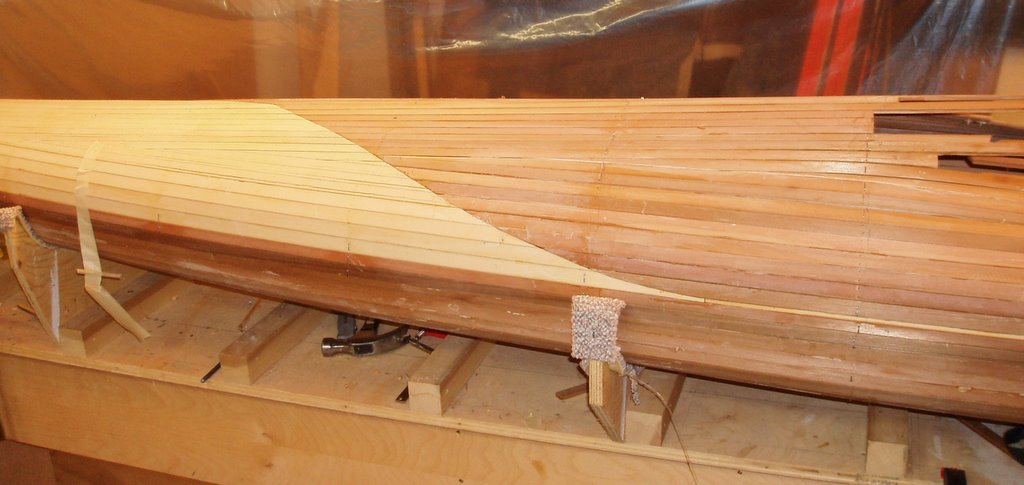
Here's a couple more pictures with all the strips in place, no bungees or staples.


Next, I need to cut out the opening for the recessed cockpit and plane, scrape & sand the deck until it's smooth and fair. Once that's done I'll flip the boat back over and put the hardwood stems onto the ends of the hull then repeat the fairing process on the hull. But, first I have to get over this cold.

Sunday, February 12, 2006

History Lesson

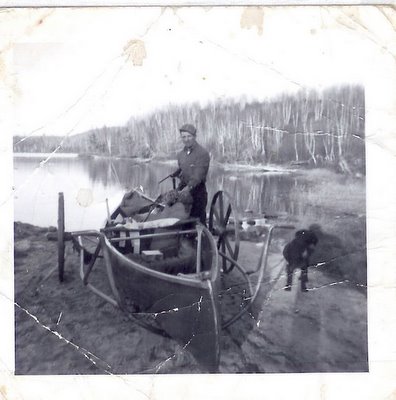
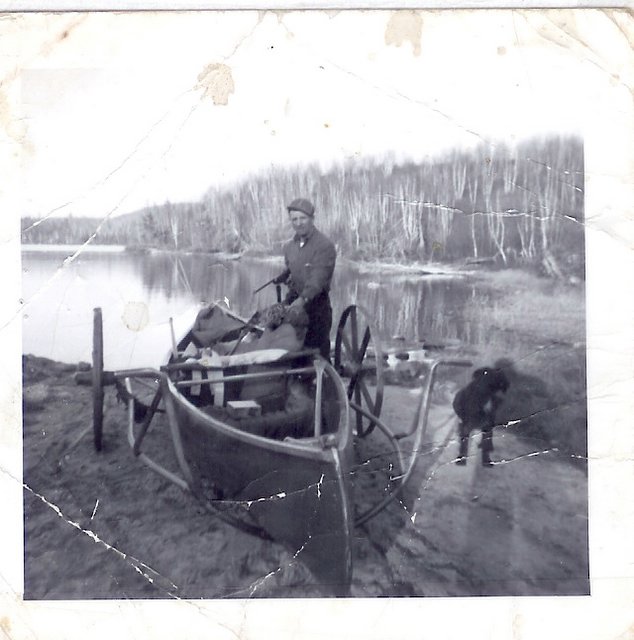
Apparently my interest in boats goes back for at least a couple generations. Here is a picture from the 1940's of my Great-Grandpa George Pelletier seemingly going hunting. I would guess that this would have been somewhere in the region of northwestern Quebec or northeastern Ontario. Check out that portage cart!

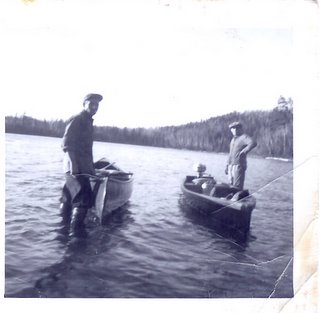
This next picture is labeled as 1949 so perhaps it was taken at the same time as the one above. This picture features Grandpa Ken Bryson on the left. That must be my Great-Grandpa & Great-Grandma (mamere) Pelletier in the middle, and maybe one of my Grandma's younger brothers on the right.

I'm not too sure about the next one, perhaps it's Grandpa Bryson & Great-Grandpa Pelletier again. Isn't that canoe a beauty?

Here's another one of Grandpa Bryson.Later on Grandpa Bryson moved up a bit in his choice of boats. Here is a picture from 1979 when he lived on Vancouver Island at Campbell River.