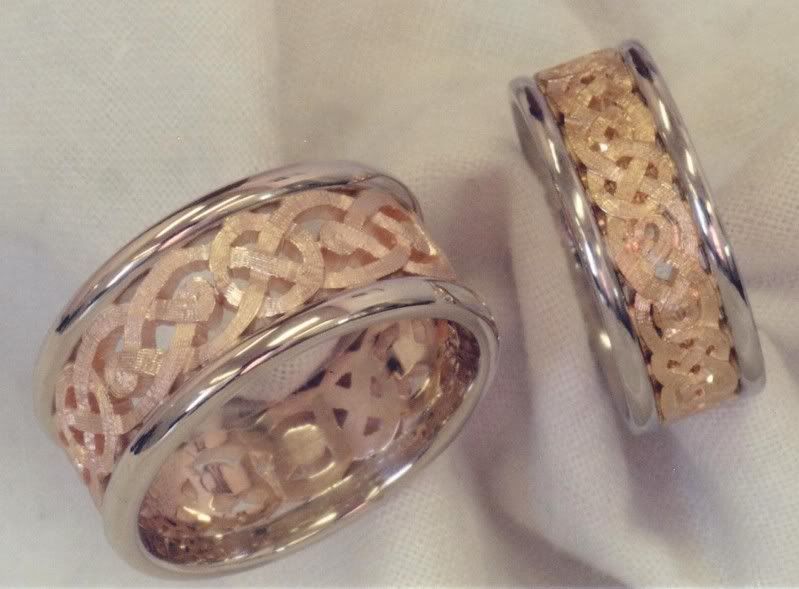
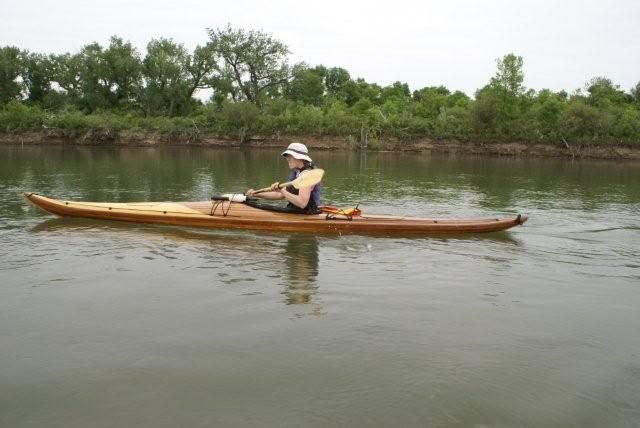
A long, long time ago I proposed to my wife. She wasn't really into engagement rings, so I promised to get her a kayak instead. Well, that never really happened like we planned and the money went towards other things. So, when I built this kayak which was to be primarily for her use, I decided to do something different on the deck. When we got married we had a set of wedding bands custom-made by
local goldsmith Ken Paulson. The pattern used was picked from a book of patterns and had no particular significance at the time. When thinking of a personalized touch to add to the kayak deck, I had the idea of turning the celtic knot pattern used on our wedding bands into a carving.
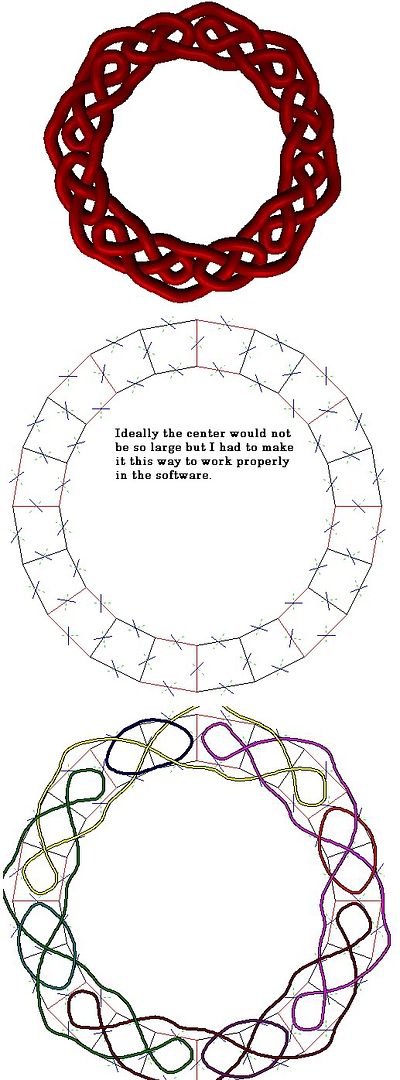
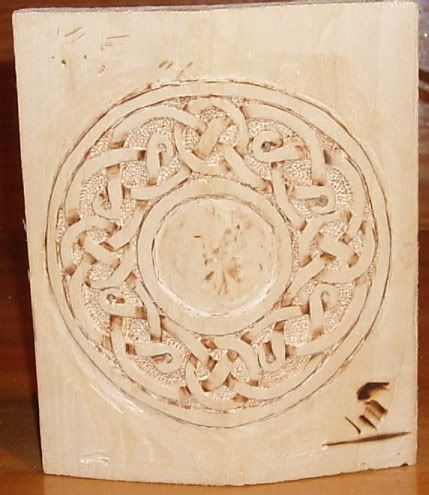
The only problems were I didn't know how to carve or even how to draw such a thing. Well I managed to figure out both challenges and eventually carved into a block of basswood a modified celtic knot in the same pattern as what's on our wedding bands. The first step was to come up with a drawing. For that I employed a bit of
software. It took a lot of manipulation and playing with the software, but eventually it churned out something that was in generally the right pattern. Although it wasn't perfect, that software-produced drawing gave me the layout and showed me how the lines had to cross in order to work and be a complete circle. I then decided what diameter the inner and outer portions should be and with some trial and error, eventually drew something that looked acceptable and with proportions I was happy with. In fact I only drew just over a quarter of the circular pattern as it could be rotated 1/4 turn and the pattern repeated.
With a template pattern in hand, I then turned to wood. I had purchased some basswood and some
simple carving tools, and began by practicing in a block of wood. Once I thought I had the general gist of how it works, I turned my attention to what was to become the real thing. I cut a piece of the bass about 6" x 6"x 2" thick, a bit over-sized to fit my pattern. I then determined where in the deck the carving was destined to reside. I used the adjacent form from the kayak to trace a profile of the deck onto my 2" thick block of wood. With a block plane I planed the block down to match the profile of the peak of the deck. The bottom of the block I left alone for the time being.
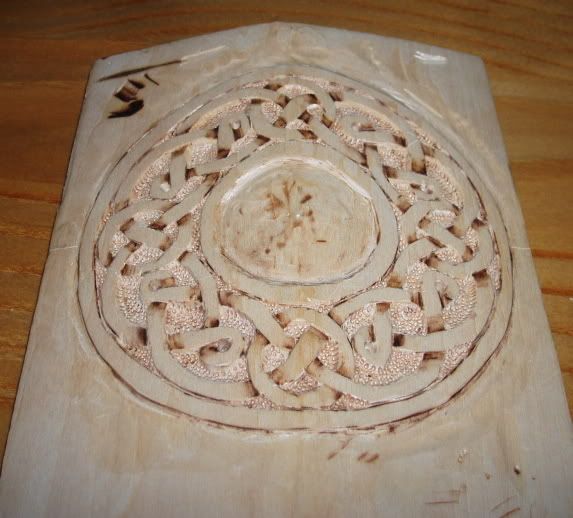
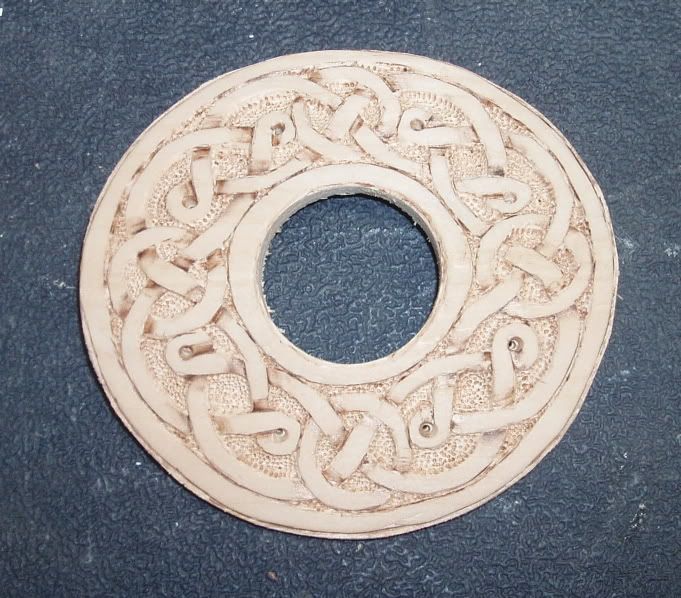
I drew reference lines onto the block and used a pin to mark the center through the template. I then used graphite paper to trace the pattern onto the shaped block, rotating the pattern for each quarter of the circle. I then began using the carving tools to remove all material that did not belong. I gave the pattern some relief where the lines of the knots go over and under each other, and made the background space deeper. Thankfully, the act of carving proved to be not overly difficult (I have a new found love of bass wood). Once I had a carving that I was happy with, I used wood burning to add further depth to the appearance of the carving, creating a bit of shadow where one line goes under another, and a stippling effect for the background spaces. After a few hours work, most of which was completed at the dining room table while my wife was at work, I had something that I thought wasn't too bad.
With the carving complete, I then prepared for insertion in the deck of the kayak. The bottom of the block of wood was planed down (bass is so nice to work with) until the overall thickness was just over 1/4". The carved disc was then cut from the block using a circle cutting jig on my Dremel. The center was also cut out of the carved disc (I may have used a hole saw for that one).
If it all went wrong, I might have had a water bottle holder instead.
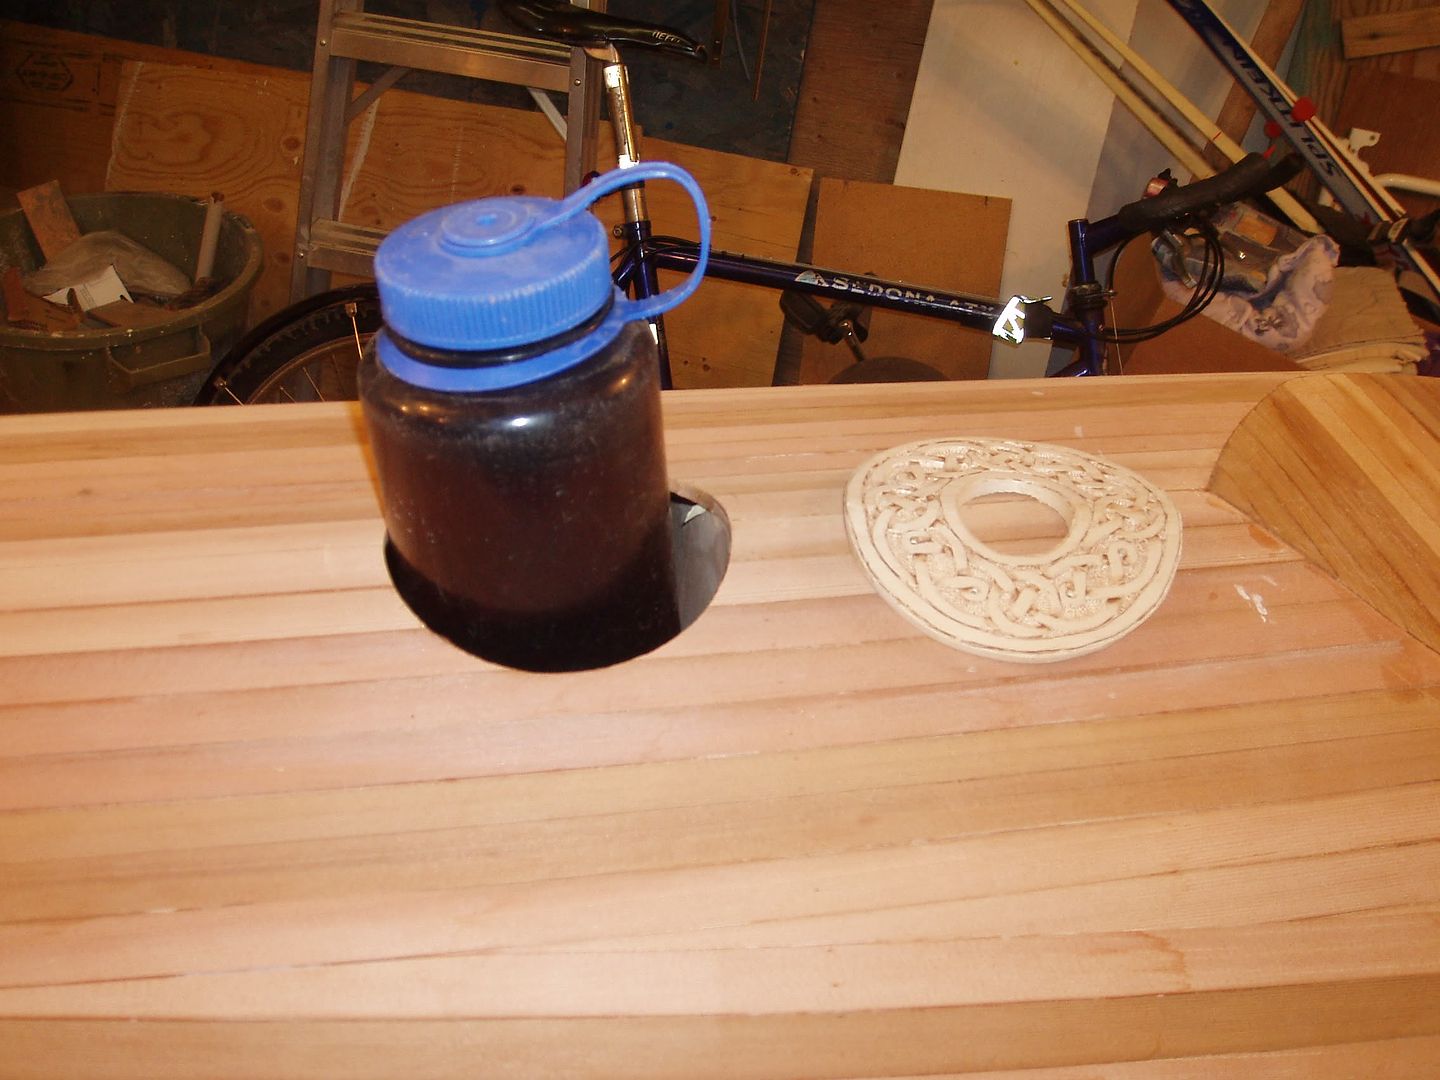
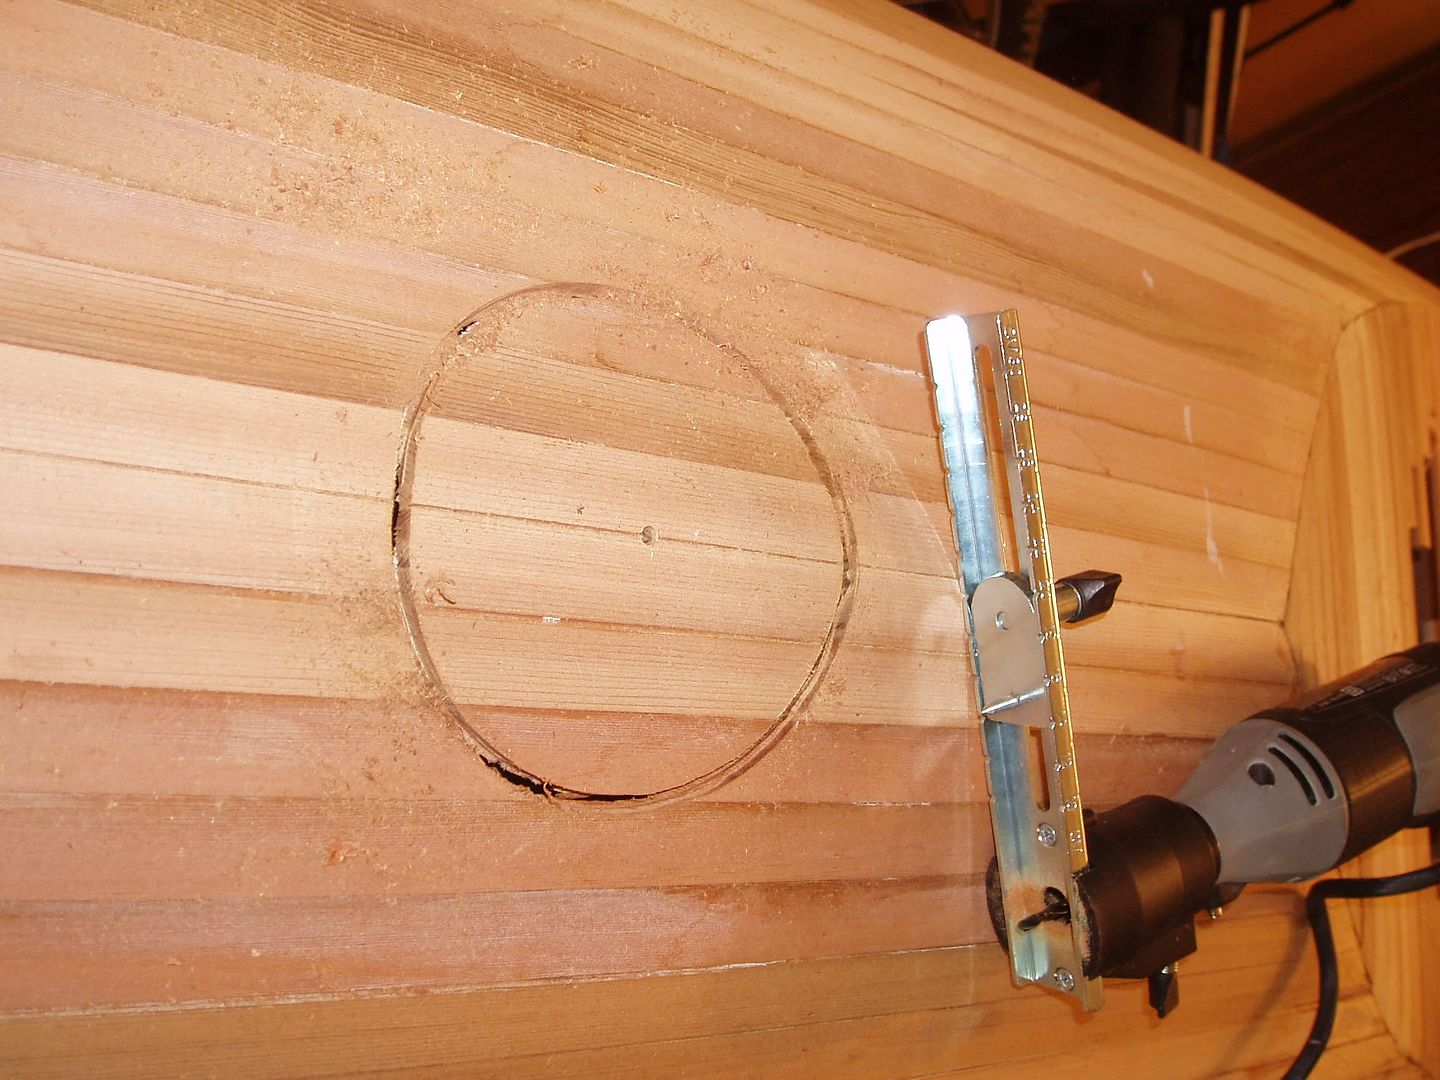
Using the jig and Dremel to cut the hole worked OK, but the resulting hole was a slight oval due to the peak of the deck.
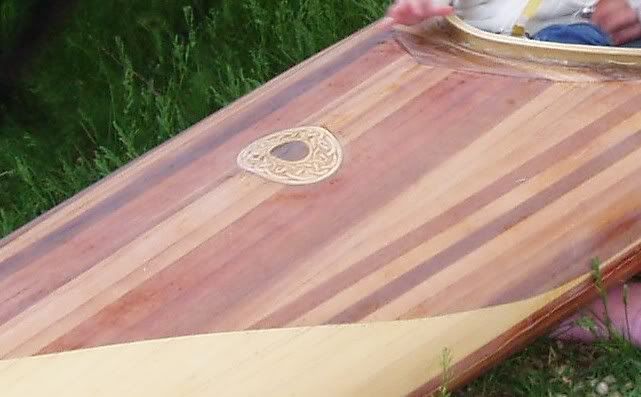
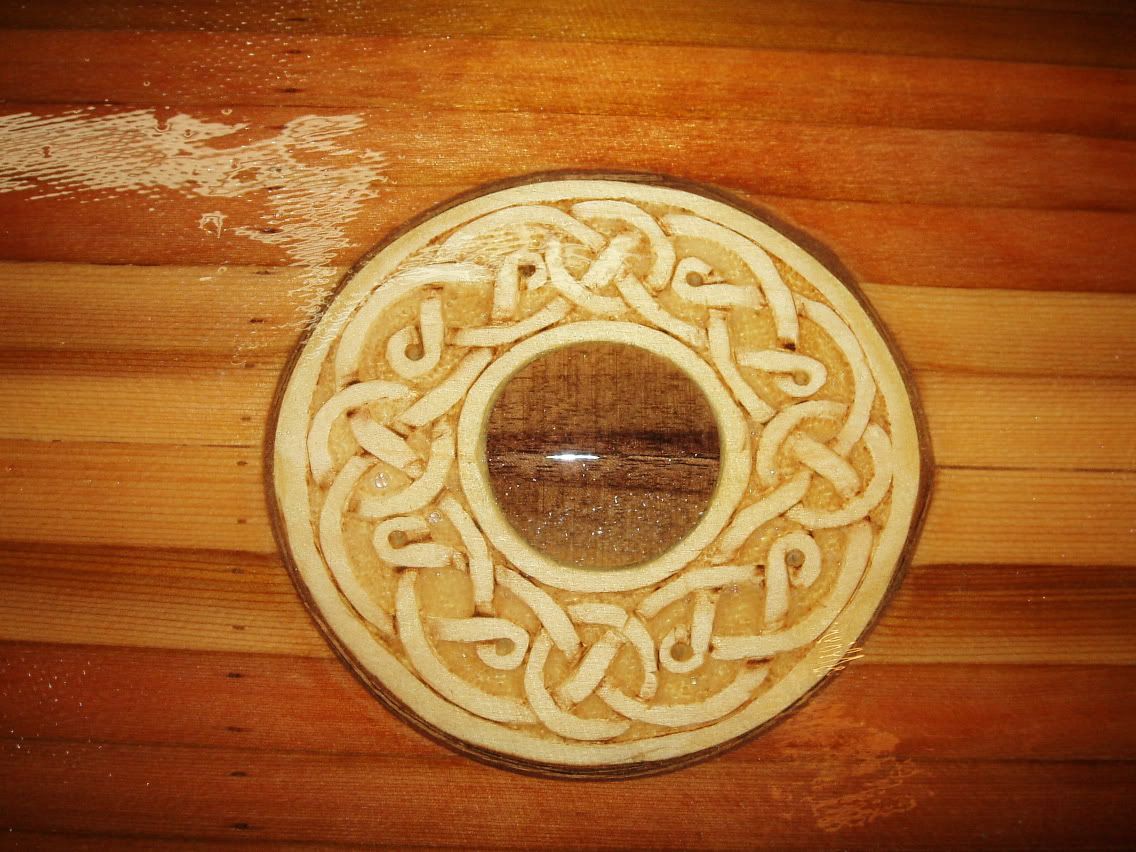
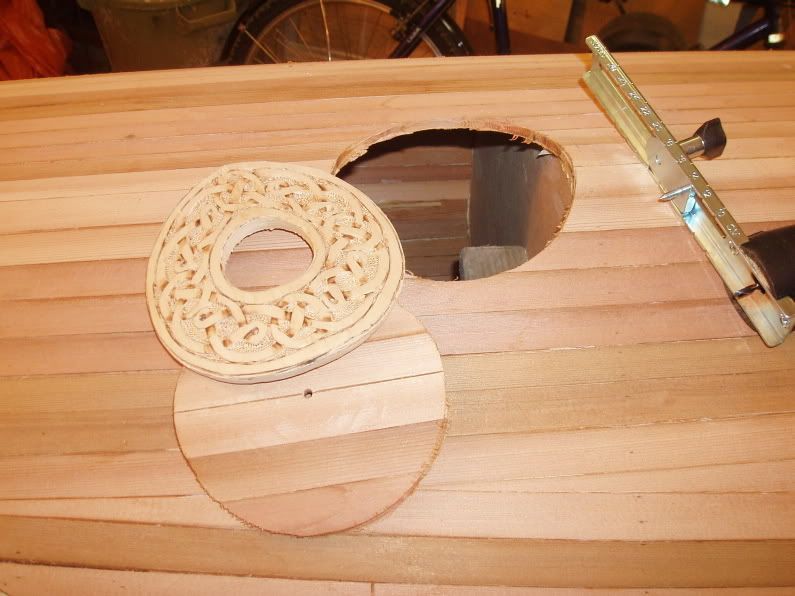
 Initially, I was going to use a center disc of cedar cut from the deck but this proved not to work very well. Instead I used a piece of walnut to fill the center. Thin strips of walnut were also used to fill the gap around the outside of the carving as the hole in the deck was cut slightly oversize. This was done on purpose since the carved disc did not perfectly match the deck hole. If left as shown in the above photo, the imperfections would have been very obvious. Instead, I removed material in order to make a fairly even gap all the way around. As it is, it now looks like a design feature of a contrasting walnut border edging the carving, which goes well with the walnut center.
The carving was glued into place, supported from underneath by temporary supports (ie sticks) hot-glued to the underside of the deck. The edges were eased and the carving gently sanded along with the rest of the deck in preparation for fiberglass. The carving received a pre-coat of epoxy in order to fill in some of the relief of the carving and then was glassed along with the rest of the deck. During the fiberglass wet-out, some bubbles were still trapped in the relief but their effect was minor. Prior to the fiberglassing the underside of the deck, the bottom of the carving was planed & sanded flush with the rest of the deck. Two or three extra layers of 4 ounce glass cloth were applied to the underside of the carving and the immediate area just to strengthen & protect this spot. The end result was an inlaid carving that is slightly raised above the deck but cannot even be felt from underneath.
 In the above photo, the carving along with the rest of the deck has been fiberglassed and the fiberglass sanded to a dull finish. The photos below were taken after another fill coat of epoxy was applied to the deck.
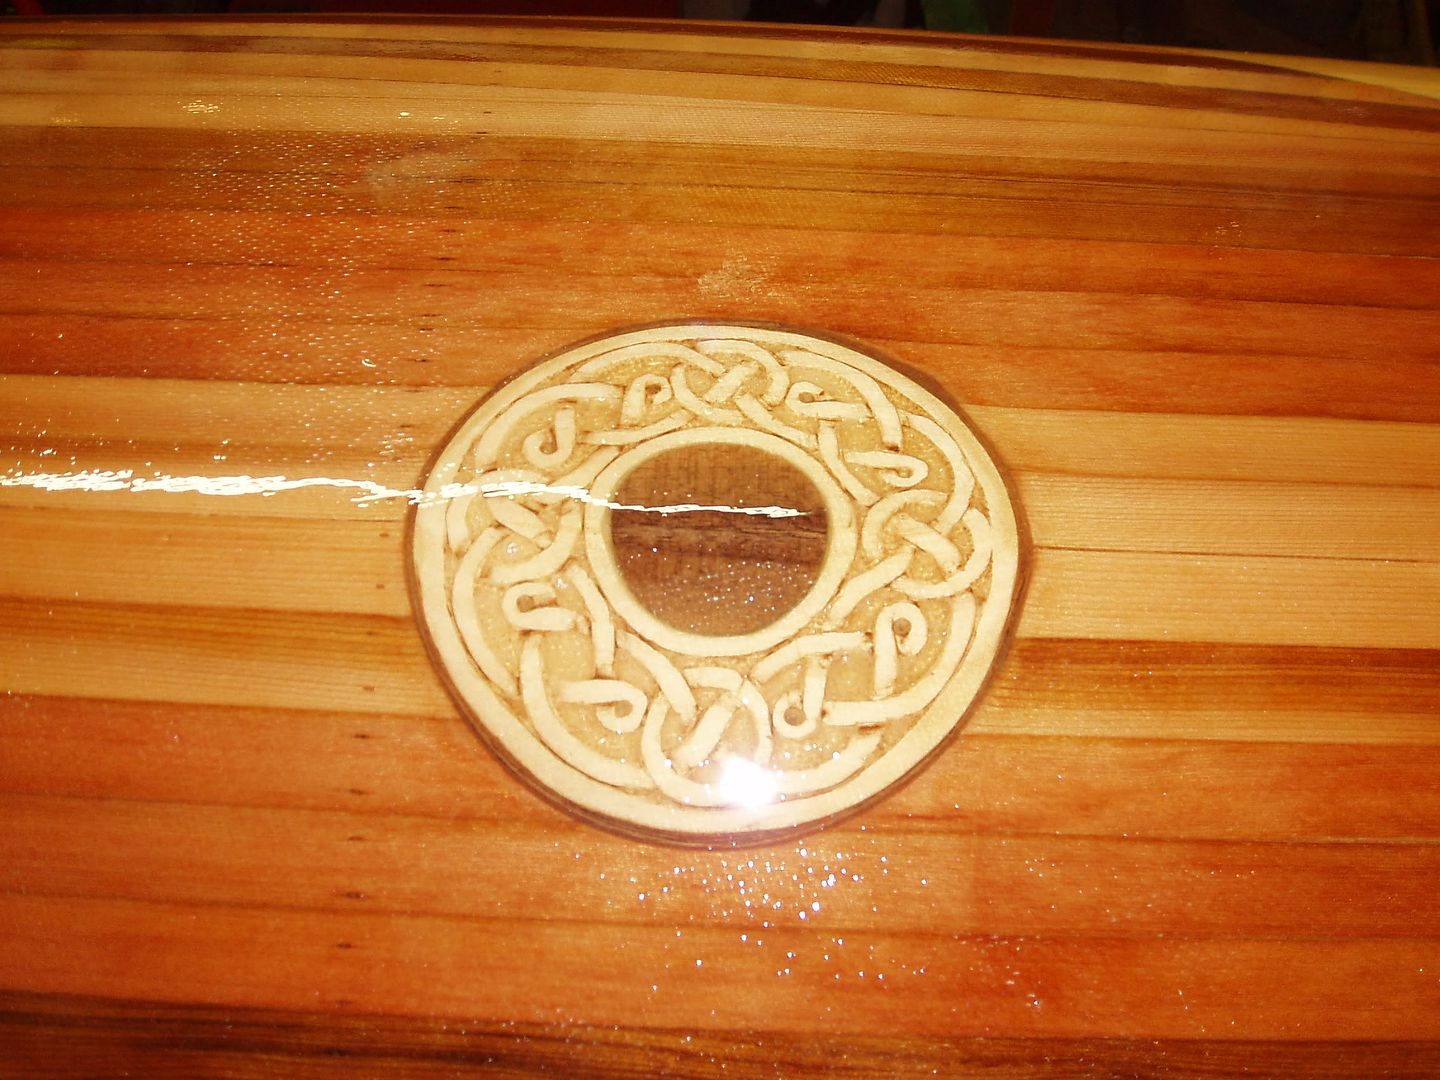
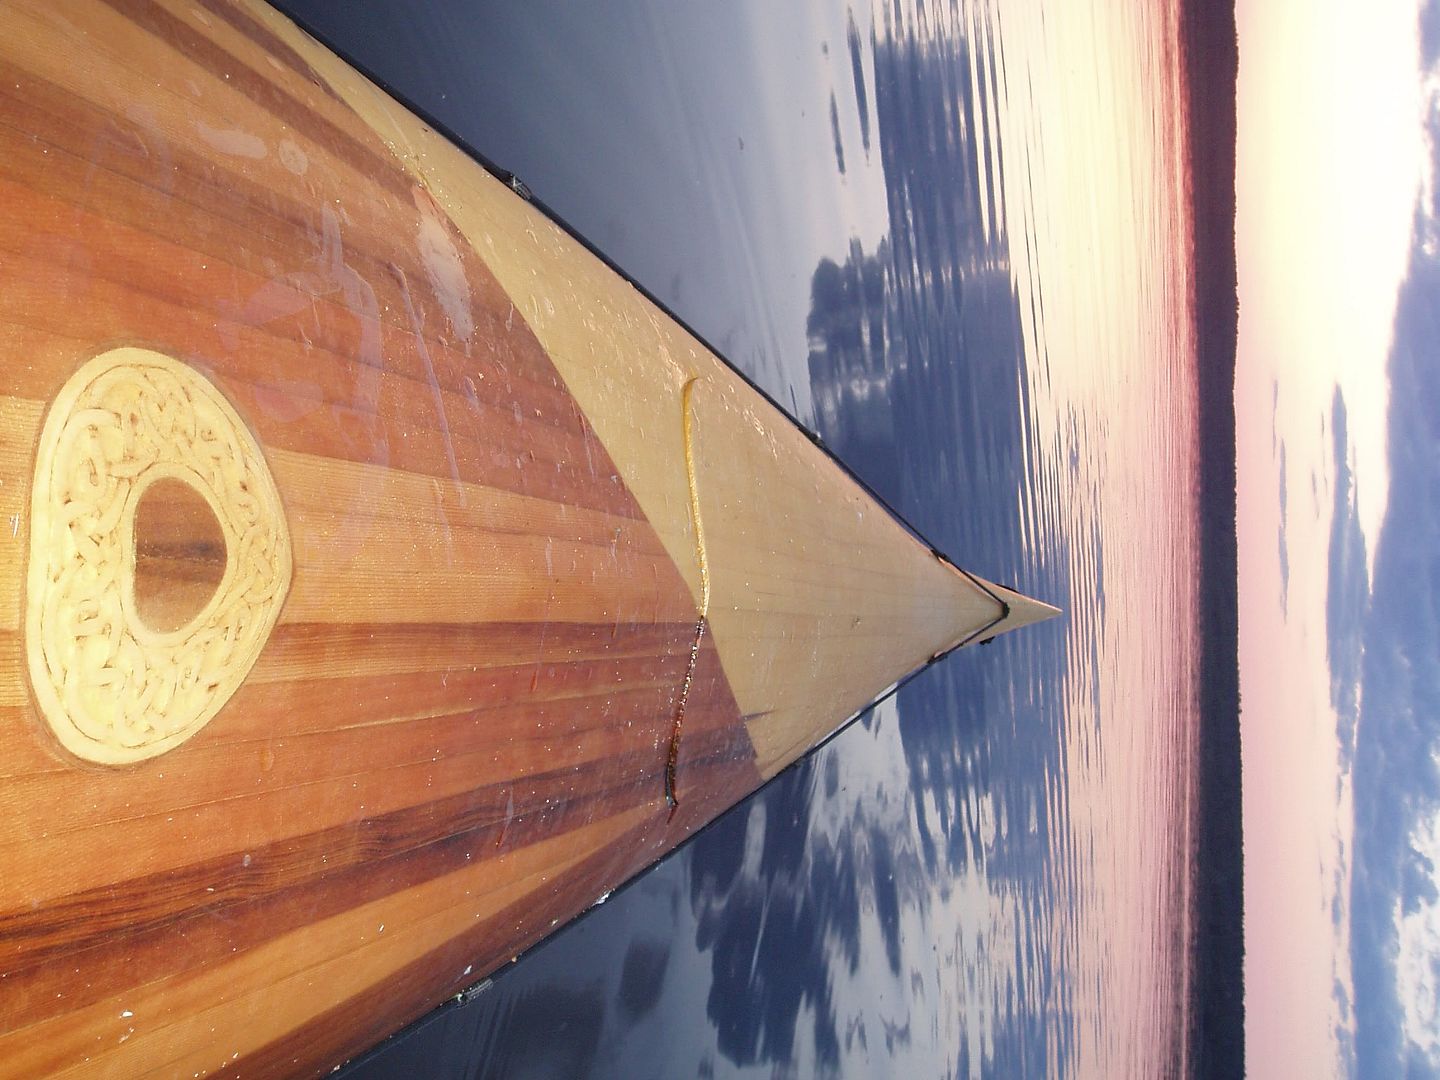
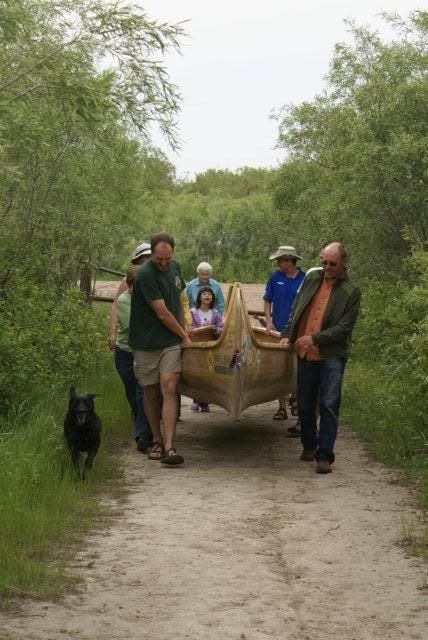
Finally, below is the finished product, dubbed the "engagement kayak."

 To this point, if things had not worked out or I made a major slip up, I could have started over on the carving or given up and nobody would ever have known about it. The next step required a much greater degree of commitment to proceed. I cut the matching hole in the deck of the kayak, again using the circle cutting jig on the Dremel.
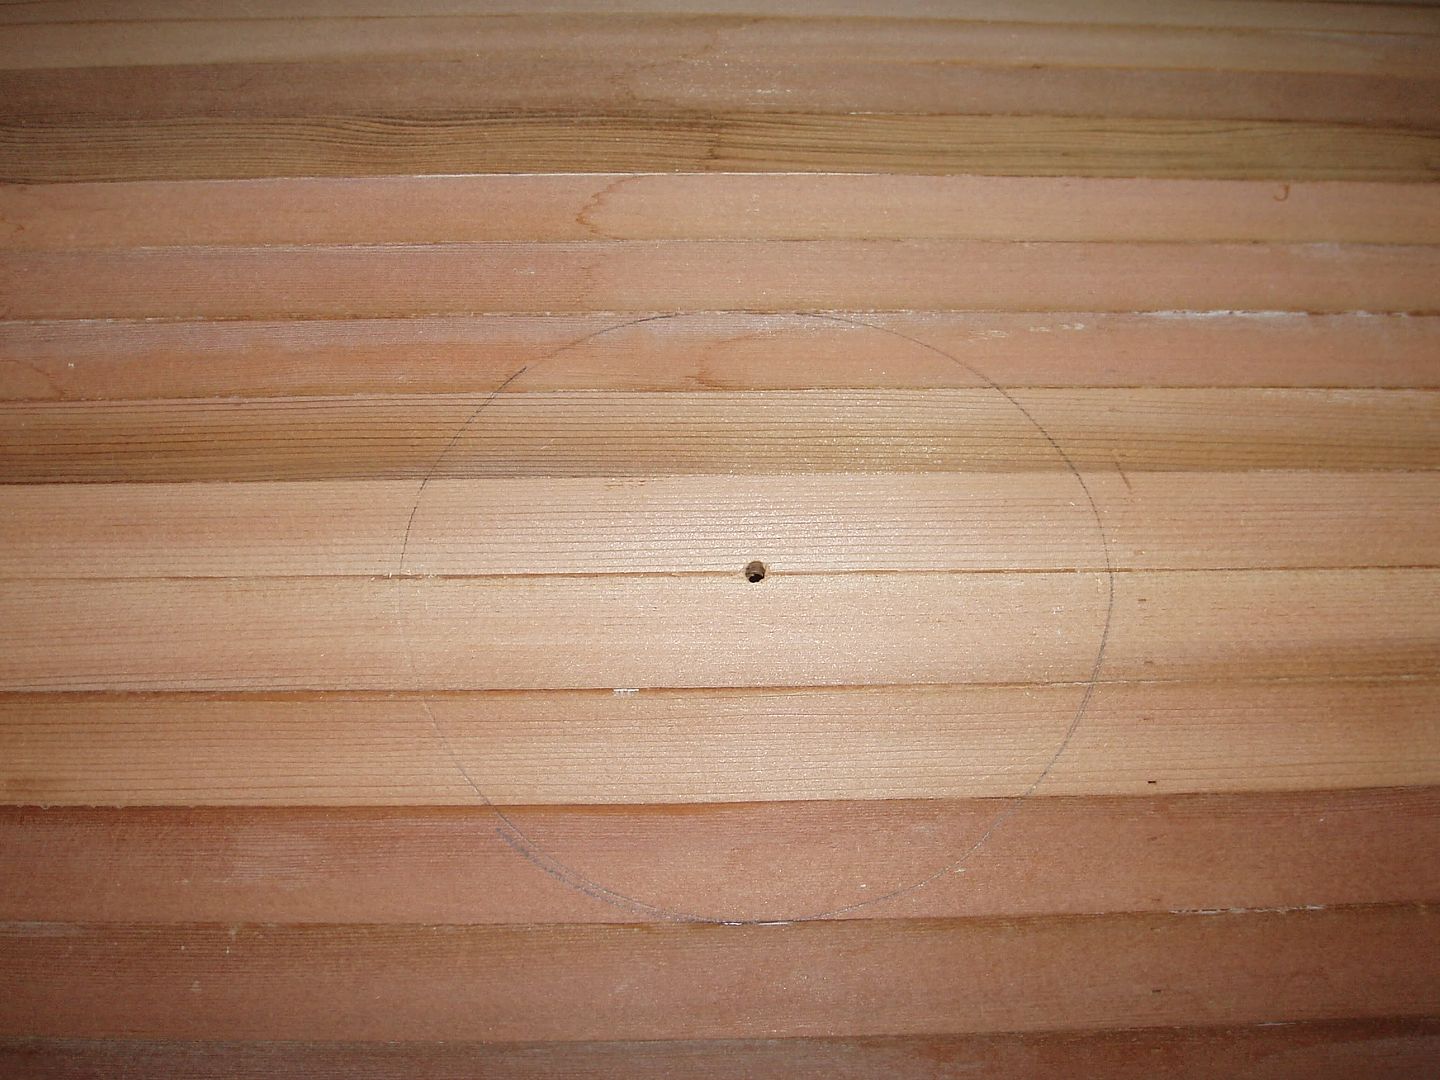


